How to centurylink wifi setup?
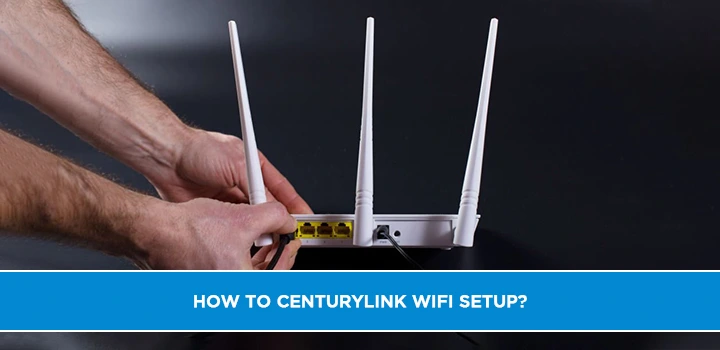
Are you looking for a way to get your CenturyLink WiFi set up and running quickly? Don’t worry, we’ve got you covered! In this blog post, we’ll walk you through the process of setting up your CenturyLink WiFi network step-by-step. With our easy-to-follow instructions, you’ll be connected in no time.
Step-by-Step CenturyLink wifi setup Guide
Step 1: Plug in the Power Cord
In order to start the CenturyLink WiFi setup process, the first step is to plug in the power cord to a wall outlet. Once this is done, the other end of the power cord needs to be plugged into the modem/router combo. This is needed in order to power on the modem/router and initiate the setup process for your CenturyLink WiFi. As per the instructions provided on the quick setup guide, this is a prerequisite for setting up your internet connection. Once this step has been completed, you can then proceed to connect the DSL cable which will provide you with access to your CenturyLink Internet.
Step 2: Connect the DSL Cable
Once the power cord is plugged in, the next step is to connect the DSL cable. The DSL cable should be connected to the CenturyLink modem's “DSL port”, which is usually labeled. Note that the C4000XG does not have a DSL port, so other steps may need to be taken. Finally, plug one end of the yellow Ethernet cord into one of the Ethernet ports on the modem, and plug the other end into the device that will be used for setup. After completing these steps, users can proceed to log in to their modem's GUI and begin setting up their wireless network.
Step 3: Log In to Modem's GUI
Once your power cord and DSL cable are connected, the next step in setting up your CenturyLink Wi-Fi connection is to log in to the modem's settings interface (Modem GUI). This can be done by entering your Admin Username and Admin Password, which are different from the credentials used to access your wireless network. Once you have logged in, you can continue with the setup process.
Step 4: Select Wireless Setup
Once the modem's GUI has been logged in, the next step is to select the Wireless Setup icon in the main menu. This will open up a wireless setup menu where users can select a wireless menu option to view step-by-step instructions. The basic settings that can be adjusted include enabling or disabling the wireless radio, changing the network name (SSID), selecting a channel, and entering a passphrase. All of these steps can be done by following the instructions on the screen. Additionally, for more advanced setup, users can download and install the CenturyLink app on their iOS or Android device Wi-fi modem advanced setup. Alternatively, users can open the QuickConnect screen for more detailed instructions.
Step 5: Use Mobile App or QuickConnect
In order to complete the CenturyLink wifi setup process, you can either use the My CenturyLink mobile app or the QuickConnect website. With the mobile app, you can activate your new modem and follow the steps to complete the installation process using QuickConnect. On the other hand, if you decide to use QuickConnect, you will need to enter the PPP username and password shown to you on the QuickConnect screen before clicking on “Apply”. Once you have finished either of these setup processes, your modem should be ready for you to connect a device and access the internet.
Step 6: Click on Wireless Setup 2.4 GHz
Once you have logged in to the modem’s GUI, you need to select the “Wireless Setup” option in the left sidebar. This will take you to the Wireless Setup menu, where you will find a selection of options such as “2.4 GHz” and “5 GHz.” Select the “2.4 GHz” option to continue with your wireless setup. This will allow you to configure your wireless settings, including SSID, passphrase, and channel. Once you have set up your wireless settings, you can then change your wireless security settings if needed. Finally, once your device is connected to the network, you can enjoy your internet connection!
Step 7: Enter SSID, Passphrase, and Channel
In Step 7, users will be prompted to enter their SSID, passphrase, and channel of their CenturyLink WiFi network. The SSID is the name of the network, and it can be changed to a more recognizable name. The passphrase is the security key for the network, which should be kept secure and not shared with anyone else. Lastly, users should select a channel for their network; this will help to reduce interference from other networks in the surrounding area. Once these settings are entered, users can proceed to the next step of changing their wireless security settings.
Step 8: Change Wireless Security Settings
In the previous steps, you have already set up the power cord connection and DSL cable, logged in to the modem's GUI, selected Wireless Setup, used the Mobile App or Quick Connect to configure the wireless settings for 2.4 GHz, and entered the SSID, passphrase, and channel. Now it's time to change the Wireless Security Settings. To do this, you must select “Wireless Security” in the menu. From here, you can choose from a variety of security options depending on your needs. These security options include WEP, WPA2/WPA3 Personal/Enterprise, and WPS. After selecting an option, you will need to enter a security key or passphrase that will be used to protect your network from unauthorized access. Once you have made your selection and entered your security key or passphrase, you can save your settings and enjoy your internet connection!
Step 9: Connect the Device to the Network
Once all of the settings have been configured, the user can now connect their device to the CenturyLink WiFi network. To do this, they will need to open the wireless settings menu on their device, select the SSID they just set up, and enter the passphrase they created. Once connected, the device will be able to access the internet through CenturyLink's network. It is important to note that a secure connection is recommended and users should always ensure that their wireless settings are updated regularly for optimal security.
Step 10: Enjoy your Internet Connection!
Once all the steps have been completed, you are now ready to enjoy your CenturyLink internet connection. Your device should automatically connect to the network name you entered so you can start browsing the web and streaming your favorite shows and movies. You can also use the CenturyLink mobile app or QuickConnect to manage your WiFi settings from anywhere. You can even set up parental controls to keep your kids safe online or set up guest networks for visitors. With CenturyLink, you can stay connected with reliable, fast internet speeds so you can make the most of your online experience.
Conclusion
In conclusion, CenturyLink provides reliable internet connection for homes and businesses. Setting up your CenturyLink WiFi Gateway can be done in a few simple steps following the instructions provided in this article. The first step is to plug the power cord into an outlet and connect the DSL cable to the modem. Then, log in to the modem's GUI and select Wireless Setup. You can then use a mobile app or QuickConnect to set up your network with an SSID, passphrase, and channel. Finally, make sure you have the correct security settings for your network so your connection is secure. With these steps complete, you can easily connect devices to your network and enjoy uninterrupted internet access.
Call on (844) 340-6066 & get help with CenturyLink wifi.