Can I bury my own fiber optic cable?
Considering burying your own fiber optic cable? This comprehensive guide breaks down the feasibility, legalities, and practical steps involved. Discover whether DIY fiber optic cable burial is a viable option for your needs, weighing the pros, cons, and essential considerations for a successful installation.
Understanding Fiber Optic Cable Burial
Fiber optic cables are the backbone of modern high-speed internet, transmitting data as pulses of light through thin strands of glass or plastic. Unlike traditional copper cables, fiber optics offer significantly higher bandwidth, lower latency, and immunity to electromagnetic interference. When considering the installation of such a critical infrastructure component, one of the primary questions that arises is about its physical placement. Burying fiber optic cable is a common and highly effective method for protecting it from environmental damage, accidental severing, and aesthetic concerns. This method offers a robust and long-lasting solution for data transmission, ensuring reliable connectivity for homes, businesses, and entire communities. However, the act of burying these sensitive cables involves a complex set of considerations, ranging from legal compliance and safety protocols to the technical intricacies of excavation and protection. Understanding the nuances of fiber optic cable burial is paramount before embarking on any DIY project, as improper installation can lead to costly repairs, performance degradation, and even safety hazards. This article delves into the question of whether you can bury your own fiber optic cable, exploring the legalities, practicalities, and potential pitfalls associated with such an endeavor.
Can You Legally Bury Your Own Fiber Optic Cable?
The legality of burying your own fiber optic cable is a nuanced question that depends heavily on your location, property ownership, and the specific context of the installation. In many residential and commercial settings, property owners generally have the right to install infrastructure on their own land, provided they adhere to local regulations and obtain necessary permits. However, several critical factors must be addressed:
Property Lines and Easements
It is crucial to understand your property boundaries. Burying cable across a neighbor's property without explicit permission and a formal easement agreement is illegal and can lead to significant legal disputes. Similarly, if your property has existing easements for utilities or other purposes, you must ensure your burial plan does not interfere with these rights. Utility easements grant utility companies the right to access and maintain infrastructure on your property, and unauthorized digging within these areas can be problematic.
Permits and Regulations
Many municipalities and local authorities require permits for any excavation, especially for underground utility installations. These permits ensure that the work is carried out safely and in compliance with building codes and utility protection standards. Failing to obtain the required permits can result in fines, mandatory removal of the installation, and liability for any damage caused.
Utility Locating Services
Before any digging commences, it is a legal requirement in most regions to contact a "Call Before You Dig" service (e.g., 811 in the United States, or similar services in other countries). These services will dispatch utility companies to mark the location of existing underground lines, including gas, water, electricity, and other communication cables. Striking an active utility line can be extremely dangerous, leading to explosions, electrocution, or service disruptions, and can result in substantial fines and liability.
HOA and Community Covenants
If you live in a community governed by a Homeowners Association (HOA) or subject to specific covenants, restrictions, and conditions (CRSs), you may need to seek approval for any external modifications, including underground cable installations. These agreements often dictate aesthetic standards and can impose restrictions on visible infrastructure or excavation activities.
Contractual Agreements with Service Providers
If the fiber optic cable is intended to connect your property to a service provider's network, you must consult your service agreement. Many providers have specific policies regarding the installation of their lines and may require professional installation or have restrictions on customer-initiated burial of their infrastructure. In some cases, burying a provider's cable yourself might void warranties or service agreements.
In summary, while the physical act of burying cable on your own property is often permissible, it is governed by a web of legal requirements. Thorough research into local ordinances, obtaining necessary permits, and respecting existing easements and utility lines are non-negotiable steps. For 2025-26, these regulations are becoming increasingly stringent as the importance of underground infrastructure protection grows.
Benefits of Burying Fiber Optic Cable Yourself
Opting for a DIY approach to burying fiber optic cable can offer several compelling advantages, particularly for those with a technical inclination and a desire for greater control over their infrastructure projects. These benefits often translate into cost savings, customization, and a deeper understanding of the installed system.
Cost Savings
The most significant benefit of burying your own fiber optic cable is the potential for substantial cost savings. Professional installation services can be expensive, with costs often running into thousands of dollars, depending on the distance, terrain, and complexity of the job. By undertaking the labor yourself, you eliminate the significant fees associated with hiring a professional crew, including their wages, equipment rental, and overhead. This allows budget-conscious individuals and businesses to deploy fiber optic connectivity more affordably.
Greater Control and Customization
When you manage the burial process yourself, you have complete control over the routing, depth, and protection methods used for the fiber optic cable. This allows for a highly customized installation tailored to your specific needs and property layout. You can choose the most direct path, avoid sensitive areas, and implement specific protective measures that align with your risk assessment. This level of control is often not possible with standard professional installations, which may follow pre-determined routes for efficiency.
Enhanced Understanding of Your Network
Undertaking a DIY project provides an invaluable opportunity to gain a deep understanding of your network infrastructure. You will be intimately familiar with the cable's path, connection points, and any protective conduits or markers installed. This knowledge is incredibly beneficial for future troubleshooting, maintenance, or upgrades, as you will know precisely where to look and what to expect if issues arise.
Flexibility in Scheduling
Professional installers operate on their own schedules, which may not always align with your availability or project timeline. By doing it yourself, you can work at your own pace, fitting the installation around your other commitments. This flexibility can be particularly important for projects that require careful planning or are dependent on specific weather conditions.
Sense of Accomplishment and Skill Development
For many, the satisfaction of completing a complex technical project successfully is a significant reward in itself. Burying fiber optic cable requires planning, physical labor, and attention to detail, offering a valuable learning experience and a sense of accomplishment. The skills acquired can be transferable to other DIY projects or even professional pursuits.
While these benefits are attractive, it's crucial to balance them against the risks and complexities involved. The DIY route requires a significant investment of time, effort, and a willingness to learn and adhere to best practices. As of 2025-26, the availability of detailed online resources and community forums can further empower DIY enthusiasts, but the inherent risks remain.
Risks and Challenges of DIY Fiber Optic Burial
Embarking on a DIY fiber optic cable burial project, while potentially rewarding, is fraught with significant risks and challenges that must be carefully considered. Overlooking these can lead to costly mistakes, safety hazards, and a compromised network. As of 2025-26, the complexity of underground infrastructure and the sensitivity of fiber optic cables mean that these risks are more pertinent than ever.
Damage to the Fiber Optic Cable
Fiber optic cables are delicate and can be easily damaged by sharp objects, excessive pressure, or improper handling. During excavation, the risk of accidentally cutting or crushing the cable is high, especially if proper precautions are not taken. Even minor damage can lead to signal degradation or complete cable failure, requiring expensive repairs or replacement.
Striking Existing Utilities
This is arguably the most dangerous risk. Failing to accurately locate and mark all underground utilities before digging can lead to catastrophic consequences. Hitting a gas line can cause an explosion, an electrical line can result in electrocution, and water or sewer lines can cause significant property damage and disruption. The legal and financial repercussions of such an incident can be severe.
Improper Depth and Protection
Burying the cable at an insufficient depth makes it vulnerable to damage from surface activities like gardening, landscaping, or even accidental digging by future occupants. Conversely, burying it too deep can complicate future access and repairs. Furthermore, inadequate protection, such as failing to use a suitable conduit or warning tape, increases the risk of accidental damage.
Environmental Factors and Soil Conditions
Different soil types and environmental conditions present unique challenges. Rocky soil can make excavation difficult and increase the risk of damaging the cable. Areas prone to frost heave can exert pressure on buried cables, leading to stress and potential failure over time. Saturated soil can also pose issues for trench stability and cable protection.
Legal and Liability Issues
As previously discussed, failing to obtain permits, respect property lines, or adhere to utility safety protocols can result in legal penalties, fines, and significant liability if damage occurs to public utilities or neighboring properties. If you are connecting to a service provider's network, DIY installation might void warranties or service agreements.
Technical Expertise Required
While burying the cable is a physical task, proper installation also requires an understanding of fiber optic cable handling, termination, and testing. Incorrectly splicing or terminating cables can render the entire installation useless. Without the necessary technical knowledge, you risk creating a non-functional or poorly performing network.
Time and Labor Commitment
Burying cable is physically demanding and time-consuming. It requires careful planning, excavation, trenching, laying the cable, backfilling, and restoration of the landscape. Underestimating the effort involved can lead to a project that drags on for weeks or months, causing prolonged disruption.
Difficulty in Troubleshooting and Repair
If issues arise with a DIY buried cable, troubleshooting can be significantly more challenging without professional equipment and expertise. Locating the exact point of failure in a buried cable can be a complex and costly process.
It is essential to approach a DIY fiber optic burial project with a realistic understanding of these challenges. For many, the risks and required expertise may outweigh the potential cost savings, making professional installation a more prudent choice.
Planning Your Fiber Optic Cable Burial Project
Successful and safe fiber optic cable burial hinges on meticulous planning. Rushing into excavation without a comprehensive plan is a recipe for disaster. This phase is critical for identifying potential issues, ensuring compliance, and setting the stage for a smooth installation. For 2025-26, planning remains the cornerstone of any successful underground infrastructure project.
1. Define Your Needs and Scope
Before anything else, clearly define why you need to bury the fiber optic cable and what you aim to achieve. Are you connecting a main building to a secondary structure? Extending internet service to a detached garage? Establishing a network link between two properties? The distance, the required bandwidth, and the intended use will dictate the type of cable and the complexity of the installation.
2. Route Planning and Mapping
Identify the most practical and safest route for the cable. Consider:
- Obstacles: Note the location of trees, large rocks, existing structures, driveways, patios, and any other permanent features.
- Property Lines: Ensure the entire planned route lies within your property or has proper easements.
- Existing Utilities: While you'll use professional services later, make preliminary observations of potential utility crossings (e.g., where water or gas lines might enter the house).
- Future Development: Consider any future landscaping or construction plans that might impact the buried cable.
- Terrain: Steep slopes or difficult terrain can complicate excavation and may require different techniques.
Create a detailed map or sketch of your property, marking the proposed cable path, any identified obstacles, and potential utility locations. This visual aid is invaluable for planning and communication.
3. Research Local Regulations and Obtain Permits
This step cannot be overstated. Contact your local building department or municipality to understand:
- Permit requirements for excavation and underground utilities.
- Required depths for buried cables.
- Regulations regarding conduit usage and warning tape.
- Any specific requirements for fiber optic installations.
Apply for and obtain all necessary permits well in advance. This process can sometimes take weeks, so factor it into your timeline.
4. Contact Utility Locating Services (Call Before You Dig)
Dial 811 (or your local equivalent) at least a few business days before you plan to start digging. This is a free service that will notify relevant utility companies to mark the approximate location of their underground lines on your property. Understand that these markings are often approximate, and caution is still required.
5. Select the Right Fiber Optic Cable and Conduit
Choose a fiber optic cable rated for direct burial or suitable for installation within a conduit. For buried applications, outdoor-rated, UV-resistant, and moisture-resistant cables are essential. Consider:
- Cable Type: Single-mode or multi-mode, depending on distance and bandwidth needs.
- Armoring: Some cables have built-in armoring for added protection against crushing and rodent damage.
- Conduit: A high-density polyethylene (HDPE) conduit is typically recommended to protect the fiber optic cable from physical damage, moisture, and soil chemicals. The conduit size should be appropriate for the cable and allow for easy pulling.
6. Estimate Material Needs
Based on your route plan, calculate the amount of fiber optic cable, conduit, connectors, splice closures, warning tape, and any other necessary materials. It's always wise to purchase slightly more than you estimate to account for errors or unforeseen circumstances.
7. Develop a Safety Plan
Outline safety procedures for excavation, handling tools, and working with potentially hazardous underground utilities. Ensure you have appropriate personal protective equipment (PPE), such as gloves, safety glasses, and sturdy footwear.
8. Create a Timeline
Break down the project into manageable phases (e.g., permit application, utility marking, excavation, conduit installation, cable pulling, splicing, testing, backfilling, restoration). Estimate the time required for each phase, considering potential delays.
Thorough planning is an investment that pays dividends in a safer, more compliant, and ultimately successful fiber optic cable burial. For 2025-26, with increasing reliance on digital infrastructure, this planning phase is more critical than ever.
Essential Tools and Materials for Fiber Optic Burial
Successfully burying fiber optic cable requires a specific set of tools and materials. Having the right equipment on hand before you begin will ensure efficiency, safety, and a professional-quality installation. Here’s a breakdown of what you'll likely need for your 2025-26 project:
Tools for Excavation and Trenching
- Shovel: A sturdy, flat-edged shovel is essential for digging trenches and backfilling.
- Pickaxe or Mattock: For breaking up hard or rocky soil.
- Trenching Machine (Optional but Recommended): For longer runs or tougher soil conditions, a walk-behind trencher can significantly speed up the process and create a more uniform trench. Rental is often a cost-effective option.
- Post Hole Digger: Useful for digging holes for marking posts or anchor points.
- Wheelbarrow: For moving excavated soil and backfill material.
- Measuring Tape: For accurate depth measurements and layout.
- Level: To ensure the conduit is laid at a consistent grade if necessary.
Materials for Cable Protection and Installation
- Fiber Optic Cable: Choose a cable rated for direct burial or suitable for conduit installation. Ensure it meets your bandwidth and distance requirements (e.g., OS2 single-mode for long distances).
- Conduit: High-density polyethylene (HDPE) conduit is the standard for protecting buried fiber optic cables. Available in various sizes (e.g., 1-inch, 1.25-inch, 1.5-inch) and lengths. Choose a size that allows for easy cable pulling.
- Conduit Fittings: Couplings, elbows, and end caps for connecting sections of conduit and sealing the ends.
- Cable Lubricant: A specialized, water-based lubricant designed for pulling fiber optic cables through conduit to reduce friction and prevent damage.
- Innerduct (Optional): Smaller tubes that can be pulled inside a larger conduit, allowing for future expansion or separation of cables.
- Warning Tape: Brightly colored plastic tape (often marked "Caution: Fiber Optic Cable Below") placed in the trench above the conduit to alert future excavators.
- Marker Posts: To visually indicate the location of the buried cable at key points (e.g., property lines, entry/exit points).
Tools for Cable Handling and Termination (If Applicable)
Note: If you are simply running pre-terminated fiber optic cable, you may not need these. However, for custom installations or repairs, they are essential.
- Fiber Optic Strippers: Specialized tools to precisely remove the buffer coating and jacket from fiber optic strands without damaging them.
- Fiber Optic Cleavers: High-precision tools used to create a perfectly flat end on the fiber strand for splicing or connectorization.
- Fusion Splicer: A machine that uses an electric arc to fuse two fiber strands together, creating a permanent, low-loss connection. This is a professional tool that is expensive to purchase and often requires training.
- Mechanical Connectors: Alternative to fusion splicing, these connectors are faster to install but can sometimes have slightly higher signal loss.
- Fiber Optic Identifier/Tester: Tools to check for the presence of light, measure signal loss (Optical Loss Test Set - OLTS), or certify the fiber link (Optical Time Domain Reflectometer - OTDR).
- Cable Pulling Grips (Swivels and Grips): To attach the cable to the pulling rope or winch for installation into the conduit.
- Duct Rodder or Fish Tape: For pulling the pulling rope through the conduit.
Safety Equipment
- Work Gloves: To protect your hands.
- Safety Glasses or Goggles: To protect your eyes from debris.
- Sturdy Work Boots: With steel toes for foot protection.
- High-Visibility Vest: Especially if working near roads or in low-light conditions.
- First-Aid Kit: Essential for any DIY project.
Ensuring you have all these tools and materials ready before you start will significantly contribute to a safe, efficient, and successful fiber optic cable burial project in 2025-26.
Step-by-Step Guide to Burying Fiber Optic Cable
Burying your own fiber optic cable is a multi-step process that requires careful execution. This guide outlines the typical steps involved, assuming you have completed the planning phase, obtained permits, and had utilities marked. For 2025-26, adherence to these steps is crucial for a reliable installation.
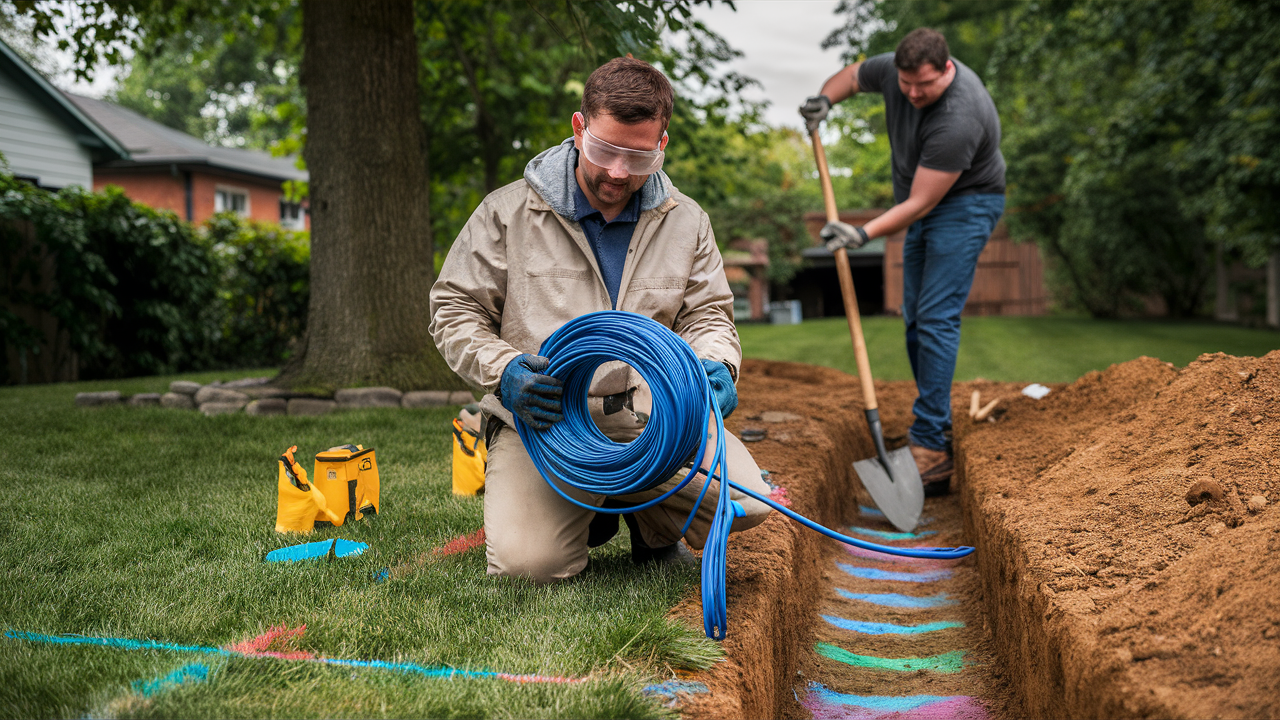
Step 1: Mark the Route and Excavate the Trench
Using your planned route map, mark the exact path of the trench on the ground. This can be done with spray paint, flags, or stakes. Begin excavating the trench. The width of the trench will depend on the conduit size and local regulations, but typically 6-12 inches is sufficient. The depth is critical and dictated by local codes (see the next section for details).
- Soil Removal: Carefully remove any sharp rocks or debris from the trench to prevent damage to the conduit and cable.
- Trench Stability: Ensure the trench walls are stable, especially in softer soils. If necessary, use trench shoring for deeper trenches, though this is usually only required for professional work.
- Obstacle Avoidance: If you encounter unexpected rocks or roots, carefully work around them. Do not force the trenching process if it risks damaging anything.
Step 2: Install the Conduit
Lay the HDPE conduit sections into the trench. Connect sections using appropriate couplings. Ensure the conduit is clean and free of debris before joining. If the run is long, consider using a duct rodders or fish tape to pull a pilot string through the conduit first, which will aid in pulling the fiber optic cable later.
- Conduit Bends: Use sweep elbows for gentle bends rather than sharp angles, which can make pulling the cable difficult.
- Sealing Ends: Temporarily cap the ends of the conduit to prevent soil and water from entering during the installation process.
- Support: Ensure the conduit is laid on a relatively smooth and stable base within the trench.
Step 3: Prepare for Cable Pulling
Once the conduit is laid and connected, it's time to prepare for pulling the fiber optic cable. This is often the most challenging part of the installation.
- Attach Pulling Rope: Securely attach a strong, durable pulling rope or cable to one end of the conduit. A swivel can help prevent the rope from twisting.
- Lubricate the Conduit: Apply a generous amount of cable lubricant to the inside of the conduit. This is crucial for reducing friction and preventing damage to the cable jacket.
- Prepare the Cable: Carefully unspool the fiber optic cable, ensuring it doesn't kink or tangle.
Step 4: Pull the Fiber Optic Cable
This step typically requires at least two people, and often more for longer pulls, or the use of a mechanical winch.
- Gentle Pulling: Begin pulling the cable through the conduit. Maintain a steady, consistent pull. Avoid jerky movements.
- Communication: Maintain clear communication between the person feeding the cable and the person pulling.
- Monitor Tension: Be mindful of the tension on the cable. Excessive tension can damage the fiber strands. If using a winch, ensure it has a tension monitoring system.
- Feed Smoothly: Ensure the cable feeds into the conduit smoothly, without snagging.
- End of Pull: Once the cable has been pulled through the entire length of the conduit, secure the end.
Step 5: Install Warning Tape and Backfill
Before backfilling, lay the bright yellow warning tape in the trench, typically a few inches above the conduit. This serves as a visual alert for anyone digging in the future. Then, begin carefully backfilling the trench.
- Initial Backfill: Place a layer of fine soil or sand around and over the conduit to provide cushioning.
- Compaction: Gradually backfill the trench, compacting the soil in layers to prevent settling. Avoid using heavy machinery directly over the conduit.
- Restore Surface: Replace any sod, gravel, or other surface materials to restore the area to its original condition.
Step 6: Install Marker Posts
Install marker posts at strategic points along the cable route, especially at property lines, turns, or entry/exit points. These posts serve as a permanent visual reminder of the buried cable's location.
Step 7: Splicing and Termination (If Necessary)
If your cable is not pre-terminated or requires joining sections, this is where splicing or termination occurs. This is a highly technical process that requires specialized tools and expertise. If you are not experienced, it is strongly recommended to hire a professional for this stage.
Step 8: Testing and Verification
After installation and any necessary splicing, the fiber optic link must be thoroughly tested to ensure it is functioning correctly and meeting performance specifications. This is covered in more detail in a later section.
Following these steps meticulously will greatly increase the chances of a successful and durable fiber optic cable burial. For 2025-26, remember that patience and precision are key.
Depth and Conduit Requirements for Fiber Optic Cable
The depth at which fiber optic cable is buried and the type of conduit used are critical factors for its protection and longevity. These requirements are often dictated by local regulations and industry best practices to safeguard the cable from various hazards. As of 2025-26, these standards continue to evolve to ensure network resilience.
Recommended Burial Depth
The required burial depth for fiber optic cables varies significantly by region and the intended use of the land above. However, general guidelines exist:
- General Residential/Commercial Areas: A common recommendation is a minimum depth of 24 to 36 inches (approximately 60 to 90 cm). This depth provides protection from typical surface activities like gardening, light landscaping, and accidental digging with hand tools.
- Areas with Heavy Traffic (Roads, Driveways): In areas subject to vehicle traffic or heavy machinery, much greater depths are required. Depths of 48 inches (120 cm) or more are common to prevent damage from the weight and vibration of vehicles.
- Agricultural Land: In fields used for farming, where plows and heavy agricultural equipment operate, depths of 36 to 48 inches (90 to 120 cm) are often recommended to protect the cable from tillage equipment.
- Frost Line: In colder climates, it is crucial to bury the cable below the local frost line to prevent damage caused by ground heaving and thawing cycles.
Crucially, always consult your local building codes and permit requirements. These regulations will specify the exact minimum burial depths for your area.
Conduit Requirements
While direct burial fiber optic cables exist, installing the cable within a protective conduit is highly recommended for several reasons:
- Physical Protection: Conduit shields the delicate fiber optic cable from sharp objects, crushing forces, and abrasion during installation and in the future.
- Ease of Replacement/Upgrade: If the cable needs to be replaced or upgraded, it can often be pulled out and a new one pulled in using the existing conduit, significantly simplifying future maintenance.
- Protection from Soil Chemicals: Some soils can contain chemicals that may degrade cable jacketing over time. A conduit provides a barrier.
- Moisture Protection: While not completely waterproof, a well-sealed conduit can offer a degree of protection against moisture ingress.
Recommended Conduit Material: High-Density Polyethylene (HDPE)
HDPE conduit is the industry standard for underground fiber optic installations due to its:
- Durability: It is resistant to corrosion, chemicals, and impact.
- Flexibility: It can bend without cracking, allowing for easier installation around obstacles.
- Strength: It can withstand significant ground pressure.
- Smooth Interior: Facilitates easier cable pulling.
HDPE conduit is available in various sizes (diameters) and wall thicknesses (SDR ratings). The diameter should be chosen to accommodate the fiber optic cable with sufficient space for pulling lubricant and the cable itself. Common sizes range from 1 inch to 2 inches.
Conduit Installation Best Practices
- Continuous Run: Aim for the longest continuous conduit run possible to minimize the number of connections and potential points of failure.
- Smooth Bends: Use swept elbows for any necessary turns to reduce pulling friction.
- Sealing: Properly seal conduit ends to prevent the ingress of water, dirt, and rodents.
- Warning Tape: Always install warning tape above the buried conduit to alert future excavators.
- Marker Posts: Use marker posts to indicate the cable path.
Adhering to these depth and conduit requirements is fundamental for ensuring the long-term reliability and protection of your buried fiber optic cable. For 2025-26, these standards are well-established and critical for network integrity.
Locating Underground Utilities Before You Dig
The single most critical step before any excavation, including burying fiber optic cable, is to accurately locate all underground utilities. This is not just a recommendation; it is a legal requirement in most jurisdictions and a fundamental safety imperative. In 2025-26, the density of underground infrastructure means this step is more vital than ever.
The "Call Before You Dig" Service (e.g., 811)
In the United States, the national "Call Before You Dig" number is 811. In other countries, similar services exist (e.g., "Click Before You Dig" in Canada, "Dial Before You Dig" in Australia). This service is free and connects you with a notification center that will alert all member utility companies in your area to mark the approximate location of their underground lines on your property.
How it Works:
- Initiate the Call: Contact 811 (or your local equivalent) a few business days before you plan to dig. You will typically be asked for your location, the type of work you plan to do, and the date you intend to start digging.
- Utility Response: Utility companies (gas, electric, water, sewer, telecommunications, etc.) that have underground facilities in the vicinity of your proposed digging site will send trained technicians to mark the approximate location of their lines.
- Marking System: These markings are typically done using colored spray paint or flags. The standard color codes are:
- Red: Electric power lines, cables, conduit, and lighting cables.
- Yellow: Gas, oil, steam, petroleum, or gaseous materials.
- Orange: Communication, alarm or signal lines, cables, or conduit.
- Blue: Potable water.
- Green: Sewers and drain lines.
- Purple: Reclaimed water, irrigation, and slurry lines.
- White: Proposed excavation limits or routes.
- Pink: Temporary survey markings.
- Respect the Marks: Once the lines are marked, you must respect these markings. Digging is generally permitted within a specific buffer zone around the marked lines (often 18-24 inches on either side, plus the width of the marking itself), but extreme caution must be exercised.
Limitations of Utility Markings
It's crucial to understand that utility markings indicate the *approximate* location of underground lines. They are not always perfectly precise. Factors like shifting soil, old markings, or undocumented lines can lead to inaccuracies.
- "Potholing" or Hand Digging: For critical areas or when digging near marked utilities, the safest practice is "potholing" or hand digging. This involves carefully excavating by hand around the marked utility to precisely determine its exact location and depth before proceeding with mechanical excavation.
- Private Utilities: The 811 service typically only covers utilities owned by member companies that run to the property line or main service. Utilities located entirely on private property (e.g., lines from the meter to a detached garage, sprinkler systems, landscape lighting) are often *not* marked by 811. You are responsible for locating these yourself, which may involve hiring a private locating service.
- Documentation: Keep records of your 811 request and the date the utilities were marked.
Consequences of Not Calling 811
Failing to call 811 before digging can lead to:
- Serious Injury or Death: Striking gas or electric lines can be fatal.
- Extensive Property Damage: Ruptured water, sewer, or gas lines can cause significant damage.
- Service Outages: Damaging utility lines can disrupt services for entire neighborhoods.
- Legal Penalties and Fines: Violating "Call Before You Dig" laws can result in substantial fines.
- Liability for Damages: You will be held financially responsible for the cost of repairs and any resulting damages.
For any underground installation in 2025-26, making the 811 call is the absolute first step after planning and obtaining permits. It is non-negotiable for safety and legal compliance.
Testing and Verifying Your Fiber Optic Installation
Once your fiber optic cable is buried, pulled through conduit, and any necessary splicing or termination is complete, the work isn't finished. Rigorous testing and verification are essential to ensure the cable is functioning optimally and that the installation meets performance standards. For 2025-26, network performance is paramount, making testing a critical final step.
Why Testing is Crucial
- Signal Integrity: Fiber optic cables transmit data via light. Any kinks, breaks, poor splices, or damaged connectors can attenuate (weaken) or block the light signal, leading to slow speeds, intermittent connectivity, or complete failure.
- Performance Standards: Fiber optic networks are designed to meet specific performance metrics (e.g., bandwidth, latency, signal-to-noise ratio). Testing confirms these standards are met.
- Troubleshooting: If issues arise later, having baseline test results can significantly speed up the diagnostic process.
- Warranty and Compliance: Some manufacturers or service providers may require documented testing for warranty claims or to certify the installation.
Key Fiber Optic Testing Methods
The type of testing required depends on the complexity of the installation and the desired level of certification. Here are the most common methods:
1. Visual Inspection
Before any electronic testing, a thorough visual inspection is necessary:
- Cable Jacket: Check for any nicks, cuts, or abrasions on the cable jacket.
- Connectors: Ensure connectors are clean, properly seated, and free from damage. Dust and debris are major enemies of fiber optics.
- Splices: Visually inspect splice closures for proper sealing and integrity.
2. Visual Fault Locator (VFL)
A VFL is a pen-like device that emits a bright red laser light. When activated, it can help identify:
- Macro-bends: Sharp bends in the fiber that can cause signal loss.
- Breaks: If the fiber is broken, the red light will "bleed" out at the break point, making it visible.
- Faulty Connectors: A VFL can help pinpoint issues with connector seating.
Note: The red light from a VFL is not safe for direct eye exposure.
3. Optical Power Meter (OPM) and Light Source
This is a fundamental test for measuring the signal loss (attenuation) through the fiber optic link.
- Light Source: Emits a stable light signal at a specific wavelength (e.g., 1310nm or 1550nm for single-mode).
- Optical Power Meter: Measures the power of the light signal received at the other end.
The difference between the transmitted power and the received power, adjusted for the length of the fiber, gives you the total signal loss. This loss should be within acceptable limits for the cable type and length.
4. Optical Time Domain Reflectometer (OTDR)
An OTDR is a more advanced diagnostic tool that acts like a radar for fiber optics. It sends pulses of light down the fiber and analyzes the reflected and backscattered light to:
- Measure Total Link Length: Accurately determine the cable's length.
- Detect and Locate Faults: Pinpoint the exact location of breaks, bad splices, connector issues, and bends along the fiber path.
- Measure Event Loss: Quantify the loss at individual connection points or splices.
- Characterize Fiber Quality: Assess the overall health and performance of the fiber.
OTDRs are essential for certifying longer or more complex fiber optic networks. They require skilled operation and interpretation of the resulting trace.
5. Continuity Testing
This is a basic check to ensure that the light signal can pass from one end of the fiber to the other without complete interruption. A VFL can often perform a basic continuity check.
Interpreting Test Results
Test results should be compared against industry standards or the specifications provided by the cable manufacturer. For example, single-mode fiber typically has a maximum loss budget of around 0.5 dB per kilometer, plus additional loss for connectors and splices.
If test results are unsatisfactory, it indicates a problem that needs to be addressed. This might involve re-splicing, re-terminating connectors, or even replacing sections of cable. For 2025-26, having documented test results is a mark of a professional and reliable installation.
Alternatives to Burying Your Own Fiber Optic Cable
While burying your own fiber optic cable can be a rewarding DIY project, it's not always the most practical or feasible solution for everyone. Several alternatives exist that might better suit your needs, budget, or technical capabilities. As of 2025-26, these alternatives offer various trade-offs in terms of cost, performance, and installation complexity.
1. Professional Installation Services
This is the most straightforward alternative. Hiring a reputable telecommunications contractor or a fiber optic installation company means the entire process, from planning and permitting to excavation, installation, and testing, is handled by experienced professionals. While more expensive, it offers peace of mind, warranty on the work, and ensures compliance with all regulations and best practices.
Pros:
- Expertise and experience ensure a high-quality, reliable installation.
- Handles all aspects of the project, including permits and utility locating.
- Often comes with a warranty on labor and materials.
- Saves you significant time and physical labor.
Cons:
- Significantly higher cost compared to DIY.
- Less control over the exact routing and installation methods.
2. Aerial Fiber Optic Cable Installation
If your property allows and local regulations permit, running fiber optic cable overhead on poles can be an alternative to burial. This is common for connecting buildings across a yard or property where trenching is difficult or undesirable.
Pros:
- Often less invasive and disruptive than trenching.
- Can be quicker to install than underground methods.
- Easier access for repairs or upgrades.
Cons:
- Aesthetically less pleasing for some.
- Vulnerable to weather (wind, ice, lightning) and falling objects (tree branches).
- Requires sturdy poles and proper tensioning.
- May require specific permits and adherence to pole attachment regulations.
3. Using Existing Conduits or Pathways
If there are already underground conduits in place that are no longer in use or have spare capacity, you might be able to pull your new fiber optic cable through them. This is common in business parks or areas with existing utility infrastructure.
Pros:
- Significantly reduces or eliminates the need for new excavation.
- Cost-effective if a suitable conduit is available.
Cons:
- Conduit may be damaged, blocked, or occupied.
- The conduit material might not be suitable for fiber optics.
- Requires thorough inspection and potentially cleaning of the existing conduit.
4. Wireless Point-to-Point (PTP) or Point-to-Multipoint (PTMP) Solutions
For connecting two fixed locations over shorter to medium distances (up to several miles), high-speed wireless bridges can be a viable alternative to fiber optics. These systems use radio waves to transmit data wirelessly.
Pros:
- No trenching or aerial installation required.
- Can be installed relatively quickly.
- Cost-effective for certain applications.
Cons:
- Performance can be affected by weather (rain, fog) and physical obstructions (trees, buildings).
- Generally lower bandwidth and higher latency compared to fiber optics.
- Requires line-of-sight between the antennas.
5. Utilizing Existing Network Infrastructure
If you are extending a network within a building or campus, explore if existing Ethernet cabling or other wired infrastructure can be leveraged or upgraded. While Ethernet has distance limitations, technologies like Power over Ethernet (PoE) and newer Ethernet standards can extend connectivity without needing new fiber runs in some cases.
Pros:
- Leverages existing infrastructure, reducing costs and disruption.
- Often simpler to implement than new underground runs.
Cons:
- Limited by the distance capabilities of the existing cabling (typically 100 meters for standard Ethernet).
- May not provide the high bandwidth or long-distance capabilities of fiber optics.
Choosing the right alternative depends on your specific circumstances. For 2025-26, wireless and professional installation services continue to be strong contenders for those who want to avoid the complexities of DIY burial.
Expert Advice and Professional Installation
While this guide aims to provide comprehensive information on burying fiber optic cable yourself, it's crucial to acknowledge the significant advantages and peace of mind that come with professional expertise. For many individuals and businesses, especially those dealing with complex installations or uncertain conditions, opting for professional installation is the most prudent choice. As of 2025-26, the demand for reliable, high-speed connectivity means that professional installations are more important than ever for ensuring network integrity.
When to Consider Professional Installation
- Complex Terrain: If your property involves steep slopes, rocky soil, extensive landscaping, or numerous obstacles, professional trenching equipment and expertise can navigate these challenges more effectively and safely.
- Long Distances: For runs exceeding a few hundred feet, pulling fiber optic cable through conduit becomes increasingly difficult. Professionals have specialized equipment like winches and experienced crews to manage long pulls without damaging the cable.
- Multiple Utilities: If your planned route crosses or runs near numerous existing underground utilities, the risk of accidental damage increases significantly. Professionals are trained in advanced utility locating and safe excavation practices around these sensitive areas.
- Lack of Time or Physical Capability: Trenching and cable pulling are physically demanding tasks. If you lack the time, physical strength, or inclination for this type of work, professional installation is a worthwhile investment.
- Critical Infrastructure: For business-critical networks, data centers, or essential communication links, the reliability and performance guarantees offered by professional installers are invaluable.
- Splicing and Testing Expertise: Fiber optic splicing and advanced testing (like OTDR) require specialized equipment and significant training. If you don't have access to this or the expertise to perform it correctly, a professional is essential.
- Permitting and Regulatory Navigation: Professionals are well-versed in local permitting processes and regulatory requirements, ensuring your installation is compliant from the outset.
What to Look for in a Professional Installer
- Experience: Look for companies with a proven track record specifically in fiber optic installation and underground utility work.
- Certifications: While not always mandatory, certifications from industry bodies can indicate a commitment to quality and best practices.
- References and Reviews: Check online reviews and ask for references from previous clients.
- Comprehensive Quotes: Ensure the quote clearly outlines all services included, materials, labor, permitting, and any potential additional costs.
- Insurance: Verify that the company carries adequate liability insurance to cover any potential damage during the project.
- Warranty: A reputable installer will offer a warranty on their workmanship and materials.
- Safety Record: Inquire about their safety protocols and training for their crews.
The Value Proposition of Professional Installation
While the upfront cost of professional installation is higher, it often translates to better long-term value. A correctly installed fiber optic network is more reliable, performs better, and is less likely to incur costly repairs down the line. Professionals can identify potential issues before they become problems, ensure optimal signal transmission, and provide the necessary documentation for network certification. For critical infrastructure in 2025-26, the investment in professional installation is often a necessity rather than a luxury.
Consider consulting with a few local, reputable fiber optic installation companies to get quotes and discuss your project. This will give you a clear understanding of the costs involved and help you make an informed decision about whether DIY is the right path for you.
Conclusion: Is DIY Fiber Optic Burial Right for You?
The question of whether you can bury your own fiber optic cable is complex, with a definitive answer depending on your specific circumstances, knowledge, and resources. As we've explored, while legally permissible in many scenarios on private property, the process is laden with technical, safety, and regulatory considerations. The potential cost savings of a DIY approach are attractive, offering greater control and a rewarding learning experience. However, these benefits must be weighed against the substantial risks, including damage to the delicate fiber optic cable, striking existing underground utilities (a potentially life-threatening hazard), and legal liabilities for non-compliance.
For 2025-26, the increasing reliance on robust digital infrastructure makes the integrity of fiber optic installations paramount. If you possess a strong understanding of excavation safety, local regulations, and have access to the necessary tools and time, a DIY burial might be feasible. Thorough planning, meticulous execution of steps like utility marking and proper depth, and rigorous testing are non-negotiable. The use of protective conduit is highly recommended to safeguard your investment.
However, for the majority of homeowners and businesses, the complexities, potential dangers, and the need for specialized skills (especially for splicing and testing) often make professional installation the more sensible and reliable choice. Professional installers bring expertise, specialized equipment, insurance, and warranties, ensuring a compliant, safe, and high-performing network. Ultimately, the decision hinges on a realistic assessment of your capabilities versus the project's demands. Prioritize safety, legality, and long-term network performance above all else when deciding whether to embark on this challenging but potentially rewarding endeavor.