Xfinity Internet Setup A Step-by-Step Guide to Seamless Connectivity
Unlock the full potential of your Xfinity internet with our comprehensive, step-by-step guide. This article provides everything you need for a seamless Xfinity internet setup, ensuring robust connectivity and optimal performance from the moment you plug in your equipment. Get ready for a smooth online experience.
Getting Started: What You Need Before You Begin
Embarking on the Xfinity internet setup journey is exciting, promising faster speeds and more reliable connectivity. Before you even open the box, a little preparation goes a long way in ensuring a smooth and stress-free installation. This section will guide you through the essential prerequisites, helping you avoid common pitfalls and accelerating your path to seamless internet access. By understanding what's required and having everything at hand, you'll be well-equipped to tackle the setup process efficiently.
The modern digital landscape demands a stable and speedy internet connection. Whether you're a remote worker, a dedicated gamer, a student, or simply enjoy streaming your favorite shows, your internet service is the backbone of your online life. Xfinity, a leading provider, offers various plans and equipment options designed to meet diverse needs. However, the initial setup can sometimes feel daunting, especially if you're new to the process or upgrading your existing service. This guide aims to demystify the Xfinity internet setup, providing clear, actionable steps that anyone can follow.
In 2025-26, the average household internet speed across the US continues to climb, with many demanding gigabit-level connections for their daily tasks. Xfinity is at the forefront of this evolution, offering speeds that can support multiple high-bandwidth activities simultaneously. To fully leverage these capabilities, a correct and optimized setup is paramount. This guide will not only walk you through the physical connections but also delve into Wi-Fi configuration, device pairing, and essential troubleshooting tips, ensuring you get the most out of your Xfinity service.
Key items to have ready:
- Your Xfinity welcome kit or equipment shipment.
- The Xfinity app downloaded on your smartphone or tablet.
- A valid Xfinity account number and associated credentials (username/password).
- A clear, accessible location for your modem and router, ideally near your primary internet outlet.
- Basic tools like a screwdriver (though often not needed for self-install).
- Patience and a positive attitude!
Having these items ready will streamline the entire process. The Xfinity app, in particular, has become an indispensable tool for self-installation and ongoing management, offering guided setup, speed tests, and network monitoring. Let's move on to the exciting part: unboxing your new Xfinity equipment.
Unboxing and Equipment Check
The moment of truth has arrived – it's time to unpack your Xfinity internet equipment. This step is crucial for ensuring you have all the necessary components and that they are in good working order. A thorough check now can save you significant time and frustration later. We'll guide you through what to expect in your Xfinity self-install kit and how to verify its contents.
Typically, an Xfinity self-install kit includes a modem (or a gateway, which is a modem and router combined), a power cord, an Ethernet cable, and a coaxial cable. Depending on your service plan and location, you might also receive a Wi-Fi extender or other accessories. The goal is to identify each piece and confirm its condition.
What's usually in the box:
- Modem/Gateway: This is the heart of your internet connection. It converts the signal from your cable line into a usable internet connection for your home. If you have a separate modem and router, you'll have two devices. If you have a gateway, it's a single unit performing both functions.
- Power Adapter: This supplies power to your modem/gateway. Ensure it's the correct adapter for your device.
- Coaxial Cable: This is the cable that connects your modem/gateway to the Xfinity wall outlet. It looks similar to a TV cable but is specifically designed for internet data transmission.
- Ethernet Cable: This cable is used to connect devices directly to your modem/router or to connect a separate modem to a router.
- Quick Start Guide: This usually contains basic instructions and diagrams for setup.
- Welcome Letter: This often includes your account information and important contact numbers.
Actionable steps for unboxing:
- Carefully open the shipping box and lay out all the contents on a clean, flat surface.
- Compare the items you received against the packing list or the quick start guide.
- Inspect each piece of equipment for any visible damage, such as cracks, bends, or loose parts.
- Ensure all cables are present and appear to be in good condition, without kinks or frayed ends.
- Locate the model numbers on your modem/gateway and compare them to what Xfinity expects for your service plan. You can usually find this information on your order confirmation or the Xfinity website.
If anything is missing or damaged, do not proceed with the setup. Contact Xfinity customer support immediately. They will arrange for replacement parts or guide you on the next steps. Having the correct, undamaged equipment is fundamental to a successful Xfinity internet setup.
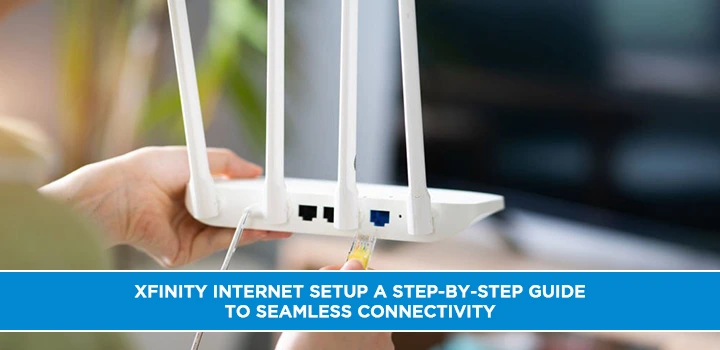
Connecting Your Modem/Router
With your Xfinity equipment unpacked and verified, it's time to physically connect your modem or gateway. This is a critical step that establishes the physical link between your home and the Xfinity network. Following these instructions carefully will ensure a stable foundation for your internet connection.
The placement of your modem/router is important. Ideally, it should be centrally located in your home to provide the best Wi-Fi coverage. It should also be near the coaxial wall outlet and a power outlet. Avoid placing it in enclosed cabinets, near large metal objects, or in areas with significant electronic interference, as these can degrade Wi-Fi signals.
Step-by-step connection process:
- Locate the Coaxial Outlet: Find the coaxial cable outlet on your wall. This is usually a round connector with a threaded center pin. If you have an existing cable outlet from a previous provider, you might be able to use that. Ensure it's active and properly installed.
- Connect the Coaxial Cable: Take the coaxial cable provided in your kit. Screw one end securely onto the back of your Xfinity modem/gateway. Then, screw the other end firmly onto the wall outlet. Hand-tightening is usually sufficient; avoid using excessive force.
- Connect the Power Adapter: Plug the power adapter into the designated port on your modem/gateway. Then, plug the other end into a working electrical outlet. It's often recommended to plug the modem directly into a wall outlet rather than a surge protector during initial setup, to ensure consistent power.
- Connect an Ethernet Cable (if applicable): If you are using a separate router, connect an Ethernet cable from the modem's Ethernet port to the router's WAN (or Internet) port. If you have a gateway, this step is not necessary as the router functionality is built-in.
Once connected, observe the lights on your modem/gateway. They will typically blink and then become solid as the device powers on and establishes a connection. This process can take several minutes. The specific sequence and meaning of these lights vary by model, but generally, you'll see lights indicating power, downstream, upstream, and online status. Refer to your quick start guide for the specific light indicators for your device.
This physical connection is the foundation of your Xfinity internet service. Ensuring it's done correctly minimizes the chances of connectivity issues during the activation phase. If you encounter any problems with the connections or the lights don't behave as expected, consult the troubleshooting section or contact Xfinity support.
Powering On and Activation
After successfully connecting your Xfinity modem/gateway, the next crucial step is powering it on and activating your service. This process synchronizes your equipment with Xfinity's network, enabling internet access. The Xfinity app is your primary tool for this phase, simplifying what used to be a more complex manual process.
Activation can take anywhere from 5 to 30 minutes, depending on network conditions and your specific equipment. During this time, your modem/gateway will go through a series of checks and updates. Patience is key here; avoid unplugging or resetting the device unless instructed by Xfinity support.
Steps for powering on and activation:
- Power On: Ensure your modem/gateway is properly connected to power as described in the previous section. The device will automatically power on once plugged in.
- Observe the Lights: Watch the status lights on your modem/gateway. They will typically cycle through various states (blinking, solid colors) as the device boots up, connects to the network, and downloads configuration settings. The "Online" or "Internet" light should eventually become solid, indicating a successful connection to Xfinity's network.
- Launch the Xfinity App: If you haven't already, download the Xfinity app from your smartphone's app store (iOS or Android). Log in using your Xfinity account credentials.
- Follow In-App Prompts: The Xfinity app is designed to guide you through the activation process. Look for an option like "Set up new equipment" or "Activate your service." The app will detect your new modem/gateway and initiate the activation sequence.
- Device Identification: The app may ask you to confirm the MAC address of your modem/gateway, which is usually found on a sticker on the device itself. This helps Xfinity identify your specific equipment on the network.
- Activation Process: The app will communicate with Xfinity's servers to activate your service. This involves provisioning your modem/gateway with the correct speed tier and features associated with your Xfinity plan.
- Confirmation: Once activation is complete, the app will notify you. The "Online" or "Internet" light on your modem/gateway should be solid, indicating that your internet service is active.
What if activation fails?
- Check Connections: Double-check that all cables (coaxial, power, Ethernet if applicable) are securely connected.
- Restart Equipment: Try unplugging the power from your modem/gateway for about 30 seconds, then plugging it back in. Wait a few minutes for it to reboot and try activation again.
- Contact Xfinity Support: If the issue persists, contact Xfinity customer support. They can check for any network issues in your area or manually push the activation signal to your modem/gateway.
A successful activation is confirmed by the solid "Online" light and a notification through the Xfinity app. With your service activated, you're now ready to configure your home Wi-Fi network.
Setting Up Your Wi-Fi Network
Activating your Xfinity internet service is a major milestone, but the true usability of your connection hinges on a well-configured Wi-Fi network. This section will guide you through setting up your wireless network, including choosing a network name (SSID) and a strong password, which are essential for both convenience and security. In 2025-26, with an increasing number of connected devices, a robust Wi-Fi setup is more critical than ever.
Your Wi-Fi network is what allows your smartphones, laptops, smart TVs, and other wireless devices to connect to the internet. The Xfinity app is your primary tool for managing your Wi-Fi settings, offering an intuitive interface for customization.
Key Wi-Fi Settings:
- Network Name (SSID): This is the name your Wi-Fi network will broadcast. Choose a name that is easily recognizable but not too personal. Avoid using your name or address.
- Password (Pre-Shared Key - PSK): This is the secret code required to connect to your Wi-Fi network. It's crucial to create a strong, unique password to prevent unauthorized access.
- Security Protocol: Modern networks use WPA2 or WPA3 security protocols. WPA3 is the latest and most secure, offering enhanced protection against hacking attempts. Your Xfinity gateway should default to the strongest available option.
- Frequency Bands: Most modern routers broadcast on two bands: 2.4 GHz and 5 GHz. The 2.4 GHz band offers a wider range but slower speeds, while the 5 GHz band offers faster speeds but a shorter range. Some gateways offer a combined SSID where the router automatically assigns devices to the best band.
Steps for setting up your Wi-Fi network using the Xfinity App:
- Open the Xfinity App: Launch the app on your smartphone or tablet and log in to your account.
- Navigate to Wi-Fi Settings: Look for a section related to "Wi-Fi," "Network Settings," or "My WiFi."
- Choose Your Network Name (SSID): The app will likely suggest a default SSID. You can change this to something you prefer.
- Create a Strong Password: This is paramount. A strong password should be at least 12 characters long and include a mix of uppercase and lowercase letters, numbers, and symbols. Avoid using common words or easily guessable information.
- Select Security Protocol: Ensure WPA2 or WPA3 is selected.
- Apply Changes: Once you've made your selections, save the changes. Your Wi-Fi network will restart with the new settings.
- Connect Your Devices: You will need to reconnect all your wireless devices to the new Wi-Fi network using the SSID and password you just created.
Tips for a strong Wi-Fi password:
- Use a passphrase generator or create a memorable sentence and use the first letter of each word, mixed with numbers and symbols. Example: "My dog loves to chase squirrels in the park!" could become "Mdltcsitp!2025".
- Never reuse passwords from other accounts.
- Change your password periodically, especially if you suspect unauthorized access.
By taking the time to set up a secure and personalized Wi-Fi network, you enhance your online experience and protect your home network from potential threats. This is a fundamental step in leveraging the full capabilities of your Xfinity internet service.
Connecting Your Devices
With your Xfinity internet activated and your Wi-Fi network configured, the next logical step is to connect your various devices to the internet. This is where you begin to enjoy the fruits of your setup efforts. Whether it's a laptop, smartphone, smart TV, or gaming console, connecting them is generally straightforward, especially if you've set up a user-friendly Wi-Fi network.
The process for connecting devices will vary slightly depending on the device's operating system and type, but the underlying principle is the same: select your network and enter your password.
Connecting Wireless Devices:
Most modern devices connect via Wi-Fi. Here's a general guide:
- Smartphones and Tablets (iOS/Android):
- Go to your device's 'Settings'.
- Tap on 'Wi-Fi' or 'Network & Internet'.
- Ensure Wi-Fi is turned on.
- Your device will scan for available networks. Select your Xfinity Wi-Fi network name (SSID) from the list.
- When prompted, enter your Wi-Fi password.
- Tap 'Join' or 'Connect'.
- Laptops and Computers (Windows/macOS):
- Click on the Wi-Fi icon in the system tray (Windows) or menu bar (macOS).
- Select your Xfinity Wi-Fi network name (SSID) from the list of available networks.
- Click 'Connect'.
- Enter your Wi-Fi password when prompted.
- Click 'Next' or 'Join'.
- Smart TVs, Streaming Devices, and Gaming Consoles:
- Navigate to your device's 'Settings' menu.
- Look for 'Network' or 'Internet' settings.
- Select 'Wi-Fi' or 'Wireless Connection'.
- Choose your Xfinity Wi-Fi network name (SSID) from the list.
- Enter your Wi-Fi password using the on-screen keyboard or controller.
- Confirm the connection.
Connecting Wired Devices (Ethernet):
For devices that require the most stable and fastest connection, or for added security, using an Ethernet cable is recommended. This is particularly useful for desktop computers, gaming consoles, and smart TVs.
- Locate Ports: Find an available Ethernet port on your Xfinity gateway or router and on the device you wish to connect.
- Connect the Cable: Plug one end of an Ethernet cable into the device's Ethernet port and the other end into the gateway/router's Ethernet port.
- Automatic Configuration: Most devices will automatically detect the wired connection and establish internet access without requiring any further configuration.
Using the Xfinity App for Device Management:
The Xfinity app offers features to manage connected devices:
- View Connected Devices: See a list of all devices currently connected to your network.
- Prioritize Devices: Some gateways allow you to prioritize bandwidth for specific devices, ensuring critical applications or devices get the best performance.
- Guest Networks: Set up a separate guest network for visitors, keeping your main network secure.
Ensuring all your devices are connected is the final step in getting your Xfinity internet up and running. With multiple devices connected, you can now experience the full benefits of your high-speed internet. However, sometimes things don't go perfectly, and you might encounter issues.
Troubleshooting Common Issues
Even with a meticulous setup, occasional internet issues can arise. Understanding how to troubleshoot common problems is a vital skill for maintaining a seamless Xfinity internet experience. This section provides practical solutions for frequently encountered issues, empowering you to resolve minor disruptions quickly and efficiently.
The most common issues users face include slow speeds, intermittent connectivity, and complete loss of internet access. By systematically addressing these problems, you can often restore your service without needing to contact customer support.
1. No Internet Connection:
- Check Modem/Gateway Lights: As mentioned, observe the status lights. If the "Online" or "Internet" light is off or blinking red, there's likely a problem with the connection to Xfinity's network.
- Verify Physical Connections: Ensure the coaxial cable is tightly screwed into both the wall outlet and the modem/gateway. Check that the power adapter is securely plugged in.
- Reboot Your Equipment: Unplug the power from your modem/gateway for 30 seconds, then plug it back in. Wait 5-10 minutes for it to fully reboot and attempt to connect.
- Check for Service Outages: Use the Xfinity app or website to check if there are any known service outages in your area.
- Test with a Wired Connection: If possible, connect a computer directly to the modem/gateway using an Ethernet cable. If you get internet this way, the issue is likely with your Wi-Fi setup.
2. Slow Internet Speeds:
- Run a Speed Test: Use a reliable speed test tool (like Ookla Speedtest or the one in the Xfinity app) to measure your current download and upload speeds. Compare these to the speeds advertised in your Xfinity plan.
- Check Wi-Fi Signal Strength: If you're far from your router, the Wi-Fi signal might be weak. Try moving closer to the router or consider a Wi-Fi extender.
- Reduce Network Congestion: Too many devices using high-bandwidth applications simultaneously can slow down your connection. Try disconnecting some devices or pausing large downloads.
- Restart Your Modem/Gateway and Router: A simple reboot can often resolve temporary performance issues.
- Check for Malware: Malicious software on your devices can consume bandwidth and slow down your internet. Run a scan with your antivirus software.
- Test with Ethernet: Connect a device via Ethernet cable. If speeds are significantly better, the issue is likely Wi-Fi related.
- Update Router Firmware: Ensure your router's firmware is up to date. This is often managed through the Xfinity app or router's web interface.
3. Intermittent Connectivity (Wi-Fi Drops):
- Router Placement: Ensure your router is in a central, open location, away from obstructions and potential sources of interference (microwaves, cordless phones).
- Channel Congestion: In densely populated areas, Wi-Fi channels can become congested. The Xfinity app may allow you to change the Wi-Fi channel your router uses.
- Overheating: Ensure your modem/gateway has adequate ventilation.
- Firmware Updates: Outdated firmware can cause instability. Check for updates via the Xfinity app.
- Interference: Other electronic devices can interfere with Wi-Fi signals. Try turning off nearby devices temporarily to see if the problem resolves.
4. Unable to Connect to Wi-Fi:
- Verify Password: Ensure you are entering the correct Wi-Fi password. Passwords are case-sensitive.
- Restart Device: Try restarting the device you are trying to connect.
- Forget and Reconnect: On your device, "forget" the Wi-Fi network and then try connecting again, re-entering the password.
- Check Router Status: Ensure your router is powered on and broadcasting a Wi-Fi signal.
5. Xfinity App Issues:
- Update the App: Make sure you have the latest version of the Xfinity app installed.
- Clear App Cache: On your smartphone, go to app settings and clear the cache for the Xfinity app.
- Reinstall the App: If problems persist, uninstall and then reinstall the app.
If you've tried these troubleshooting steps and are still experiencing issues, it's time to contact Xfinity customer support. They have advanced diagnostic tools and can dispatch a technician if necessary. Remember to have your account information and details about the problem ready when you call.
Optimizing Your Xfinity Internet for Peak Performance
Once your Xfinity internet is up and running smoothly, the next step is to optimize it for peak performance. This involves fine-tuning your network settings, understanding your plan's capabilities, and implementing best practices to ensure you're getting the fastest and most reliable speeds possible. In the competitive landscape of 2025-26, maximizing your internet's potential is key for a superior online experience.
Optimization isn't just about speed; it's also about ensuring stability, reducing latency, and making your network efficient for all your connected devices.
1. Understanding Your Xfinity Plan:
The first step to optimization is knowing what you're paying for. Xfinity offers a range of internet plans with varying speeds. Ensure your current plan meets your household's needs. If you consistently find yourself experiencing slow speeds despite troubleshooting, it might be time to consider an upgrade.
- Speed Tiers: Xfinity plans range from basic speeds suitable for light browsing to gigabit speeds for heavy users.
- Data Caps: Be aware of any data caps associated with your plan. Exceeding them can result in throttling or extra charges.
2. Wi-Fi Optimization Techniques:
- Router Placement: As emphasized before, central placement is crucial. Avoid corners, basements, and areas with thick walls or large appliances that can block signals.
- Channel Selection: If your Xfinity gateway allows it, experiment with different Wi-Fi channels. Auto-channel selection is often good, but manual selection might be better in crowded Wi-Fi environments. The 5 GHz band is generally less congested and offers higher speeds, but its range is shorter.
- Dual-Band Usage: Utilize both the 2.4 GHz and 5 GHz bands. Connect devices that are closer and require higher speeds (like streaming devices or gaming consoles) to the 5 GHz band. Devices further away or that don't require extreme speeds can use the 2.4 GHz band.
- Wi-Fi Extenders/Mesh Systems: For larger homes or areas with weak signals, consider Xfinity's Wi-Fi Boost (formerly xFi Pods) or a third-party mesh Wi-Fi system. These create a more robust and seamless Wi-Fi coverage throughout your home.
3. Wired Connections for Critical Devices:
For devices that demand the utmost stability and speed, such as gaming consoles, desktop computers, or smart TVs used for 4K streaming, a wired Ethernet connection is always superior to Wi-Fi. Ensure you're using high-quality Ethernet cables (Cat 5e or Cat 6) for optimal performance.
4. Modem/Gateway Maintenance:
- Keep Firmware Updated: Xfinity gateways usually update their firmware automatically. However, you can check the Xfinity app or your gateway's admin interface to ensure it's running the latest version.
- Regular Reboots: While not always necessary, a weekly reboot of your modem/gateway can help clear cache and resolve minor performance glitches.
- Avoid Overheating: Ensure your equipment has good ventilation.
5. Network Security:
A secure network is a performant network. Weak security can lead to unauthorized access, slowing down your connection and exposing your data.
- Strong Wi-Fi Password: As discussed, use a complex password.
- Change Default Credentials: If your gateway has default administrator login credentials, change them immediately.
- Enable WPA3 Security: If your gateway supports it, enable WPA3 for the strongest wireless encryption.
- Guest Network: Use a guest network for visitors to keep your primary network secure.
6. Monitoring Your Performance:
Regularly use speed test tools to monitor your internet performance. The Xfinity app provides built-in speed test functionality and can help identify potential issues. Keep a record of your speeds to compare against your plan's advertised rates.
By implementing these optimization strategies, you can ensure your Xfinity internet service is performing at its best, providing a fast, reliable, and secure online environment for all your digital activities.
Advanced Tips and Security
For users looking to go beyond the basic setup and optimization, this section delves into advanced tips and crucial security measures to further enhance your Xfinity internet experience. In the evolving digital landscape of 2025-26, understanding these aspects can provide peace of mind and unlock more efficient network management.
1. Understanding Your Gateway's Advanced Settings:
Your Xfinity gateway, accessible via a web browser (usually by typing 10.0.0.1 into the address bar) or through the Xfinity app, offers advanced settings that can be customized. While caution is advised, understanding these can offer more control.
- Quality of Service (QoS): Some gateways allow you to prioritize traffic for specific applications or devices. For example, you could prioritize video conferencing over background downloads to ensure smooth calls.
- Port Forwarding: If you run servers or specific applications that require external access (like some online games or remote access tools), you might need to configure port forwarding. This directs incoming traffic on specific ports to a designated device on your network.
- DNS Settings: You can sometimes change your DNS (Domain Name System) server settings. Using a faster or more privacy-focused DNS provider (like Cloudflare or Google DNS) can sometimes slightly improve browsing speeds and enhance privacy.
Note: Modifying advanced settings without understanding their implications can negatively impact your network performance or security. Always research thoroughly before making changes.
2. Network Security Best Practices:
Security is paramount in today's interconnected world. Beyond a strong Wi-Fi password, consider these measures:
- Enable WPA3 Security: If your gateway supports it, WPA3 offers superior encryption and protection against brute-force attacks compared to WPA2.
- Regularly Update Firmware: Ensure your gateway's firmware is always up-to-date. Xfinity typically pushes updates automatically, but it's good practice to verify.
- Disable WPS (Wi-Fi Protected Setup): While convenient, WPS can be a security vulnerability. If not actively used, consider disabling it in your gateway's settings.
- Firewall Configuration: Your Xfinity gateway has a built-in firewall. Ensure it's enabled and configured appropriately. The Xfinity app can help manage some firewall settings.
- Secure IoT Devices: Internet of Things (IoT) devices (smart speakers, cameras, smart appliances) can be entry points for attackers if not secured. Ensure they have strong, unique passwords and are updated regularly. Consider placing them on a separate guest network if possible.
- VPN Usage: For enhanced privacy and security, especially on public Wi-Fi or for accessing geo-restricted content, consider using a Virtual Private Network (VPN) on your devices.
3. Monitoring Network Traffic:
The Xfinity app provides insights into your network activity. Understanding this data can help you identify bandwidth hogs or potential security threats.
- Bandwidth Usage: Monitor which devices are consuming the most data. This can help you identify unexpected usage or optimize device settings.
- Connected Devices: Regularly review the list of connected devices to ensure no unauthorized devices are on your network.
4. Wi-Fi Extenders vs. Mesh Systems:
For larger homes, the choice between Wi-Fi extenders and mesh systems is important.
- Wi-Fi Extenders: These devices rebroadcast your existing Wi-Fi signal. They are generally less expensive but can sometimes create separate network names and may reduce speeds.
- Mesh Wi-Fi Systems: These use multiple nodes that work together to create a single, seamless Wi-Fi network with a single SSID. They offer better performance and coverage but are typically more expensive. Xfinity's Wi-Fi Boost service uses mesh technology.
5. Future-Proofing Your Network:
As technology advances, consider future needs:
- Wi-Fi 6/6E: Newer gateways and devices support Wi-Fi 6 or 6E, offering faster speeds, lower latency, and better performance in congested environments. Ensure your equipment is compatible if you plan to upgrade devices.
- Gigabit Speeds: With the increasing demand for bandwidth, consider if your current plan and equipment can support future gigabit internet speeds.
By implementing these advanced tips and prioritizing security, you can create a robust, efficient, and secure home network that maximizes the benefits of your Xfinity internet service. This proactive approach ensures your online experience remains seamless and protected.
In conclusion, setting up Xfinity internet is a manageable process when approached systematically. From unboxing and connecting your equipment to activating your service, configuring your Wi-Fi, and connecting your devices, each step builds upon the last to deliver seamless connectivity. Troubleshooting common issues and optimizing your network further ensures you harness the full power of your internet service. By following this comprehensive guide, you're well-equipped to enjoy a reliable and high-performing internet experience, making your digital life smoother and more productive.