What does fiber installation include?
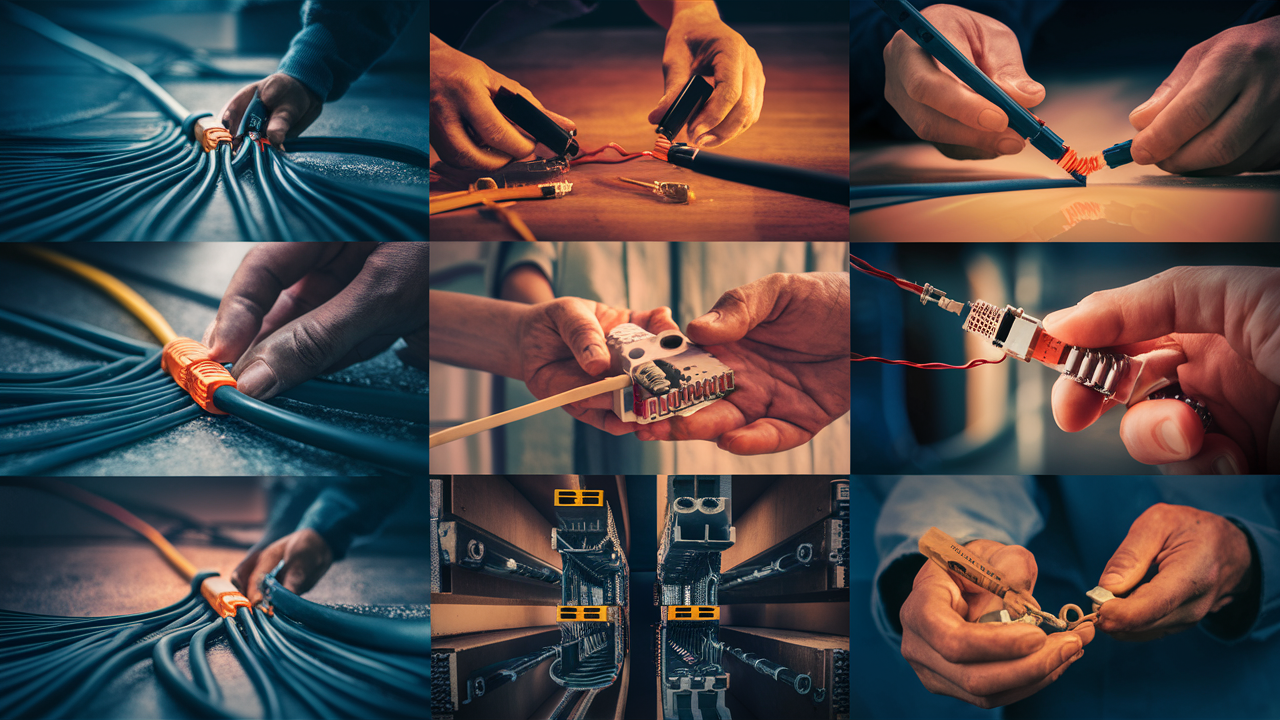
Embarking on fiber optic internet installation can feel complex, but understanding what's involved clarifies the process. This guide details the essential steps, equipment, and considerations, ensuring you know precisely what to expect when upgrading to lightning-fast fiber.
Understanding Fiber Optic Technology
Fiber optic internet represents a significant leap forward in data transmission compared to traditional copper-based technologies like DSL or cable. At its core, fiber optics utilize thin strands of glass or plastic to transmit data as pulses of light. This fundamental difference unlocks unparalleled speed, bandwidth, and reliability. Unlike electrical signals that can degrade over distance and are susceptible to electromagnetic interference, light signals travel unimpeded, maintaining their integrity and speed across vast distances. This makes fiber optic networks inherently more robust and future-proof, capable of handling the ever-increasing demands of modern digital life, from high-definition streaming and online gaming to remote work and smart home technologies. By 2025, the global fiber optic market is projected to reach over $100 billion, underscoring its critical role in the digital infrastructure.
The Science Behind the Speed
The magic of fiber optics lies in its ability to transmit data using light. These ultra-thin glass fibers, often thinner than a human hair, are bundled together to form cables. Data is encoded into light pulses, which are then sent down these fibers. At the receiving end, a device converts these light pulses back into digital data. This light-based transmission is incredibly efficient, allowing for speeds that can reach up to 10 Gigabits per second (Gbps) and beyond, far surpassing the capabilities of copper wiring. The lack of electrical conductivity also means fiber is immune to electrical surges and interference, making it a safer and more reliable option.
Fiber vs. Other Technologies: A 2025 Perspective
To truly appreciate what fiber installation includes, it's vital to understand its advantages over older technologies.
| Feature | Fiber Optic | Cable Internet | DSL Internet |
|---|---|---|---|
| Max Download Speed (Typical) | 1 Gbps - 10 Gbps+ | Up to 1 Gbps | Up to 100 Mbps |
| Max Upload Speed (Typical) | 1 Gbps - 10 Gbps+ | Up to 50 Mbps | Up to 10 Mbps |
| Latency | Very Low | Moderate | Higher |
| Reliability | Very High (Immune to Interference) | Moderate (Can be affected by network congestion) | Moderate (Affected by distance from exchange) |
| Bandwidth Capacity | Extremely High | High | Limited |
| Future-Proofing | Excellent | Good | Limited |
As of 2025, the demand for symmetrical upload and download speeds is skyrocketing, driven by video conferencing, cloud backups, and content creation. Fiber is the only technology that consistently delivers this capability.
The Crucial Pre-Installation Phase
Before the technicians arrive with their tools, a significant amount of planning and preparation takes place. This phase is critical for a smooth and efficient installation process and often involves coordination between the internet service provider (ISP), local authorities, and sometimes even the homeowner. Skipping or rushing these steps can lead to delays, increased costs, or suboptimal placement of your fiber connection.
Site Survey and Assessment
The first major step is the site survey. A technician or a specialized team will visit your property to assess the best route for the fiber optic cable. This involves:
- Identifying the nearest fiber point of presence (POP): This is the location where the ISP's fiber network is accessible, often a utility pole or a junction box in your neighborhood.
- Determining the optimal path: They will evaluate whether the fiber can be run overhead (aerial) from a pole to your house, or if it needs to be buried underground (buried or trenching). This decision depends on existing infrastructure, property layout, local regulations, and potential obstacles like trees, driveways, or existing underground utilities.
- Locating the desired indoor termination point: You'll discuss where you want the Optical Network Terminal (ONT) – the device that converts light signals to usable internet data – to be installed inside your home. Common locations include a utility room, garage, or central area where your router will be placed.
- Checking for existing conduits: If you have existing conduits from previous utility installations, they might be utilized to minimize disruption.
- Assessing potential challenges: This includes identifying any difficult terrain, hardscaping (patios, decks), or landscaping that might complicate the installation.
This survey is crucial for accurate quoting and scheduling. For instance, aerial installations are generally quicker and less disruptive than underground ones, which might require permits and specialized trenching equipment.
Permitting and Rights-of-Way
Depending on your location and the chosen installation method, permits may be required from local municipalities or homeowner associations. If the fiber needs to cross public or private property not owned by you, the ISP will need to secure rights-of-way. This process can sometimes add significant time to the overall installation schedule, especially in densely populated areas or regions with complex regulatory frameworks. Understanding these requirements upfront helps manage expectations regarding the timeline.
Scheduling the Installation
Once the survey is complete and any necessary permits are in progress, your installation will be scheduled. ISPs typically offer appointment windows, and it's essential to have someone over 18 present at the property for the entire duration. The technician will need access to both the exterior and interior of your home.
Homeowner Responsibilities Before Arrival
While the ISP handles most of the technical work, there are a few things you can do to prepare:
- Clear the path: Ensure the technician has clear access to the exterior of your home where the cable will enter, and to the interior location you've chosen for the ONT. This might mean moving outdoor furniture, plants, or clearing clutter inside.
- Identify existing utilities: If you know where your water, gas, or electrical lines are buried, it's helpful to point them out to the technician, especially for underground installations. While they will use utility locating services, your knowledge can prevent accidents.
- Prepare for the ONT location: Ensure the chosen spot for the ONT has access to a power outlet.
Proper preparation on your part can significantly speed up the installation day.
The Fiber Installation Process: Step-by-Step
The actual installation day is when the physical work of bringing fiber optic internet to your home takes place. While specifics can vary based on whether the connection is aerial or buried, the core steps involve bringing the fiber from the network to your premises and then connecting it inside.
Step 1: Bringing Fiber to Your Property
This is the most significant physical part of the installation.
- Aerial Installation: If your neighborhood has overhead utility lines, the technician will likely run a new fiber optic cable from the nearest pole to your house. This usually involves attaching the cable to the existing pole and then securing it along the side of your house, typically near where your electrical meter is located. They will use specialized tools to pull and secure the cable, ensuring it's at a safe height and tension.
- Buried (Underground) Installation: This is a more involved process. The ISP will either use a trenching machine to dig a narrow trench from the street or a nearby utility box to your house, or they might use directional boring to create an underground pathway without extensive digging. The fiber optic cable is then laid in the trench or conduit, and the ground is restored. This method is often preferred for aesthetic reasons and to protect the cable from weather damage, but it takes longer and can be more disruptive.
In 2025, there's a growing trend towards underground fiber deployment in new developments and urban areas to enhance aesthetics and resilience.
Step 2: Entry into Your Home
Once the fiber cable reaches your house, the technician will carefully drill a small hole through your exterior wall to bring the cable inside. The location of this hole is usually pre-determined during the site survey and is often near the planned ONT location. The hole is then sealed to prevent water and pest entry.
Step 3: Installing the Optical Network Terminal (ONT)
Inside your home, the technician will install the ONT. This device is the critical interface that converts the optical light signals from the fiber cable into electrical signals that your router and devices can understand. The ONT is typically mounted on a wall and connected directly to the incoming fiber line. It will also need to be connected to a power source.
The ONT is a crucial piece of equipment. Some ISPs provide a combined modem/router unit, while others provide a separate ONT and expect you to use your own router. Understanding this distinction is important for your setup.
Step 4: Connecting the Router and Testing
The ONT will have an Ethernet port. The technician will connect an Ethernet cable from the ONT to your router. If the ISP provides a combo unit, this step is integrated. They will then power up the equipment and perform speed tests to ensure you are receiving the contracted internet speeds. This includes testing both download and upload speeds, as well as latency.
The technician will also verify that your Wi-Fi network is functioning correctly and that you can connect devices. They may assist with initial setup of your Wi-Fi name and password.
Step 5: Cleanup and Demonstration
After confirming everything is working, the technician will clean up any debris from the installation process. They will also provide a brief demonstration of how the system works, answer any immediate questions you might have, and explain basic troubleshooting steps.
What Exactly is Included in Fiber Installation?
When you sign up for fiber internet, the advertised price for installation typically covers a standard setup. However, the definition of "standard" can vary between providers. Here’s a breakdown of what is generally included:
Standard Installation Components:
- Site Survey: As detailed earlier, this is almost always included.
- Bringing Fiber to the Exterior of Your Home: This includes the labor and materials to run the fiber optic cable from the nearest network access point (pole or underground box) to your house. For aerial installations, this covers the cable, clips, and weather-resistant connectors. For buried installations, it covers the trenching or boring, the conduit (if used), and the fiber cable itself, up to a certain distance from the property line.
- Drilling and Entry Point: A small hole drilled through an exterior wall to bring the fiber inside.
- Installation of the Optical Network Terminal (ONT): Mounting the ONT on an interior wall and connecting it to the incoming fiber.
- Connection to Router: Running an Ethernet cable from the ONT to your router (or the ISP-provided modem/router combo unit).
- Basic Setup and Testing: Connecting the router, powering on equipment, and performing speed tests to confirm service activation and performance.
- Wi-Fi Network Configuration: Setting up your Wi-Fi network name (SSID) and password.
What Might NOT Be Included (and could incur extra charges):
- Longer Cable Runs: If the distance from the nearest network access point to your home is significantly longer than the standard allowance (e.g., >100-150 feet for aerial, >50-75 feet for buried), you may be charged for the extra cable and labor.
- Complex Routing: Installations requiring extensive trenching across driveways, patios, or through difficult terrain might incur additional fees. Similarly, aerial installations needing to cross significant obstacles or requiring specialized pole work could cost more.
- Interior Wiring Beyond Basic Connection: If you want the fiber or Ethernet cable run through multiple walls, ceilings, or to different rooms beyond the immediate vicinity of the ONT and router, this is usually considered custom work and will be billed separately.
- Equipment Upgrades: If you require a more powerful router than what the ISP provides, or if you need additional Wi-Fi extenders or mesh systems, these are typically separate purchases.
- Conduit Installation: While some buried installations include conduit, others might charge extra for it, especially if specific types of conduit are required.
- Restoration Work Beyond Basic: While ISPs are responsible for restoring the area disturbed by installation, extensive landscaping repairs or replacement of damaged structures (like driveways) might not be fully covered.
- Mounting the ONT in a Specific Location: If you desire the ONT to be installed in a hard-to-reach or inconvenient location that requires extra time and effort, additional charges may apply.
- Business Installations: Business installations often have different pricing structures and may include more robust equipment and service level agreements (SLAs) than residential setups.
It is crucial to clarify these potential extra charges with your ISP during the sales or pre-installation consultation. Asking specific questions like, "What is your standard cable length allowance?" or "What are the charges for trenching across a driveway?" can save surprises.
Essential Equipment Provided During Installation
The installation process involves setting up specific hardware that enables your fiber optic connection. Understanding these components will help you know what to expect and how they function.
Optical Network Terminal (ONT)
The ONT is the cornerstone of your fiber connection. It's a small box, typically mounted on a wall, that receives the light signals from the fiber optic cable and converts them into electrical signals that your network equipment can use. It acts as the modem for fiber internet.
- Function: Translates light signals to electrical signals.
- Connectivity: Connects to the incoming fiber line and usually has an Ethernet port for your router.
- Power: Requires a dedicated power outlet. Some advanced ONTs may have battery backup options.
The specific model of ONT can vary by ISP, but its core function remains the same.
Router
The router is responsible for creating your home network and distributing the internet connection to all your devices, both wired and wireless.
- Function: Manages network traffic, assigns IP addresses, and provides Wi-Fi connectivity.
- Connection: Connects to the ONT via an Ethernet cable.
- Features: Modern routers support the latest Wi-Fi standards (e.g., Wi-Fi 6/6E in 2025) for faster wireless speeds and better performance in crowded environments.
Some ISPs provide a combined modem/router unit, simplifying the setup. Others provide a separate ONT and router, allowing you more flexibility in choosing your own router if you prefer.
Ethernet Cables
Standard Ethernet cables (often Cat 5e or Cat 6) are used to connect the ONT to the router. The technician will typically provide and connect these. If you plan to connect devices directly to the router via a wired connection, you may need additional Ethernet cables.
Mounting Hardware and Connectors
The installation will involve various clips, fasteners, and connectors to secure the fiber optic cable to the exterior and interior of your home, and to connect it to the ONT. These are standard materials provided by the ISP.
Optional Equipment
Depending on your package and ISP, you might be offered or need to purchase additional equipment:
- Wi-Fi Extenders/Mesh Systems: For larger homes or areas with weak Wi-Fi signals, these devices can extend your wireless coverage.
- Battery Backup for ONT: To maintain internet service during power outages.
- Higher-End Routers: If you opt for a higher speed tier or have specific networking needs, you might consider purchasing a more powerful router.
Always confirm with your ISP what equipment is included in your plan and what options are available.
Post-Installation and Beyond
Once the technicians have packed up and left, your fiber journey has just begun. This phase involves ensuring your network is optimized, understanding your service, and knowing how to troubleshoot.
Optimizing Your Home Network
The installation provides the connection, but optimizing your home network ensures you get the most out of it.
- Router Placement: Position your router in a central location, away from obstructions like thick walls, metal objects, or appliances that can cause interference (microwaves, cordless phones). Elevating the router can also improve signal distribution.
- Wi-Fi Channel Selection: Most routers automatically select the best Wi-Fi channel, but if you experience interference or slow speeds, you might need to manually adjust it through your router's settings.
- Wired Connections: For devices that require the absolute highest speeds and lowest latency (e.g., gaming consoles, desktop computers), use wired Ethernet connections whenever possible.
- Firmware Updates: Regularly check for and install firmware updates for your router and ONT. These updates often include performance improvements, security patches, and new features.
Understanding Your Service Agreement
It's essential to review your service agreement to understand the terms and conditions of your fiber internet service. Pay attention to:
- Advertised Speeds vs. Actual Speeds: Understand that advertised speeds are "up to" and actual speeds can fluctuate based on network traffic, time of day, and your home network configuration.
- Data Caps: While fiber is less prone to data caps than some other technologies, check if your plan has any limitations.
- Contract Length and Early Termination Fees: Be aware of the contract duration and any penalties for canceling service before the term is up.
- Customer Support: Know how to contact customer support for technical issues or billing inquiries.
Troubleshooting Common Issues
Most fiber installations are very reliable, but occasional issues can arise. Here are common troubleshooting steps:
- No Internet Connection: Check if the ONT and router are powered on and if the indicator lights are normal. Try power cycling (unplugging, waiting 30 seconds, and plugging back in) both the ONT and the router.
- Slow Speeds: Perform a speed test using a wired connection directly from the router. If speeds are consistently low, contact your ISP. If wired speeds are good but Wi-Fi is slow, the issue might be with your router or Wi-Fi interference.
- Intermittent Connection: This could be due to loose cables, router issues, or problems with the ISP's network. Ensure all cable connections are secure.
- Wi-Fi Issues: If specific devices can't connect or have weak signals, try restarting the router, moving closer to it, or checking for firmware updates.
For persistent issues, don't hesitate to contact your ISP's technical support. They can often diagnose problems remotely.
Factors Influencing Fiber Installation Costs
While many ISPs offer "free" or low-cost standard installations, the total cost can vary significantly. Understanding these factors helps in budgeting and choosing the right provider.
Standard Installation vs. Premium Installation
The most significant factor is whether your installation qualifies as "standard." A standard installation typically involves:
- Fiber running from a nearby pole or underground box to your home within a set distance (e.g., 100-150 feet).
- A single entry point into the home.
- Installation of the ONT and connection to a single router.
A "premium" or "custom" installation might be required if:
- The fiber needs to be run a longer distance.
- Extensive trenching or boring is required across driveways, sidewalks, or landscaping.
- Multiple entry points or complex interior wiring are requested.
- Specialized equipment or permits are needed.
Costs for premium installations can range from a few hundred to over a thousand dollars, depending on the complexity.
Provider Promotions and Packages
ISPs frequently run promotions to attract new customers. These can include:
- Waived Installation Fees: Many providers offer free standard installation as a signup bonus.
- Discounted Equipment: Sometimes, installation fees cover the cost of the ONT and router, or these are offered at a reduced price.
- Bundled Services: Signing up for internet, TV, and phone bundles might result in lower overall installation costs.
Always compare current offers from different providers.
Location and Infrastructure Availability
The cost and complexity of bringing fiber to your neighborhood can depend on existing infrastructure.
- Urban vs. Rural: In urban areas, fiber might already be present nearby, making aerial or short buried runs easier. Rural installations may require longer runs from the nearest network hub, increasing costs.
- Existing Conduits: If there are existing underground conduits that can be utilized, it can significantly reduce the cost of buried installations.
- Terrain: Hilly or rocky terrain can make trenching more difficult and expensive.
Equipment Choices
While the ONT is usually provided, the router can be a variable cost.
- ISP-Provided Router: Often included in the installation fee or a small monthly rental charge.
- Your Own Router: If you choose to use your own router, you avoid rental fees but must ensure it's compatible with fiber connections and meets your speed requirements.
Permitting and Regulatory Fees
In some jurisdictions, ISPs may pass on costs associated with obtaining permits or complying with local regulations. These are usually minor but can add up.
To get an accurate estimate, always request a detailed quote from potential ISPs that clearly outlines what is included in the installation fee and any potential additional charges.
Choosing the Right Fiber Internet Provider
With fiber installation options expanding, selecting the right provider is key to a positive experience. Consider these factors:
Availability
The most critical factor is whether fiber service is actually available at your address. Use online tools on ISP websites to check coverage.
Speed Tiers and Pricing
Fiber providers offer various speed packages. Compare the advertised download and upload speeds (look for symmetrical speeds) and their corresponding monthly costs. Remember to factor in installation fees and any potential equipment rental charges. In 2025, plans offering 1 Gbps symmetrical speeds are becoming increasingly common for residential use.
Contract Terms and Fees
Understand contract lengths, data caps (though rare with fiber), and early termination fees. Some providers offer no-contract options, which provide more flexibility.
Customer Service and Reliability
Research customer reviews regarding reliability and the quality of customer support. Look for ISPs with good uptime records and responsive technical assistance. Websites like the FCC's broadband report can offer insights.
Installation Process Clarity
Choose a provider that is transparent about their installation process, what's included, and potential extra costs. A clear explanation during the sales process is a good sign.
Conclusion: Embracing the Future of Connectivity
Understanding what fiber installation includes is paramount to a seamless transition to high-speed internet. From the initial site survey and permitting to the physical connection of the ONT and router, each step is designed to bring reliable, lightning-fast connectivity to your home. While standard installations cover the core setup, being aware of potential additional costs for complex routing or extended cable runs ensures you're prepared. The equipment provided, primarily the ONT and router, forms the backbone of your new network. Post-installation optimization and understanding your service agreement will maximize your fiber experience. By carefully choosing your provider and clarifying all aspects of the installation, you can confidently embrace the future of connectivity that fiber optics offers, enjoying unparalleled speeds and reliability for all your digital needs in 2025 and beyond.
