Is it easy to install AT&T internet?
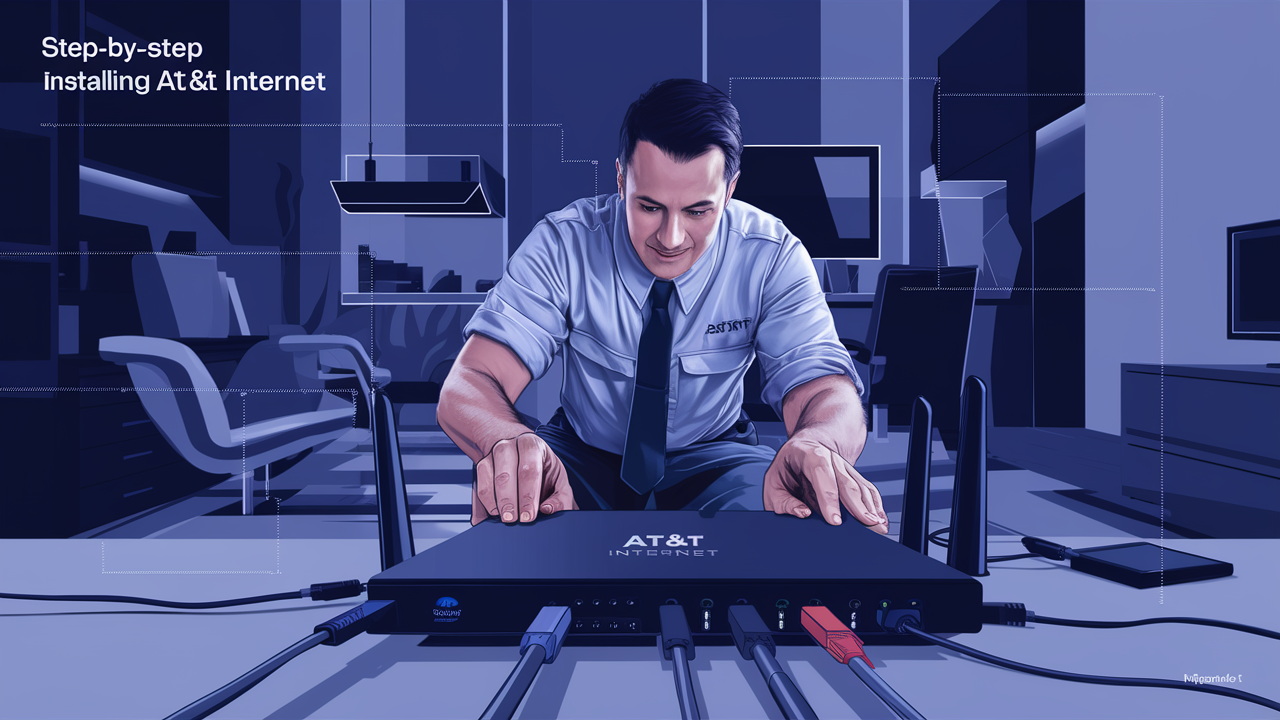
Wondering if setting up AT&T internet is a breeze or a battle? This guide breaks down the AT&T internet installation process, from self-setup options to professional installations, helping you understand the ease and potential challenges involved. Get ready for a clear, actionable overview.
AT&T Internet Installation: A Comprehensive Overview
The question of "Is it easy to install AT&T internet?" is a common one for anyone considering a new service provider. The answer, like many things in life, is nuanced. For many users, particularly those with existing AT&T infrastructure or opting for a straightforward self-installation, the process can indeed be quite simple. However, for others, especially those requiring new wiring or complex setups, a professional installation might be necessary, which introduces different considerations regarding ease and timing. This guide aims to demystify the entire AT&T internet installation journey, providing insights and actionable advice for 2025. We'll explore self-installation versus professional service, identify factors that influence the ease of setup, and offer tips to ensure a smooth transition to AT&T's high-speed internet.
The Self-Installation Path: Is It Truly Easy?
For a significant portion of new AT&T internet customers, the self-installation option is the primary and often easiest route. AT&T strives to make this process as user-friendly as possible, aiming to empower customers to get online quickly without the need for a technician visit. The ease of self-installation hinges on several factors, including the type of internet service you're signing up for and the existing infrastructure at your home.
When Self-Install is an Option
AT&T typically offers self-installation for customers who are:
- Moving into a home that previously had AT&T service with active wiring.
- Upgrading their existing AT&T service where the infrastructure is already in place.
- Signing up for services like AT&T Internet (DSL) or certain Fiber tiers where the external connection point is readily accessible and functional.
The availability of self-installation is often determined by AT&T's assessment of your specific address and the service type. If your home has been pre-wired for AT&T services, or if the necessary connections are already established and operational, self-installation is usually the default and most straightforward option. This significantly reduces the perceived difficulty of setting up internet service.
What You Get for Self-Installation
When you opt for self-installation, AT&T will ship you a package containing all the necessary equipment and instructions. This typically includes:
- Modem/Gateway: This is the central device that connects your home network to AT&T's network. For Fiber services, this might be a separate Optical Network Terminal (ONT) and a Wi-Fi gateway.
- Power Cords and Adapters: Essential for powering up your equipment.
- Ethernet Cables: For wired connections between devices and the gateway.
- Coaxial Cables (if applicable): For DSL or some cable-based internet services.
- Step-by-Step Instruction Guide: A printed manual detailing the setup process.
- Access to Online Resources: AT&T provides online tutorials, videos, and support articles to guide you.
The equipment provided is designed for plug-and-play functionality, minimizing the need for technical expertise. The instructions are usually clear and concise, breaking down the process into manageable steps.
Step-by-Step Self-Installation Guide
While the exact steps can vary slightly based on your service type (DSL vs. Fiber), a typical AT&T self-installation follows this general process:
- Unpack Your Equipment: Carefully unbox all components and verify that everything listed in the instructions is present.
- Choose a Location: Select a central location for your modem/gateway. Ideally, it should be near where the service enters your home and close to the devices you want to connect, especially if you rely heavily on Wi-Fi.
- Connect the Modem/Gateway:
- For DSL: Connect the provided phone cord from the wall jack to the modem's DSL port.
- For Fiber: This is usually more involved. You'll connect the ONT (if separate) to the fiber optic cable coming from outside, then connect the gateway to the ONT.
- For other services: Connect the appropriate cable (e.g., coaxial) from the wall outlet to the modem.
- Power Up: Plug in the power adapter to the modem/gateway and connect it to a power outlet.
- Wait for Synchronization: The modem/gateway will boot up and attempt to synchronize with AT&T's network. This can take several minutes. Look for indicator lights on the device to confirm it's online (usually a solid "Internet" or "Online" light).
- Connect Your Devices:
- Wired: Use an Ethernet cable to connect your computer or other devices directly to the modem/gateway.
- Wireless: Follow the instructions to connect your Wi-Fi enabled devices to the new network. The Wi-Fi network name (SSID) and password are often printed on a sticker on the equipment itself.
- Activate Service: You may need to visit a specific AT&T webpage or call a number to activate your service and finalize the setup.
- Test Your Connection: Browse the internet to ensure everything is working correctly.
Potential Self-Installation Hurdles
Despite AT&T's efforts, self-installation isn't always a seamless experience. Common challenges include:
- Lack of Active Wiring: If the previous phone jack or cable outlet is damaged, disconnected, or non-existent, self-installation becomes impossible.
- Incorrect Port Usage: Using the wrong wall jack for DSL can prevent synchronization.
- Equipment Malfunction: Though rare, the provided modem or gateway might be faulty.
- Confusing Instructions: Some users may find the technical jargon or diagrams in the instruction manual challenging to follow.
- Wi-Fi Signal Issues: Even if the internet is connected, users might struggle with optimizing Wi-Fi coverage or understanding network settings.
- External Cabling Problems: For Fiber, if the external fiber line is damaged or improperly terminated, self-installation won't work.
These hurdles are precisely why AT&T offers professional installation as an alternative.
Professional Installation: When and Why You Might Need It
While self-installation is designed for simplicity, professional installation is AT&T's solution for more complex scenarios or for customers who prefer expert assistance. It ensures that your internet service is set up correctly, even if your home's infrastructure isn't ideal.
When Professional Installation is Required
A professional installation is typically mandatory or highly recommended in the following situations:
- No Existing Wiring: If your home has never had AT&T internet or similar service, new wiring will need to be run from the street to your home and to the desired interior location.
- Damaged or Inactive Wiring: If existing phone lines or cable outlets are damaged, corroded, or simply not functional, a technician needs to repair or replace them.
- Fiber Optic Installation: While some Fiber installations can be self-installed if the external fiber drop is already in place and active, many require a technician to connect the fiber line to your home and install the necessary equipment (ONT).
- Complex Home Layouts: Homes with multiple levels, large square footage, or difficult-to-access areas might benefit from a professional assessment to ensure optimal modem placement and Wi-Fi coverage.
- Specific Service Tiers: Certain high-speed or specialized AT&T plans might always require professional installation to ensure optimal performance.
- Customer Preference: Some customers simply prefer to have an expert handle the setup to avoid potential issues or to ensure the best possible performance from day one.
What to Expect from an AT&T Technician
When you schedule a professional installation, AT&T will assign a certified technician to visit your home at a predetermined appointment window. Here’s what the process generally involves:
- Arrival and Assessment: The technician will arrive within the scheduled window, introduce themselves, and assess your home's current infrastructure and your desired internet setup location.
- Running New Lines (if necessary): If new wiring is required (e.g., for Fiber or if existing lines are unusable), the technician will run cables from the external network connection point to your chosen interior location. This might involve drilling small holes to pass cables through walls or attics.
- Installing Equipment: They will install and connect the necessary equipment, such as the Optical Network Terminal (ONT) for Fiber or the modem/gateway for DSL. This includes ensuring proper power and network connections.
- Configuring the Network: The technician will configure the modem/gateway, set up the Wi-Fi network, and ensure it's broadcasting with the chosen network name (SSID) and password.
- Testing and Verification: They will perform speed tests and verify that your internet connection is active and performing optimally.
- Customer Walkthrough: The technician will explain the setup, demonstrate how to connect devices, and answer any questions you may have. They will also ensure the work area is clean before leaving.
Professional installations typically take between 1 to 3 hours, depending on the complexity of the job.
Pros and Cons of Professional Installation
Pros:
- Expert Setup: Ensures correct installation and optimal performance.
- Handles Complexities: Ideal for homes with no existing wiring or damaged infrastructure.
- Troubleshooting Included: Any issues encountered during setup are resolved on the spot.
- Peace of Mind: Eliminates the stress and potential errors of DIY setup.
- Optimized Placement: Technicians can advise on the best location for equipment for Wi-Fi coverage.
Cons:
- Installation Fee: AT&T typically charges a one-time installation fee for professional services, which can be more expensive than self-installation (if any fee applies).
- Scheduling Required: You need to schedule an appointment, which might involve taking time off work.
- Less Flexibility: You are limited to the appointment windows provided by AT&T.
Key Factors Influencing Installation Ease
The perceived ease of installing AT&T internet is not solely dependent on the company's process but also on several factors related to your home and your own capabilities. Understanding these can help you anticipate the installation experience.
Your Existing Wiring and Infrastructure
This is arguably the most significant factor.
- Active & Usable Jacks: If you have active, functional phone jacks (for DSL) or coaxial outlets (for cable internet, though AT&T primarily uses DSL and Fiber) that are properly wired and connected to the outside network, self-installation is much easier.
- Fiber Ready Homes: For AT&T Fiber, if the fiber optic cable has already been brought to the exterior of your home and there's an existing, functional ONT or a suitable entry point, self-installation might be possible.
- No or Damaged Wiring: If your home lacks the necessary wiring, or if existing wiring is old, damaged, or improperly installed, you will almost certainly require a professional installation. This adds complexity and cost.
Type of Internet Service (Fiber vs. DSL)
The technology AT&T uses plays a crucial role in installation ease.
- AT&T Internet (DSL): Generally easier to self-install if a working phone jack is available. It uses existing telephone lines, making it a familiar setup for many. The equipment is usually plug-and-play.
- AT&T Fiber: While AT&T is increasingly enabling self-installation for Fiber where infrastructure allows, it often involves more delicate components (fiber optic cables) and potentially more complex initial setup steps (like connecting an ONT). Many Fiber installations still require a technician to ensure the fiber line is properly run and connected. If the fiber line is already present and active, self-install can be straightforward, but this is less common than with DSL.
Your Technical Comfort Level
Your personal comfort with technology significantly impacts how "easy" you perceive the installation to be.
- Tech-Savvy Users: If you're comfortable with plugging in devices, connecting cables, and following step-by-step instructions (even if they involve some technical terms), self-installation is likely to feel easy. You might even enjoy the process.
- Less Tech-Oriented Users: If you find technology intimidating, or if you prefer to have tasks handled by professionals, then even a simple self-installation might feel challenging. In such cases, a professional installation offers peace of mind and ensures the job is done correctly without your direct involvement.
Location and Accessibility of Installation Point
The physical location where the internet service enters your home and where you want your modem/gateway can affect installation ease.
- Easy Access: If the wall jack is in an easily accessible location (e.g., near an outlet, in a common area) and you have clear access to run cables if needed, self-installation is simpler.
- Difficult Access: If the only available jack is in a hard-to-reach place (e.g., basement, attic, behind heavy furniture), or if you need to run cables through finished walls, it can make self-installation cumbersome. A professional installer is better equipped for these situations.
AT&T Internet Installation Compared to Competitors (2025 Insights)
In the competitive landscape of internet service providers in 2025, the ease of installation is a key factor for consumers. AT&T generally offers a good balance, but how does it stack up against major competitors like Spectrum (cable), Verizon (FiOS Fiber and 5G Home), and Xfinity?
Installation Fees Comparison
Installation fees are a common pain point for consumers.
| Provider | Self-Installation Fee (Typical) | Professional Installation Fee (Typical) | Notes |
|---|---|---|---|
| AT&T | $0 - $35 (often waived with promotions) | $99 (can be waived with promotions) | Self-install is common for DSL and some Fiber. Professional install fee is standard but frequently discounted. |
| Verizon (FiOS) | $0 - $30 (often waived) | $99 (often waived with promotions) | FiOS Fiber often requires professional install, but self-install is becoming more available for simpler setups. |
| Spectrum | $0 - $20 (often waived) | $50 - $100 (can be waived) | Self-install kits are readily available for Spectrum's cable internet. |
| Xfinity (Comcast) | $0 - $20 (often waived) | $89.99 - $100 (can be waived) | Strong emphasis on self-installation for most cable internet packages. |
2025 Trend: Many providers, including AT&T, frequently offer promotions that waive installation fees, especially for new customers signing up for longer-term contracts or higher-tier plans. The cost of professional installation remains a significant differentiator, with AT&T's $99 fee being standard but often negotiable through bundled deals or limited-time offers. Self-installation fees, when charged, are typically lower and more often waived.
Self-Install Availability Comparison
The ability to self-install is a major convenience factor.
- AT&T: Offers self-installation for a good portion of its DSL and some Fiber markets. The availability depends heavily on existing infrastructure.
- Verizon: Self-installation is increasingly available for FiOS Fiber, especially in areas with established FiOS networks. Their 5G Home Internet is inherently a self-install product.
- Spectrum: Generally has high self-installation availability for its cable internet, as the setup typically involves connecting a modem to an existing coaxial outlet.
- Xfinity: Also boasts widespread self-installation availability, making it easy for customers to set up their own cable modems.
2025 Trend: Providers are continuously expanding their self-installation capabilities, particularly for Fiber services, as they refine the process and equipment. However, for the most complex Fiber deployments requiring new external line installations, professional service remains the norm across all providers.
Installation Times Comparison
The time it takes to get connected varies.
- Self-Installation: Typically takes 1-2 hours once the equipment arrives. The main waiting period is for shipping.
- Professional Installation: Can range from 1-3 hours on-site, depending on the complexity. Scheduling can add days or weeks to the total time from ordering to connection.
2025 Trend: Providers are working to shorten technician appointment windows and improve the efficiency of self-install kits. For AT&T, if self-installation is an option, it's often the fastest way to get online after the equipment is delivered. If professional installation is needed, scheduling availability can be the biggest factor in how quickly you get connected.
Making Your AT&T Internet Installation Smoother
Whether you're opting for self-installation or awaiting a professional, a little preparation can go a long way in ensuring a smooth and hassle-free experience.
Prepare Your Home
- Clear the Installation Area: Ensure the space where the modem/gateway will be placed is clean and accessible. Remove any clutter that might obstruct the technician or your own setup process.
- Identify Existing Outlets: Locate all active phone jacks (for DSL) or potential entry points for cables. If you know where the service previously entered your home, that’s a good starting point.
- Ensure Power Access: Make sure there is a working electrical outlet near where you plan to place the modem/gateway.
- For Fiber: If a technician is coming, ensure they have clear access to the exterior of your home where the fiber line will enter.
Have Information Ready
- Account Details: Have your AT&T account number and any relevant order confirmation details handy.
- Contact Information: Ensure your primary contact number and email address are up-to-date with AT&T.
- Home Details: Be prepared to answer questions about your home's construction (e.g., brick, wood frame) if a technician needs to run new lines.
Understand Your Equipment
- Read the Manual: If self-installing, take a few minutes to skim the instruction manual before you start. Pay attention to diagrams and the sequence of steps.
- Identify Ports: Familiarize yourself with the different ports on your modem/gateway (e.g., DSL, Ethernet, Power).
- Indicator Lights: Understand what the different indicator lights on your equipment mean (e.g., power, internet connection, Wi-Fi). The manual will usually explain this.
Scheduling Wisely
- Professional Installation: If you need a technician, try to schedule your appointment during a time when you can be home for the entire duration. Consider if you need to take time off work. Some providers offer appointment windows that include evenings or weekends.
- Self-Installation: Even with self-installation, ensure you have enough time allocated to complete the setup without feeling rushed. It's best to do it when you have a few uninterrupted hours.
Troubleshooting Common Installation Issues
Even with the best preparation, you might encounter minor hiccups. Here are common issues and how to address them:
- No Internet Connection / Modem Not Syncing:
- Self-Install: Double-check all cable connections. Ensure you're using the correct wall jack (especially for DSL). Power cycle the modem (unplug, wait 30 seconds, plug back in). Verify the service activation steps were completed. If using Fiber, ensure the ONT is properly connected and powered.
- Professional Install: Contact AT&T support immediately. The technician may need to return, or there might be an issue with the line outside your home.
- Slow Speeds:
- Self-Install: Run speed tests wired directly to the modem first. If speeds are good wired but poor on Wi-Fi, the issue might be Wi-Fi interference or router placement. Try moving the modem to a more central location or consider a Wi-Fi extender. Ensure you're using a modern device to test speeds.
- Professional Install: Discuss speed test results with the technician before they leave. They can re-optimize settings or identify line issues.
- Wi-Fi Not Broadcasting:
- Self-Install: Ensure the Wi-Fi indicator light on the modem is active. Check the Wi-Fi settings in the modem's interface (if accessible) or consult the manual for default SSID/password. Restart the modem.
- Professional Install: The technician should resolve this. If it occurs later, contact AT&T support.
- Equipment Not Working:
- Self-Install: If the modem/gateway won't power on or shows no signs of life, try a different power outlet. If it still doesn't work, contact AT&T for a replacement.
- Professional Install: The technician will ensure the equipment is functional before leaving. If it fails shortly after, AT&T will likely send a replacement or schedule a follow-up visit.
For any persistent issues, AT&T's customer support line or online chat are your best resources. Having your modem's MAC address (usually found on the device sticker) can speed up troubleshooting.
Conclusion: Is AT&T Internet Easy to Install?
In summary, the ease of installing AT&T internet is largely dependent on your specific situation. For many, particularly those with existing infrastructure and opting for AT&T Internet (DSL), the self-installation process is straightforward and can be completed in an hour or two. AT&T provides clear instructions and user-friendly equipment to facilitate this. However, if you are getting AT&T Fiber, or if your home lacks the necessary pre-existing wiring, a professional installation becomes essential. While this involves a fee and scheduling, it guarantees an expert setup, ensuring optimal performance and resolving any infrastructure challenges.
Considering the factors like your home's wiring, the type of service you choose, and your personal technical comfort, you can make an informed decision. By preparing your home, having necessary information ready, and understanding your equipment, you can significantly smooth out the installation process, whether you're doing it yourself or waiting for a technician. In 2025, AT&T continues to offer competitive installation options, with frequent promotions waiving fees for both self and professional setups. Ultimately, AT&T internet installation can be very easy, provided you align your choice of installation method with your home's readiness and your own capabilities.
