How To Reset Centurylink Router?
Experiencing slow internet, connectivity issues, or need to change your Wi-Fi password? Resetting your CenturyLink router is often the quickest fix. This comprehensive guide will walk you through exactly how to reset your CenturyLink router, covering different models and providing essential troubleshooting tips for 2025.
Understanding Router Resets: When and Why?
A router reset, often referred to as a factory reset or hard reset, is a powerful troubleshooting tool. It reverts your router's settings back to their original, out-of-the-box configuration. This means any custom settings you've made – such as Wi-Fi network names (SSIDs), passwords, port forwarding rules, or parental controls – will be erased.
So, when exactly should you consider performing a CenturyLink router reset? The primary reasons include:
- Persistent Connectivity Issues: If you're experiencing frequent disconnections, slow internet speeds that can't be resolved by other means, or complete loss of internet access, a reset can clear out corrupted configurations that might be causing these problems. In 2025, with increasing demands on home networks for streaming, gaming, and remote work, stable connectivity is paramount.
- Forgotten Passwords: If you've forgotten your router's administrative password (the one you use to access its settings page) or your Wi-Fi password, a factory reset is often the only way to regain access.
- Network Performance Degradation: Over time, router firmware can become bogged down with temporary files or corrupted settings, leading to a noticeable decline in performance. A reset provides a clean slate.
- Router Misconfiguration: If you've made changes to your router's settings and are now experiencing unexpected issues, a reset can undo those changes and restore functionality.
- Preparing to Sell or Give Away: Before passing on your router, a factory reset ensures that your personal network information is not accessible to the next user.
It's important to distinguish between a simple reboot and a factory reset. A reboot (unplugging the router for 30 seconds and plugging it back in) is a gentle restart that can resolve minor glitches. A factory reset is a more drastic measure that wipes all custom configurations.
In 2025, the average household has over 20 connected devices, from smart TVs and thermostats to laptops and smartphones. This increased network traffic and complexity makes router maintenance, including occasional resets, more crucial than ever for optimal performance.
Identifying Your CenturyLink Router Model
CenturyLink (now Quantum Fiber in many areas, but the process for their provided equipment remains similar) has provided various router models over the years. The method for resetting your router often depends on its specific make and model. Knowing your model is the first step to ensuring you perform the reset correctly.
Here are the most common ways to identify your CenturyLink router:
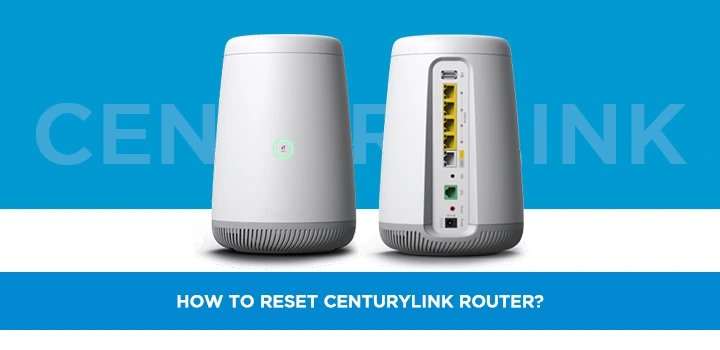
- Check the Router Itself: Look for a sticker on the bottom or back of your router. This sticker usually contains the model name, serial number, and sometimes even a diagram indicating the reset button. Common CenturyLink/Quantum Fiber models include the C1100Z, C2100Z, C3000Z, PK5001Z, and various ZyXEL or Actiontec models.
- Check Your CenturyLink Account Online: Log in to your CenturyLink or Quantum Fiber account portal. Your equipment details, including the router model, are typically listed in your service or equipment management section.
- Review Past Bills or Documentation: If you have old bills or setup guides from when you first got your internet service, they might list the specific router model provided.
- Check the Router's Web Interface: If you can still access your router's settings page, the model information is usually displayed on the status or overview page.
For the purpose of this guide, we will cover the most common reset methods, but always try to identify your specific model first. If you're unsure, consulting the manufacturer's website or CenturyLink's support resources with your router's model number will provide the most accurate instructions.
Common CenturyLink Router Models and Their Reset Button Locations:
| Router Model | Typical Reset Button Location | Type of Reset Button |
|---|---|---|
| C1100Z, C2100Z, C3000Z | Back or bottom panel, often recessed | Small button, requires a paperclip or pin |
| PK5001Z | Back panel, often near ports | Small button, requires a paperclip or pin |
| ZyXEL Models (various) | Back or bottom panel | Small button, often recessed |
| Actiontec Models (various) | Back or bottom panel | Small button, often recessed |
Note: Button locations can vary slightly between firmware versions and specific hardware revisions. Always refer to the router's physical label or manufacturer's documentation if unsure.
How to Reset Your CenturyLink Router: Step-by-Step
Performing a factory reset on your CenturyLink router is a straightforward process, but it requires careful attention to detail. The most common method involves using the physical reset button on the device. Here's a comprehensive step-by-step guide:
Step 1: Prepare for the Reset
Before you begin, it's crucial to understand what a factory reset entails:
- All custom settings will be erased: This includes your Wi-Fi network name (SSID), Wi-Fi password, any port forwarding rules, DNS settings, and administrative login credentials.
- You will need to reconfigure your network: After the reset, your router will revert to its default settings. You'll need to set up your Wi-Fi name and password again.
- Note down important information: If you have any critical network configurations (like specific port forwarding rules for gaming or business applications), make sure to write them down before proceeding.
- Ensure physical access: You'll need to be in the same location as your router to press the reset button.
Step 2: Locate the Reset Button
As identified in the previous section, the reset button is typically a small, recessed button. You'll need a thin, pointed object to press it, such as:
- A straightened paperclip
- A safety pin
- A toothpick (be gentle to avoid breaking it off inside the button)
Look on the back or bottom panel of your router. It's often labeled "Reset" or may have a small icon resembling a circular arrow.
Step 3: Power On the Router
Ensure your CenturyLink router is plugged in and powered on. You should see the indicator lights on the front of the device illuminated.
Step 4: Press and Hold the Reset Button
This is the critical step. Using your pointed object:
- Gently press the reset button.
- Continue to hold the button down.
- Keep holding the button for approximately 10 to 30 seconds. The exact duration can vary slightly by model, but holding it for at least 15-20 seconds is generally sufficient.
What to look for: While holding the button, observe the lights on the front of your router. You should see the lights change, flicker, or turn off and then back on. This indicates that the router is receiving the reset command.
Step 5: Release the Reset Button
Once you've held the button for the required duration and observed the light changes, release the reset button.
Step 6: Wait for the Router to Reboot
After releasing the button, the router will begin its reboot process. This can take several minutes (typically 2-5 minutes). During this time, the lights on the front of the router will blink and change as it powers back up and loads its default settings. Do not unplug the router during this process.
Step 7: Reconfigure Your Network
Once the router has fully rebooted, it will be back to its factory default settings. This means:
- Default Wi-Fi Name (SSID) and Password: The Wi-Fi network name and password will revert to the defaults printed on the router's sticker (or in its manual). You'll need to connect your devices to this default network first.
- Default IP Address: The router's IP address will likely revert to its default, commonly 192.168.0.1 or 192.168.1.1.
To reconfigure your network:
- Connect a computer to the router using an Ethernet cable or connect wirelessly using the default Wi-Fi credentials.
- Open a web browser and navigate to the router's default IP address (e.g.,
192.168.0.1). - You will be prompted to log in. The default username and password are often printed on the router's sticker or can be found in its manual. Common defaults include "admin" for both username and password, or "admin" and "password."
- Once logged in, navigate to the wireless settings section.
- Change your Wi-Fi network name (SSID) to something unique and memorable.
- Set a strong, unique Wi-Fi password. It's recommended to use a mix of uppercase and lowercase letters, numbers, and symbols.
- If you had other custom settings, such as port forwarding, you will need to re-enter them now.
- Save your changes. Your router may reboot again after saving.
Important Note on WPS Button: Some routers have a WPS button that might look similar to a reset button. The WPS button is used for easy device pairing and should not be confused with the reset button. The reset button is usually recessed and requires a pointed object.
Example Scenario: Let's say you have a CenturyLink C3000Z and you've forgotten your Wi-Fi password. You locate the small, recessed button on the back. You power on the router, then use a straightened paperclip to press and hold the button for 20 seconds. The lights flicker. You release it, wait for it to reboot, and then connect to the default Wi-Fi network named "CenturyLink-XXXX" with the password "YYYYYY" (found on the sticker). You then log into 192.168.0.1, change the SSID to "MyAwesomeNetwork" and set a new password.
Alternatives to a Full Router Reset
While a factory reset is a powerful solution, it's not always necessary. Before resorting to a full reset, consider these simpler troubleshooting steps that can often resolve common issues:
1. Rebooting the Router (Power Cycle)
This is the most basic and often effective troubleshooting step. It clears temporary memory and can resolve minor software glitches.
- Unplug the power adapter from your CenturyLink router.
- Wait for at least 30 seconds. This allows the device to fully discharge.
- Plug the power adapter back in.
- Wait for the router to boot up completely (usually 2-5 minutes), indicated by stable indicator lights.
This process is akin to restarting your computer and can fix many intermittent connectivity problems without losing your settings.
2. Checking Physical Connections
Loose or damaged cables can cause significant connectivity issues.
- Ensure the Ethernet cable connecting your router to the modem (if separate) is securely plugged in at both ends.
- Check the coaxial cable (for cable internet) or DSL phone line connection to the modem/router.
- Inspect cables for any visible signs of damage, such as kinks, cuts, or frayed wires. Replace damaged cables immediately.
3. Updating Router Firmware
Outdated firmware can lead to performance issues, security vulnerabilities, and compatibility problems. CenturyLink/Quantum Fiber often pushes firmware updates automatically, but sometimes manual checks are beneficial.
- Connect a computer to your router via an Ethernet cable for a stable connection.
- Open a web browser and log in to your router's administration interface (e.g., 192.168.0.1).
- Navigate to the firmware update or system settings section.
- Check for available updates and follow the on-screen instructions to install them.
Note: Some CenturyLink routers receive automatic firmware updates, and manual updates may not be available or recommended. Always check your router's interface or CenturyLink's support site for specific instructions.
4. Resetting Network Settings on Devices
Sometimes, the issue might not be with the router but with the individual devices connected to it.
- For Computers (Windows): Go to Settings > Network & Internet > Status > Network reset.
- For Computers (macOS): Go to System Preferences > Network, select your Wi-Fi connection, click "Advanced," then go to the "TCP/IP" tab and click "Renew DHCP Lease." You might also need to remove and re-add your Wi-Fi network in the network preferences.
- For Mobile Devices (iOS/Android): Go to Settings > General > Transfer or Reset iPhone/iPad > Reset > Reset Network Settings. (Android varies by manufacturer but is usually found under Settings > System > Reset options).
Resetting network settings on a device will remove saved Wi-Fi passwords and VPN configurations, requiring you to reconnect to your network.
5. Checking Internet Service Status
The problem might be with CenturyLink's service in your area.
- Visit the CenturyLink or Quantum Fiber website and check for any reported outages in your region.
- You can often find outage maps or status updates on their support pages.
By trying these less intrusive methods first, you can often resolve your internet issues without the need for a full factory reset, saving you the time and effort of reconfiguring your entire network.
Troubleshooting After Your CenturyLink Router Reset
After successfully performing a factory reset and reconfiguring your network, you might still encounter some issues. Here's how to troubleshoot common problems that can arise post-reset:
1. Cannot Connect to the Router's IP Address (e.g., 192.168.0.1)
Cause: The device you're using might not be obtaining an IP address from the router, or the router's IP address might have changed (less common after a reset). Network adapter issues on your computer can also be a factor.
Solutions:
- Verify IP Address: Ensure you are trying to access the correct default IP address for your router model. Check the sticker on the router or its manual.
- Check Ethernet Connection: If using Ethernet, ensure the cable is securely plugged into both the router and your computer. Try a different Ethernet cable.
- Check Wi-Fi Connection: Ensure you are connected to the router's default Wi-Fi network (e.g., "CenturyLink-XXXX") using the default password.
- Renew DHCP Lease: On your computer, try to manually renew the IP address. For Windows, open Command Prompt and type
ipconfig /releasefollowed byipconfig /renew. For macOS, follow the steps mentioned in the "Alternatives" section. - Disable VPN/Proxy: If you use a VPN or proxy service, temporarily disable it as it might interfere with local network access.
- Firewall Issues: Your computer's firewall might be blocking access. Temporarily disable it to test.
2. Wi-Fi Network Not Visible or Not Connecting
Cause: Incorrectly entered Wi-Fi name (SSID) or password during reconfiguration, or the Wi-Fi radio might be disabled.
Solutions:
- Double-Check Credentials: Carefully re-enter your new Wi-Fi SSID and password. Passwords are case-sensitive.
- Connect to Default Network: Try connecting to the router's original default Wi-Fi network (using the credentials from the sticker) to confirm the router's Wi-Fi is broadcasting. If this works, the issue is with your custom settings.
- Check Wi-Fi Radio: Log back into the router's interface and ensure the wireless radio is enabled and broadcasting on the correct bands (2.4GHz and/or 5GHz).
- Router Reboot: Perform a simple reboot of the router after making changes.
3. Slow Internet Speeds After Reset
Cause: Incorrect configuration, interference, or the reset didn't actually fix an underlying issue with your ISP service or router hardware.
Solutions:
- Verify Internet Connection: Ensure the router is connected to the internet. Check the WAN/Internet status in the router's interface.
- Speed Test: Run an internet speed test (e.g., Speedtest.net) from a wired connection to get an accurate baseline. Compare this to your subscribed plan speed.
- Check for Interference: If using Wi-Fi, ensure your router is not placed near other electronics that can cause interference (microwaves, cordless phones, Bluetooth devices). Try changing the Wi-Fi channel in the router's settings.
- Router Placement: Ensure the router is in a central location, away from obstructions, for optimal Wi-Fi coverage.
- Check Connected Devices: Too many devices consuming bandwidth simultaneously can slow down your network.
- Re-enter WAN Settings: In rare cases, you might need to manually re-enter your WAN (Wide Area Network) or Internet connection settings. This is usually provided by CenturyLink.
4. Devices Not Getting IP Addresses
Cause: DHCP server on the router is not functioning correctly or is disabled.
Solutions:
- Check DHCP Settings: Log into the router's interface and ensure the DHCP server is enabled and configured with a valid IP address range.
- Reboot Router: A simple reboot can often resolve DHCP issues.
- Static IP Conflicts: If any devices are configured with static IP addresses, ensure they do not conflict with the router's DHCP range.
5. Router Reverts to Default Settings After Reboot
Cause: The settings were not saved correctly, or there might be a hardware issue with the router's non-volatile memory.
Solutions:
- Save Changes: Ensure you click the "Save," "Apply," or "Submit" button after making any configuration changes in the router's interface.
- Power Cycle After Saving: Reboot the router after saving your settings.
- Firmware Corruption: If the issue persists, the router's firmware might be corrupted, or there could be a hardware defect. This might necessitate a call to CenturyLink support.
Remember that after a factory reset, you are essentially starting from scratch. Patience and methodical troubleshooting are key to getting your network back to optimal performance. If you continue to face persistent issues, it may indicate a problem with the router hardware itself or your CenturyLink internet service.
Security Considerations After Resetting
Resetting your CenturyLink router to its factory defaults has significant security implications. While it can resolve connectivity issues, it also strips away any custom security measures you may have implemented. It's crucial to re-establish strong security protocols immediately after reconfiguring your network.
1. Change Default Login Credentials
This is the most critical step. The default username and password for accessing your router's administration interface (e.g., 192.168.0.1) are widely known and can be easily found online. Leaving these unchanged makes your router vulnerable to unauthorized access.
- Action: Log in to your router's interface and navigate to the administration or security settings. Change both the username and password to something strong and unique. Avoid using common words or easily guessable combinations.
2. Set a Strong Wi-Fi Password
The default Wi-Fi password provided by CenturyLink is often basic and easily crackable. A weak Wi-Fi password allows anyone within range to connect to your network, potentially consuming your bandwidth, accessing your shared files, or even launching malicious attacks.
- Action: In the wireless settings, create a new, strong Wi-Fi password. Use a mix of uppercase and lowercase letters, numbers, and symbols. Aim for a password that is at least 12-15 characters long.
3. Choose a Secure Wi-Fi Encryption Protocol
Modern routers support various Wi-Fi encryption standards. Using an outdated or insecure protocol leaves your network exposed.
- Action: Ensure your Wi-Fi network is set to use WPA3 encryption if your router and devices support it. If not, WPA2-AES is the next best option. Avoid WEP or WPA (without the '2' or '3') as these are considered insecure.
4. Enable Network Name (SSID) Broadcasting (with Caution)
By default, routers broadcast their SSID so devices can find and connect to them. While hiding your SSID (disabling broadcasting) might seem like an added security measure, it's generally not very effective and can cause connectivity issues for some devices. It's often better to have a strong password and let the SSID broadcast.
- Action: Ensure your SSID is broadcasting. Focus on strong passwords and encryption instead. If you choose to hide your SSID, you will need to manually enter the network name and password on each device.
5. Consider MAC Address Filtering (Advanced)
MAC (Media Access Control) address filtering allows you to create a list of approved devices that can connect to your network based on their unique MAC addresses. While this adds a layer of security, it can be cumbersome to manage, especially in households with many devices or frequent guests. It's also not foolproof, as MAC addresses can be spoofed.
- Action: If you have a small, stable network and are comfortable with the management overhead, you can explore MAC filtering in your router's security settings.
6. Keep Firmware Updated
As mentioned earlier, router firmware updates often include critical security patches that protect against newly discovered vulnerabilities. After a reset, it's essential to ensure your router is running the latest firmware.
- Action: Check your router's interface for firmware update options. If automatic updates are available, enable them. Otherwise, periodically check CenturyLink's support website for firmware releases for your specific model.
7. Disable Remote Management (Unless Needed)
Remote management allows you to access your router's settings from outside your home network. While useful for some, it also presents a potential security risk if not properly secured. For most home users, disabling this feature is recommended.
- Action: Look for "Remote Management," "Remote Access," or "WAN Management" in your router's settings and disable it unless you have a specific, well-understood need for it.
By diligently implementing these security measures after resetting your CenturyLink router, you can ensure your home network remains protected against unauthorized access and potential threats in the evolving digital landscape of 2025.
When to Call CenturyLink Support
While this guide covers the most common scenarios for resetting your CenturyLink router, there are times when you'll need to escalate the issue to CenturyLink's professional support team. Recognizing when to call for help can save you significant time and frustration.
1. Persistent No Internet Connection After Reset
If you've performed a factory reset, reconfigured your network, and still have no internet access, and you've confirmed there are no local network issues (e.g., other devices connect fine, speed tests on wired connection are abysmal), it's time to call support. This could indicate:
- An issue with your modem's connection to CenturyLink's network.
- A problem with CenturyLink's service in your area that wasn't reported as an outage.
- Your modem/router provided by CenturyLink may be malfunctioning.
2. Router Not Responding or Unstable After Reset
If your router fails to boot up properly after a reset, if the lights remain off or are constantly blinking in an error pattern, or if it crashes frequently even after a clean configuration, it might be a sign of hardware failure.
- Action: Try rebooting the router multiple times. If the issue persists, contact CenturyLink support. They can diagnose potential hardware faults and arrange for a replacement if necessary.
3. Unable to Access Router's Web Interface
If you've tried all the troubleshooting steps mentioned in the previous section and still cannot access your router's IP address (e.g., 192.168.0.1) to configure your settings, there might be a deeper configuration issue or a problem with the router's web server. CenturyLink support can guide you through advanced diagnostics or potential firmware reinstallation procedures.
4. Specific Error Messages or Unusual Behavior
If your router displays specific error messages in its interface, or if it exhibits unusual behavior that isn't covered by general troubleshooting, CenturyLink support can interpret these specific indicators.
- Action: Note down any error codes or detailed descriptions of the unusual behavior before contacting support.
5. You Need to Re-provision or Activate Your Modem/Router
In some cases, especially if you've had your service interrupted or replaced equipment, CenturyLink may need to remotely provision or activate your modem/router on their network. They are the only ones who can perform these actions.
6. Concerns About Security Vulnerabilities
If you suspect your router has been compromised or if you're unsure about implementing advanced security settings, CenturyLink support can offer guidance and ensure your device is configured securely according to their standards.
How to Contact CenturyLink Support
CenturyLink (now Quantum Fiber in many areas) provides several channels for customer support:
- Phone: Look for their customer service number on your bill or their official website. This is often the fastest way to get immediate assistance for critical issues.
- Online Chat: Many providers offer live chat support through their website, which can be convenient for less urgent queries.
- Support Website/Forums: CenturyLink's official support website often has FAQs, troubleshooting guides, and community forums where you can find answers or ask questions.
Before you call:
- Have your account number ready.
- Know your router's model number and serial number.
- Be prepared to describe the problem clearly and the troubleshooting steps you've already taken.
- Note any error messages you've encountered.
By following these guidelines and knowing when to seek professional help, you can effectively manage and troubleshoot your CenturyLink router, ensuring a stable and secure internet connection.
Conclusion:
Resetting your CenturyLink router is a powerful, yet straightforward, solution for a myriad of internet connectivity problems. Whether you're battling slow speeds, persistent disconnections, or have simply forgotten your Wi-Fi password, understanding the factory reset process is an invaluable skill for any internet user. By following the step-by-step guide, identifying your router model, and carefully reconfiguring your network, you can restore your internet service to its optimal performance. Remember to prioritize security by changing default credentials and setting strong passwords immediately after the reset. If you encounter persistent issues that these steps cannot resolve, don't hesitate to contact CenturyLink support. With this comprehensive knowledge, you are well-equipped to manage your CenturyLink router effectively in 2025 and beyond.