How To Program Your Directv Remote?
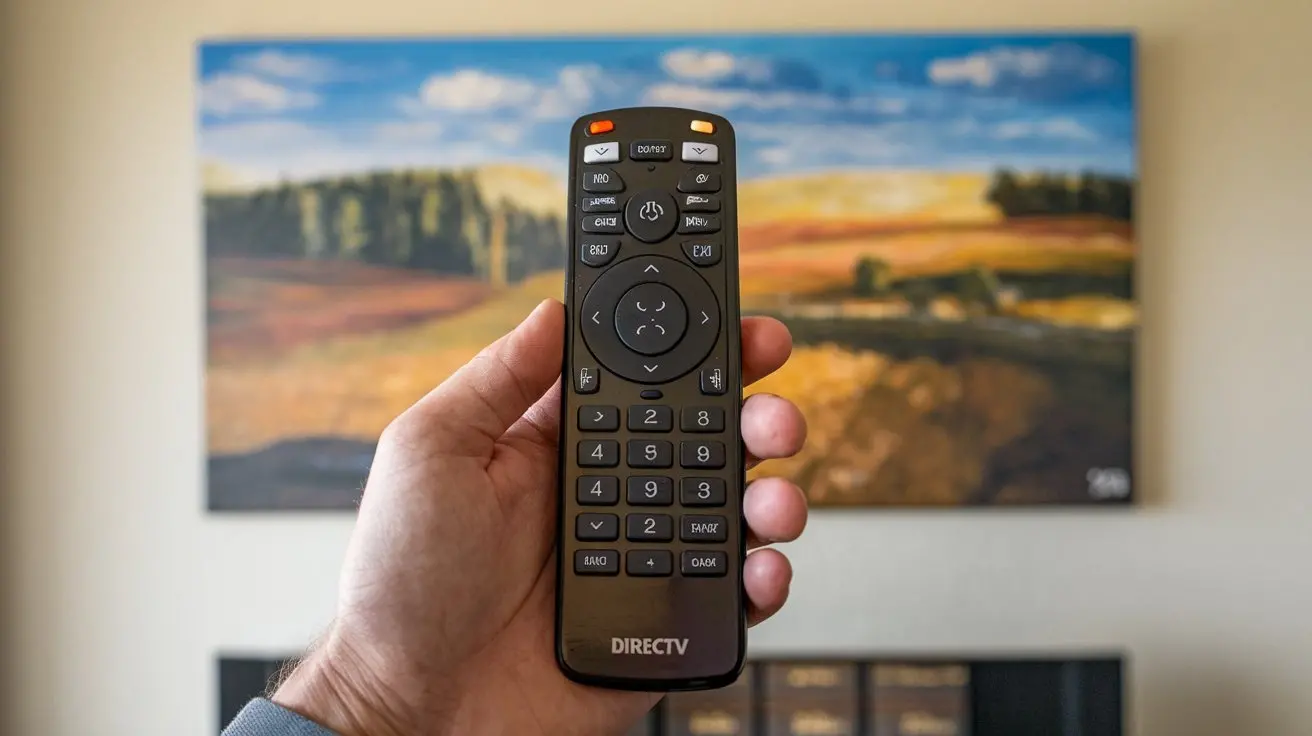
Unlock the full potential of your home entertainment by mastering your DIRECTV remote. This comprehensive guide provides step-by-step instructions and expert tips on how to program your DIRECTV remote for seamless control of your TV, audio equipment, and more, ensuring you get the most out of your viewing experience.
Understanding Your DIRECTV Remote
DIRECTV offers a variety of remote control models, each with its own set of features and programming methods. While the core functionalities remain consistent, understanding the specific type of remote you possess is the first crucial step in successful programming. Most modern DIRECTV remotes are universal, meaning they can control not only your DIRECTV receiver but also your television, soundbar, Blu-ray player, and other home theater components. This universality significantly simplifies your entertainment setup, reducing the clutter of multiple remotes.
Common DIRECTV Remote Models
DIRECTV remotes are often identified by a model number, typically found on the back of the device. Some of the most prevalent models include the RC700 series (e.g., RC707, RC717), the RC71 series, and older models like the RC23 or R16. Each series may have slight variations in button layout and programming sequences. For instance, the RC700 series is known for its sleek design and voice command capabilities (on some advanced versions), while older models might require more manual code entry.
Key Buttons and Their Functions
Familiarizing yourself with the essential buttons on your DIRECTV remote will make the programming process smoother. Common buttons include:
- Power: Turns your receiver and/or TV on and off.
- Input/Source: Cycles through the input sources on your TV (HDMI 1, HDMI 2, AV, etc.).
- Volume Up/Down: Controls the audio level.
- Mute: Silences the audio.
- Channel Up/Down: Navigates through TV channels.
- Number Pad: For direct channel entry.
- Menu: Accesses the DIRECTV receiver's on-screen menu.
- Guide: Opens the DIRECTV program guide.
- Info: Displays program information.
- Exit: Closes on-screen menus or guides.
- Last: Returns to the previous channel.
- Select/OK: Confirms selections.
- Arrow Keys (Up, Down, Left, Right): Navigates through menus and guides.
- Setup/Mode Buttons: These buttons are critical for programming. They are often labeled "Setup" or might be integrated into a mode selection (e.g., TV, AUDIO, DVD).
Understanding Universal Remote Capabilities
The magic of a DIRECTV universal remote lies in its ability to store codes for various devices. When you program your remote, you're essentially telling it which code to use to communicate with a specific device. These codes are like a secret language that allows the remote to send the correct commands (e.g., "turn volume up," "change channel to 5"). DIRECTV maintains an extensive database of these codes, which the remote accesses during the programming process.
Preparing for Remote Programming
Before diving into the programming steps, a little preparation can save you time and frustration. Ensuring you have the necessary information and that your equipment is ready will streamline the entire process. A successful programming session depends on a few key elements being in place.
Gathering Essential Information
The most crucial piece of information you'll need is the brand name and model number of the device you wish to control (e.g., Samsung TV, Sony Soundbar, LG Blu-ray player). If you don't know the model number, the brand name is usually sufficient for most programming methods. You can typically find this information on the device itself, its original packaging, or its user manual. Having a list of potential codes for your device brand can also be helpful, though many modern remotes can search for these automatically.
Identifying Your DIRECTV Receiver Model
Knowing your DIRECTV receiver model is important, as some programming methods are specific to certain receiver types. The receiver model is usually printed on a label on the front or back of the unit. Common models include the Genie (HR44, HR54, HS17), H25, and older models. This information can sometimes influence the specific button presses required.
Ensuring Device Compatibility
While most DIRECTV universal remotes are designed for broad compatibility, it's wise to confirm. Newer DIRECTV remotes (like the RC700 series) are generally designed to work with most modern TVs, audio systems, and playback devices. However, if you have a very old or obscure piece of equipment, it might not be supported. DIRECTV's website or your remote's manual usually provides compatibility lists. In 2025, compatibility is exceptionally high for devices manufactured in the last decade.
Checking Batteries and Signal Strength
Low battery power can interfere with the remote's ability to send signals effectively, leading to programming failures or erratic behavior. Ensure your remote has fresh batteries installed. Also, make sure there are no obstructions between the remote and the devices it needs to control during the programming process. For infrared (IR) remotes, a clear line of sight is essential.
Understanding Different Programming Methods
DIRECTV remotes typically support a few primary programming methods:
- Code Search: The remote cycles through a database of codes until it finds one that works for your device. This is often the most reliable method if you don't know the specific code.
- Direct Code Entry: You manually enter a specific 5-digit code for your device brand. This is faster if you have the correct code.
- Auto-Scan (for some older models): Similar to code search, but the remote might have a dedicated auto-scan function.
Understanding which method your remote uses or prefers will guide your approach.
Programming Your Remote for Your TV
Controlling your television with your DIRECTV remote is the most common programming task. This allows you to manage power, volume, and input selection without switching remotes. The process is generally straightforward and involves a few key steps, with variations depending on your remote model.
Method 1: Using the Code Search Feature (Recommended for Most Users)
This method is ideal when you don't know the specific code for your TV brand. It's a systematic way for the remote to find the correct code.
- Turn on your TV. Ensure it's powered on and displaying a picture.
- Point the DIRECTV remote at your TV.
- Press and hold the SETUP button on your DIRECTV remote until the light at the top (usually green or red) blinks twice.
- Press and release the TV button on the remote. The light should blink twice again.
- Press and hold the POWER button on the remote. Keep holding it.
- Simultaneously, press and release the CHANNEL UP button repeatedly.
- Watch your TV screen. As soon as the TV turns off, release the POWER button immediately. This indicates the remote has found a code that works.
- Press the SELECT button to lock in the code. The light should blink twice.
- Test the remote. Turn your TV back on using the remote's power button. Try changing channels and adjusting the volume to ensure all functions work correctly.
- If volume doesn't work: If the power and channel functions work but volume doesn't, you may need to program the volume control separately. Press SETUP, then TV, then the MUTE button. Then press SELECT. The light should blink twice. Now, try the volume buttons. If this doesn't work, you might need to perform a different code search or try direct code entry.
Method 2: Direct Code Entry
If you have a list of codes for your TV brand, direct entry can be faster. You'll need to find a list of DIRECTV remote codes for your TV brand. These can often be found on the DIRECTV website, in your remote's manual, or through a quick online search for "[Your TV Brand] DIRECTV remote codes 2025".
- Turn on your TV.
- Point the DIRECTV remote at your TV.
- Press and hold the SETUP button on your DIRECTV remote until the light blinks twice.
- Press and release the TV button. The light should blink twice.
- Enter the 5-digit code for your TV brand using the number pad. For example, if the code for a Samsung TV is 30177, enter those digits. The light should blink twice after you enter the last digit.
- Test the remote. Press the POWER button to see if your TV turns off. If it does, press SELECT to lock in the code. Then test other functions like channel and volume.
- If the code doesn't work: Repeat steps 3-5 with the next code on your list for your TV brand.
Verifying TV Control Functions
Once programmed, thoroughly test all basic TV functions:
- Power: Does the remote turn the TV on and off reliably?
- Volume: Does the volume up/down and mute buttons control the TV's sound?
- Channels: Can you change channels using the number pad, channel up/down, and last buttons?
- Input/Source: Does the Input or Source button cycle through your TV's inputs?
- Menu/Guide: While these primarily control the DIRECTV receiver, ensure they don't conflict with TV functions.
Setting Volume Control Mode (TV vs. Audio Device)
A common point of confusion is which device controls the volume. By default, the DIRECTV remote might be set to control the TV's volume. If you add a soundbar or AV receiver, you'll want to switch volume control to that device.
- To control the TV volume: Ensure the remote is in TV mode (press TV button) and program it for your TV as described above.
- To control an Audio Device volume: You'll need to program the remote for your audio device (see the next section) and then tell the remote to use that device for volume. This typically involves pressing SETUP, then AUDIO (or the button for your audio device), then SELECT. The remote should now use the audio device for volume control when in its respective mode.
In 2025, most users opt for soundbars, making this a critical step for many.
Programming Your Remote for Audio Devices
Enhancing your home theater experience often involves adding a soundbar, AV receiver, or home theater system. Programming your DIRECTV remote to control these audio components allows for unified control and simplifies operation. The process is similar to programming for a TV but involves selecting the appropriate device mode.
Programming for Soundbars and AV Receivers
Soundbars and AV receivers are the most common audio devices programmed into DIRECTV remotes.
- Turn on your audio device.
- Point the DIRECTV remote at your audio device.
- Press and hold the SETUP button on your DIRECTV remote until the light blinks twice.
- Press and release the AUDIO button (or the button designated for audio devices, sometimes labeled SAT, AUX, or a specific device icon). The light should blink twice.
- Perform a Code Search:
- Press and hold the POWER button.
- Simultaneously, press and release the CHANNEL UP button repeatedly.
- Watch your audio device. As soon as it powers off (or mutes, depending on the device's response), release the POWER button immediately.
- Press SELECT to lock in the code. The light should blink twice.
- Test the remote. Ensure the power, volume, and mute functions work correctly for your audio device.
Programming for Blu-ray/DVD Players
If you still use physical media, you can program your remote to control your Blu-ray or DVD player.
- Turn on your Blu-ray/DVD player.
- Point the DIRECTV remote at the player.
- Press and hold the SETUP button until the light blinks twice.
- Press and release the DVD/BD button (or the button designated for playback devices). The light should blink twice.
- Perform a Code Search:
- Press and hold the POWER button.
- Simultaneously, press and release the CHANNEL UP button repeatedly.
- Watch your player. As soon as it powers off, release the POWER button immediately.
- Press SELECT to lock in the code. The light should blink twice.
- Test the remote. Verify that the power, play, pause, stop, and other essential playback controls function as expected.
Assigning Volume Control to Your Audio Device
This is a critical step for a unified experience. Once your audio device is programmed, you need to tell the DIRECTV remote to use that device for volume control, overriding the TV's volume.
- Press and hold the SETUP button until the light blinks twice.
- Press and release the AUDIO button (or the button for your audio device). The light blinks twice.
- Press and release the MUTE button. The light should blink twice.
- Press and release the SELECT button. The light blinks twice.
Now, when the remote is in AUDIO mode (or the mode for your specific audio device), the volume buttons will control that device. When in TV mode, they will control the TV (unless you've explicitly set it to follow the audio device). Many users prefer to have volume always follow the audio device, which is achievable with these steps.
Understanding Device Modes
Most DIRECTV remotes have dedicated buttons or modes for different device types: TV, AUDIO, DVD/BD, and sometimes AUX or SAT. When you press one of these buttons, the remote switches its "brain" to use the codes programmed for that specific device type. For example, pressing TV makes the remote send commands to your TV, while pressing AUDIO makes it send commands to your soundbar or receiver.
Example Scenario: Programming a Samsung Soundbar
Let's say you have a DIRECTV RC737 remote and a Samsung HW-Q990C soundbar.
- Turn on the Samsung soundbar.
- Press and hold SETUP on the RC737 until the light blinks twice.
- Press AUDIO. The light blinks twice.
- Press and hold POWER, then repeatedly press CHANNEL UP until the soundbar powers off.
- Release POWER, then press SELECT. The light blinks twice.
- Now, press and hold SETUP until the light blinks twice.
- Press AUDIO. The light blinks twice.
- Press MUTE. The light blinks twice.
- Press SELECT. The light blinks twice.
Your remote is now programmed to control the soundbar's power and volume.
Troubleshooting Common Remote Programming Issues
Even with clear instructions, remote programming can sometimes present challenges. Fortunately, most issues are resolvable with a systematic troubleshooting approach. Understanding common pitfalls can help you get back to enjoying your entertainment system quickly.
Remote Not Responding During Setup
Issue: The remote's light doesn't blink twice when pressing SETUP or other command buttons.
Solutions:
- Check Batteries: Ensure batteries are fresh and inserted correctly. Low power is the most common culprit.
- Press and Hold Correctly: Make sure you are pressing and holding the SETUP button until the light blinks twice. Don't just press and release.
- Remote Model: Verify you are using the correct button sequence for your specific DIRECTV remote model. Consult your remote's manual or DIRECTV's support site.
- Receiver Issue: Sometimes, the DIRECTV receiver itself might need a reboot. Unplug the receiver from power for 30 seconds, then plug it back in.
Code Search Fails to Find a Working Code
Issue: The remote goes through the code search, but the device doesn't respond correctly or at all.
Solutions:
- Try Again Carefully: Ensure you released the POWER button *immediately* when the device responded (turned off or muted). Releasing too late or too early can miss the correct code.
- Alternative Code Search Method: Some remotes allow searching by pressing CHANNEL DOWN instead of CHANNEL UP. Try this if the standard method fails.
- Direct Code Entry: If code search is proving difficult, try finding a list of specific codes for your device brand and attempt direct entry. This is often more precise.
- Check Device Compatibility: As mentioned earlier, ensure your device is compatible with DIRECTV universal remotes. Very old or niche devices might not have codes available.
- Try a Different Mode: If you're trying to program a device that might fall under multiple categories (e.g., a complex soundbar that also has some TV-like functions), try programming it under a different mode (e.g., AUX instead of AUDIO).
Only Some Functions Work (e.g., Power Works, Volume Doesn't)
Issue: The remote powers the TV on and off, but volume control or channel selection doesn't work.
Solutions:
- Volume Lock: The remote might be "locked" to control volume from a different device. You need to explicitly set which device controls the volume. For TVs, this usually involves programming the remote for TV mode, then pressing SETUP, TV, MUTE, SELECT. For audio devices, follow the steps in the "Assigning Volume Control" section.
- Separate Programming: Some advanced functions might require programming the remote for that specific function separately. For example, if volume doesn't work for the TV, try programming the remote specifically for volume control for the TV using a dedicated code.
- Code Conflict: It's possible that the code selected for one function conflicts with another. You may need to reset the remote and try programming again, perhaps starting with the most critical function (like power or volume).
Remote Control is Unresponsive After Programming
Issue: The remote suddenly stopped working after a successful programming session.
Solutions:
- Reset the Remote: Many DIRECTV remotes can be reset to factory defaults. This often involves pressing a combination of buttons (e.g., MENU + BACK ARROW for 10 seconds, or specific button sequences found online for your model). After resetting, you'll need to re-program all your devices.
- Check for Stuck Buttons: Ensure no buttons are physically stuck down, which can prevent the remote from functioning.
- Receiver Glitch: Reboot your DIRECTV receiver by unplugging it for 30 seconds.
How to Reset Your DIRECTV Remote
Resetting the remote can resolve many persistent issues. The exact method varies by model, but a common method for RC700 series remotes is:
- Press and hold the BACK ARROW button and the EXIT button simultaneously for 10 seconds.
- The light at the top of the remote should blink twice.
- Release the buttons.
After resetting, you will need to re-program all your devices from scratch. This is a good starting point if you've tried other troubleshooting steps without success.
Contacting DIRECTV Support
If you've exhausted all troubleshooting steps, it might be time to contact DIRECTV customer support. They can provide model-specific guidance, access advanced troubleshooting tools, and determine if your remote or receiver requires replacement. As of 2025, DIRECTV support channels are robust and readily available online and via phone.
Advanced DIRECTV Remote Features
Beyond basic programming, many DIRECTV remotes offer advanced features that can significantly enhance your viewing experience. Understanding and utilizing these can make your remote even more powerful.
Voice Control (on select models)
Some newer DIRECTV remotes, particularly those paired with Genie HD DVRs or specific Genie clients, feature voice command capabilities. This allows you to control your DIRECTV system using spoken commands.
- How to Use: Typically, you press and hold a dedicated Microphone button on the remote and speak your command clearly. Examples include "Search for movies starring Tom Hanks," "Go to channel 5," "Record The Mandalorian," or "What's the weather?"
- Setup: Voice control usually requires initial setup and pairing with your receiver. Follow the on-screen prompts when you first use the remote or check your receiver's settings menu.
- Benefits: Voice control offers unparalleled convenience, especially for searching content, navigating menus, and controlling playback without needing to find specific buttons.
Backlit Buttons
For those who enjoy watching movies in a darkened room, a backlit remote is a significant advantage. Certain DIRECTV remote models feature illuminated buttons, making them easy to use without fumbling in the dark.
- Activation: Backlighting is usually activated by picking up the remote or pressing any button. It typically stays lit for a set period (e.g., 5-10 seconds) before turning off to conserve battery.
- Availability: This feature is more common on premium or newer remote models. Check your remote's specifications if this is a desired feature.
Customizable Buttons (Limited)
While not as extensive as some third-party universal remotes, some DIRECTV remotes allow for minor customization. This might involve assigning a specific function to a programmable button or setting preferences for how certain commands behave.
- Example: You might be able to assign a favorite channel to a specific shortcut button or configure the remote to always control volume from your soundbar, regardless of the selected mode.
- Configuration: Customization options are usually found within the DIRECTV receiver's settings menu, under "Remote Control" or "Settings."
RF (Radio Frequency) vs. IR (Infrared) Control
Most DIRECTV remotes primarily use Infrared (IR) signals, which require a direct line of sight to the receiver or device. However, some advanced setups utilize Radio Frequency (RF) technology, often through a dedicated adapter or built into newer receivers.
- IR: Standard for most remotes. Needs line of sight.
- RF: Allows control without line of sight (e.g., if the receiver is in a cabinet). Requires an RF adapter or receiver with built-in RF capability. Some Genie models and their remotes support RF.
- Programming for RF: If your setup uses RF, ensure the remote and receiver are properly paired. This is usually done through the receiver's setup menu.
Controlling Multiple Receivers
If you have multiple DIRECTV receivers in your home, you can program a single remote to control each one. However, you must ensure the remote is in the correct mode or paired with the intended receiver.
- Pairing: For Genie systems with multiple clients, the remote is usually paired automatically. For separate receivers, you might need to go into the receiver's settings to "pair" the remote.
- Mode Switching: Ensure you are using the correct device mode (e.g., SAT or AUX) when trying to control a specific receiver, especially if it's not your primary one.
Using the DIRECTV App as a Remote
For users with smartphones or tablets, the DIRECTV app offers a powerful virtual remote control. This is especially useful if you misplace your physical remote or want to control your system from another room.
- Features: The app typically includes all the functionality of a physical remote, plus features like easy search, access to your recorded shows, and even live TV streaming.
- Setup: Download the DIRECTV app from your device's app store and follow the instructions to connect it to your DIRECTV account and receiver. Ensure your app-connected device and DIRECTV receiver are on the same Wi-Fi network.
Maintaining Your DIRECTV Remote
A well-maintained remote control will last longer and function more reliably. Simple care practices can prevent common issues and ensure your remote is always ready when you need it.
Battery Care
As mentioned, fresh batteries are crucial. Avoid using a mix of old and new batteries, or different battery types (e.g., alkaline and rechargeable). Replace all batteries at the same time for optimal performance. If you notice sluggish response, battery replacement is the first step.
Cleaning Your Remote
Remotes can accumulate dust, grime, and germs. Regular cleaning is recommended.
- Frequency: Aim to clean your remote at least once a month, or more often if it's used heavily or by multiple people.
- Method:
- Turn off and unplug any relevant devices.
- Remove the batteries from the remote.
- Use a slightly damp (not wet) microfiber cloth to wipe down the exterior. For stubborn grime, you can use a cotton swab lightly dampened with isopropyl alcohol, being careful not to let liquid seep into any openings.
- Pay attention to the buttons and the crevices around them.
- Ensure the remote is completely dry before reinserting batteries and using it.
Preventing Physical Damage
Accidental drops or spills can damage the internal components of your remote.
- Protective Cases: Consider purchasing a silicone remote cover. These add grip, protect against minor spills, and cushion the remote if dropped.
- Designated Spot: Try to keep your remote in a consistent, safe place (like a coffee table tray or a remote caddy) to avoid misplacing it or having it fall.
- Keep Away from Liquids: Be mindful of drinks and food when using your remote.
Software Updates (for Connected Remotes)
Some advanced DIRECTV remotes, especially those with voice control or Wi-Fi connectivity, may receive occasional software updates. These updates can improve performance, fix bugs, or add new features.
- How Updates Occur: Updates are typically delivered automatically through your DIRECTV receiver or via an internet connection if the remote is directly connected.
- Checking for Updates: You can usually check for remote software updates within your DIRECTV receiver's settings menu, under options related to the remote control.
Troubleshooting with Physical Checks
Before assuming a programming issue, perform a quick physical check:
- Button Functionality: Press each button firmly to ensure it's not sticking or damaged.
- Battery Compartment: Check for corrosion in the battery compartment. Clean gently with a pencil eraser if necessary.
- IR Emitter: Ensure the small plastic window at the front of the remote (where the IR signal comes out) is clean and unobstructed.
By following these maintenance tips, you can ensure your DIRECTV remote remains a reliable and essential part of your home entertainment system for years to come.
Conclusion
Mastering your DIRECTV remote programming is an achievable goal that significantly enhances your home entertainment experience. By understanding your remote's capabilities, preparing thoroughly, and following the step-by-step guides for your TV and audio devices, you can consolidate control and simplify your setup. Remember to utilize the code search feature for ease, but don't hesitate to try direct code entry if you have the necessary information. Troubleshooting common issues is part of the process, and with the right approach—from checking batteries to resetting the remote—most problems are quickly resolved. Embrace the advanced features like voice control and the DIRECTV app for ultimate convenience. Regular maintenance ensures your remote's longevity and performance. With this comprehensive guide, you are now equipped to program your DIRECTV remote for seamless operation of all your home theater components.