How to log in to your router?
Introduction
Your router is the backbone of your home or office network, managing internet connectivity, Wi-Fi settings, and security features. Accessing your router’s admin panel allows you to customize settings such as Wi-Fi passwords, network names (SSIDs), parental controls, port forwarding, and firmware updates. Logging in is typically a simple process, but it requires knowing your router’s IP address, default credentials, and a few troubleshooting steps if issues arise. This guide provides a detailed, step-by-step approach to logging into your router, tailored for both beginners and advanced users. We’ll cover common router brands, default credentials, troubleshooting tips, and frequently asked questions to ensure a smooth experience.
Why Log In to Your Router?
Logging into your router’s admin panel gives you control over your network’s functionality and security. Common reasons to access the router include:
-
Changing Wi-Fi Settings: Update the network name or password to enhance security or personalize your network.
-
Managing Connected Devices: View and control devices connected to your network, including blocking unauthorized users.
-
Setting Up Parental Controls: Restrict internet access for specific devices or times.
-
Updating Firmware: Keep your router secure and performant with the latest software updates.
-
Configuring Advanced Settings: Set up guest networks, VPNs, or port forwarding for gaming or remote access.
Understanding how to log in empowers you to optimize your network and troubleshoot connectivity issues effectively.
Prerequisites for Logging In
Before attempting to log in, ensure you have the following:
-
A Device Connected to the Router: Use a computer, smartphone, or tablet connected to the router via Wi-Fi or an Ethernet cable.
-
Router’s IP Address: This is typically printed on the router’s label or found in the manual. Common IP addresses include 192.168.0.1, 192.168.1.1, or 10.0.0.1.
-
Default Username and Password: These are often listed on the router’s label, in the manual, or available online for your router model.
-
Web Browser: Any modern browser (e.g., Chrome, Firefox, Safari) will work to access the router’s admin panel.
If the router has been previously configured, you may need custom credentials set by the user or your Internet Service Provider (ISP).
Step-by-Step Guide to Logging In
Follow these steps to access your router’s admin panel:
Step 1: Connect to the Router’s Network
Ensure your device is connected to the router’s network, either via Wi-Fi or an Ethernet cable. If you’re not connected, you won’t be able to access the admin panel. To confirm:
-
Wi-Fi: Check that your device is connected to the correct Wi-Fi network (look for the SSID on your router’s label).
-
Ethernet: Plug an Ethernet cable from your device to one of the router’s LAN ports.
Step 2: Find the Router’s IP Address
The router’s IP address is the gateway to its admin panel. Here’s how to find it:
-
Check the Router’s Label: Most routers have a sticker listing the IP address (e.g., 192.168.0.1 or 192.168.1.1).
-
Use Your Device:
-
Windows: Open Command Prompt (type cmd in the search bar), then type ipconfig and press Enter. Look for the “Default Gateway” under your active network connection.
-
Mac: Open Terminal, type netstat -nr | grep default, and press Enter. The IP address next to “default” is your router’s IP.
-
Linux: Open Terminal, type ip route | grep default, and press Enter. The IP address listed is your router’s.
-
Mobile Devices: On iOS, go to Settings > Wi-Fi, tap the connected network, and find the “Router” field. On Android, go to Settings > Wi-Fi, tap the network, and look for “Gateway.”
-
-
Common IP Addresses: If you can’t find the IP, try common addresses like 192.168.0.1, 192.168.1.1, or 10.0.0.1.
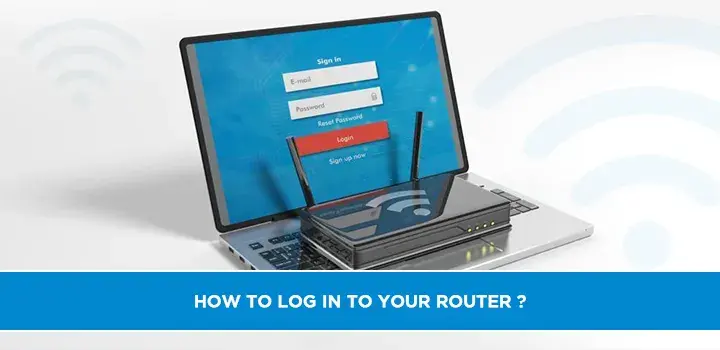
Step 3: Access the Router’s Admin Panel
Open a web browser and enter the router’s IP address in the address bar (e.g., http://192.168.0.1). Press Enter to load the login page. If the page doesn’t load:
-
Ensure the IP address is correct (no typos, e.g., “l” instead of “1”).
-
Verify you’re connected to the router’s network.
-
Try a different browser or clear your browser’s cache.
Some routers use a domain like http://routerlogin.net (NETGEAR) or http://tplinkwifi.net (TP-Link). Check your router’s documentation for specifics.
Step 4: Enter Login Credentials
The login page will prompt for a username and password. Use the default credentials, which vary by router brand. Below is a table of common default credentials for popular router brands:
|
Router Brand |
Default IP Address |
Default Username |
Default Password |
|---|---|---|---|
|
TP-Link |
192.168.0.1 or 192.168.1.1 |
admin |
admin |
|
NETGEAR |
192.168.0.1 or routerlogin.net |
admin |
password or admin |
|
Linksys |
192.168.1.1 |
admin or blank |
admin or blank |
|
ASUS |
192.168.1.1 |
admin |
admin |
|
D-Link |
192.168.0.1 |
admin |
blank or admin |
|
CenturyLink |
192.168.0.1 |
admin |
Printed on router label |
-
Finding Credentials: Check the router’s label, manual, or the manufacturer’s website. For example, CenturyLink routers often have unique passwords printed on the device.
-
Custom Credentials: If the router was previously configured, the default credentials may have been changed. Use the custom username and password set by the user or ISP.
-
ISP-Provided Routers: If your router came from your ISP, contact them for login details, as they may use custom credentials.
Step 5: Log In and Navigate the Admin Panel
Enter the username and password, then click “Log In” or “Sign In.” If successful, you’ll access the router’s admin panel, where you can:
-
Change the Wi-Fi name (SSID) and password.
-
Update firmware for security and performance.
-
Configure security settings (e.g., WPA3 encryption).
-
Set up guest networks or parental controls.
-
Monitor connected devices or adjust Quality of Service (QoS) settings.
Step 6: Troubleshoot Login Issues
If you can’t log in, try these steps:
-
Verify Connection: Ensure you’re connected to the router’s network.
-
Check IP Address: Confirm the IP address is correct. Try pinging it (e.g., ping 192.168.0.1 in Command Prompt or Terminal) to ensure the router responds.
-
Clear Browser Cache: Cached data can interfere with the login page. Clear your browser’s cache or try incognito mode.
-
Reset Credentials: If the default credentials don’t work, the router may have custom settings. Contact the person who set it up or your ISP.
-
Factory Reset: As a last resort, reset the router by pressing and holding the reset button (usually a small pinhole) for 10–30 seconds. This restores default settings but erases all custom configurations, including Wi-Fi passwords and port forwarding.
Security Best Practices
After logging in, take these steps to secure your router:
-
Change Default Credentials: Update the admin username and password to prevent unauthorized access. Use a strong password (e.g., 12+ characters, mixing letters, numbers, and symbols).
-
Update Firmware: Check for firmware updates in the admin panel to patch security vulnerabilities. Most routers have an “Update” or “Firmware” section.
-
Enable Strong Encryption: Use WPA3 or WPA2 for Wi-Fi security to protect your network.
-
Disable Remote Access: Turn off remote management unless necessary, as it allows external access to your router’s admin panel.
-
Regularly Monitor Devices: Check the list of connected devices to ensure no unauthorized users are on your network.
For more security tips, visit CISA’s router security guide.
Brand-Specific Considerations
Different router brands have unique interfaces and default settings. Below are tips for popular brands:
-
TP-Link: Access via http://tplinkwifi.net or 192.168.0.1. The admin panel is user-friendly, with a “Quick Setup” wizard for beginners. Default credentials are typically “admin”/“admin.”
-
NETGEAR: Use http://routerlogin.net or 192.168.0.1. NETGEAR routers often require creating an account for advanced features like remote management.
-
Linksys: Access via 192.168.1.1. Some models leave the username blank by default. Linksys Smart Wi-Fi routers may prompt for an account setup.
-
ASUS: Use 192.168.1.1. ASUS routers offer advanced features like AiMesh for network expansion, accessible after login.
-
D-Link: Access via 192.168.0.1. The password may be blank or “admin.” D-Link’s interface includes a setup wizard for easy configuration.
-
CenturyLink: CenturyLink routers often use 192.168.0.1 with a unique password printed on the device. Contact CenturyLink if ISP-specific credentials are needed.
For brand-specific guides, check the manufacturer’s website (e.g., TP-Link Support, NETGEAR Support).
Troubleshooting Common Issues
Here are solutions to common login problems:
-
“Page Not Found” Error: Verify the IP address and ensure you’re connected to the router’s network. Try a different browser or device.
-
Incorrect Credentials: Double-check the default username and password on the router’s label. If changed, reset the router to restore defaults.
-
Router Not Responding: Power cycle the router (unplug for 30 seconds, then plug back in). Ensure the router’s lights indicate it’s powered on.
-
ISP Restrictions: Some ISPs lock router settings. Contact your ISP for access instructions or to confirm if you need a separate admin account.
If issues persist, consult your router’s manual or contact the manufacturer’s support team.
Advanced Tips for Power Users
For users comfortable with networking, consider these advanced steps:
-
Access via SSH/Telnet: Some routers support command-line access for advanced configuration. Check your router’s documentation for SSH/Telnet support.
-
Custom Firmware: Install open-source firmware like DD-WRT or OpenWrt for enhanced features, but note this may void warranties. Visit DD-WRT for compatible models.
-
Static IP Configuration: If the router’s IP changes frequently, set a static IP in the admin panel to ensure consistent access.
-
Backup Settings: Before making changes, back up your router’s configuration in the admin panel to restore settings if needed.
Conclusion
Logging into your router is a straightforward process that unlocks powerful tools to manage your network. By connecting to the router’s network, finding its IP address, and using the correct credentials, you can access the admin panel to customize settings and enhance security. Always verify your router’s IP and credentials, secure the device after logging in, and consult manufacturer resources for brand-specific guidance. Whether you’re a beginner or an advanced user, this guide provides the tools to confidently access and manage your router. For further assistance, check your router’s manual or contact your ISP or manufacturer’s support team.
Faq
What is my router’s IP address?
The IP address is usually 192.168.0.1, 192.168.1.1, or 10.0.0.1. Check the router’s label, manual, or use the ipconfig (Windows) or netstat (Mac) command to find the “Default Gateway.”
What are the default login credentials for my router?
Common defaults are “admin”/“admin” or “admin”/“password.” Check the router’s label or manufacturer’s website for model-specific credentials.
What should I do if I forgot my router’s password?
If you changed the default password and forgot it, reset the router by holding the reset button for 10–30 seconds. This restores default credentials but erases custom settings.
Can I log in to my router from outside my home network?
Some routers allow remote access if enabled in the admin panel. However, this poses security risks. Disable remote access unless necessary and use a strong password.
Why can’t I access my router’s admin panel?
Ensure you’re connected to the router’s network, using the correct IP address, and entering the right credentials. Try a different browser or reset the router if needed.