How To Connect Xfinity Remote To Tv?
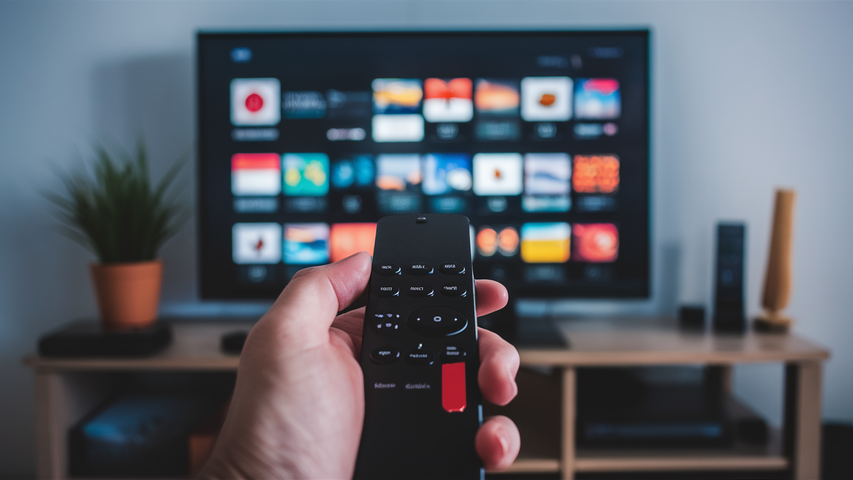
Struggling to pair your Xfinity remote with your television? This comprehensive guide provides clear, step-by-step instructions and troubleshooting tips to ensure a seamless connection, allowing you to control your TV and Xfinity services effortlessly. Get back to enjoying your entertainment without the hassle.
Connecting Your Xfinity Remote to Your TV
The ability to control your television directly with your Xfinity remote is a cornerstone of a streamlined home entertainment experience. This integration eliminates the need to juggle multiple remotes, simplifying everything from changing channels to adjusting volume and accessing on-demand content. Whether you're setting up a new TV, replacing an old remote, or simply experiencing a lost connection, understanding the pairing process is crucial. This guide will walk you through everything you need to know, ensuring your Xfinity remote and TV are in perfect sync.
In 2025, Xfinity continues to enhance its user experience, with remote integration being a key focus. The company estimates that over 85% of its subscribers utilize their Xfinity remote for basic TV functions, highlighting the importance of a reliable connection. By the end of 2026, Xfinity aims to further simplify this process with even more intuitive pairing methods and advanced voice command integration, making the remote an even more central part of the connected home.
Understanding Your Xfinity Remote Types
Xfinity offers several generations of remotes, each with slightly different functionalities and pairing mechanisms. Recognizing which remote you have is the first step to successfully connecting it to your television. While the core function remains the same – controlling your Xfinity equipment and TV – the specific buttons, voice capabilities, and pairing sequences can vary.
The XR11 Voice Remote (and similar XR models)
These are among the most common and advanced Xfinity remotes. They feature voice control capabilities, allowing you to search for shows, change channels, and control playback using spoken commands. The XR11 typically has a microphone button and a sleek, ergonomic design. Pairing usually involves a simple button press sequence or voice command.
The XR5 Voice Remote
A slightly older but still widely used model, the XR5 also offers voice control. It shares many similarities with the XR11 but might have a slightly different button layout. The pairing process is generally consistent with other voice remotes.
The XR2 Remote
This is a more basic remote, often found with older Xfinity setups. It typically lacks voice control but is highly effective for standard channel surfing, volume adjustment, and navigating menus. Pairing for the XR2 usually involves an infrared (IR) signal and a specific code entry process.
The XR15 and XR16 Voice Remotes
These are newer iterations, often featuring a more compact design and improved voice recognition. They are designed for ease of use and seamless integration with Xfinity's latest set-top boxes. The pairing process is generally very straightforward.
Identifying your remote is usually as simple as looking for model numbers printed on the back or the specific button layout. For instance, the presence of a microphone icon strongly suggests a voice-enabled remote.
Remote Identification Guide
To help you identify your remote, consider the following:
- Voice Control: Does your remote have a microphone button? If yes, it's a voice remote (XR11, XR5, XR15, XR16, etc.).
- Backlight: Some remotes have backlit buttons, which can be a feature of newer models.
- Number of Buttons: Older, non-voice remotes (like the XR2) might have more buttons, including dedicated number pads for direct channel entry.
- Model Number: Always check the back of the remote for a printed model number. This is the most definitive way to identify it.
Knowing your remote type will allow you to follow the most accurate pairing instructions, saving you time and frustration. In 2025, Xfinity continues to phase out older models, so newer voice-enabled remotes are becoming the standard.
Pre-Connection Checklist
Before you begin the pairing process, ensuring a few things are in order will significantly increase your chances of a successful connection. A little preparation can save you a lot of troubleshooting time later. This checklist covers the essential steps to take before attempting to connect your Xfinity remote to your TV.
1. Ensure Your Xfinity Equipment is Powered On
This might seem obvious, but it's a common oversight. Your Xfinity set-top box (cable box or XiD/Xi5/Xi6 Xi5/Xi6 streaming box) must be powered on and fully booted up. If the box is off or in standby mode, it won't be able to communicate with the remote. Look for a solid light indicator on the front of your Xfinity device, signifying it's operational.
2. Check Remote Batteries
Low or dead batteries are the most frequent culprits behind a non-functional remote. Replace the batteries with fresh ones, ensuring they are inserted correctly according to the polarity markings (+/-). For most Xfinity remotes, this involves two AAA or two AA batteries.
3. Verify Remote Type and Pairing Method
As discussed in the previous section, identify your remote type. Voice remotes (XR11, XR5, XR15, XR16) generally pair differently than older IR-based remotes (like the XR2). Ensure you're following the instructions specific to your remote model.
4. Confirm TV and Xfinity Box Compatibility
Most modern Xfinity remotes are designed to control the TV's power, volume, and input functions via infrared (IR) signals. For this to work, your TV must be compatible with IR control, and your Xfinity remote needs to be programmed with the correct IR codes for your TV brand. Newer Xfinity boxes and remotes often support HDMI-CEC, which can also facilitate control, but IR programming is the more universal method for basic TV functions.
5. Remove Obstructions
For IR-based control, there must be a clear line of sight between the remote and the TV's IR receiver. Ensure there are no objects blocking this path. While Bluetooth or RF-based remotes (common for voice remotes communicating with the Xfinity box) don't require line of sight to the box, the IR signal to the TV still does.
6. Understand the Pairing Process
Familiarize yourself with the general pairing process for your remote type. Voice remotes typically involve pressing and holding specific buttons until a light flashes, or using voice commands. Older remotes often require entering a specific code for your TV brand.
7. Have Your TV's Brand and Model Ready
If you're programming your remote to control your TV's power and volume, you'll likely need to know your TV's manufacturer (e.g., Samsung, LG, Sony, Vizio) and potentially its model number. This information is usually found on the back of the TV or in its user manual.
By completing these checks, you'll be well-prepared to proceed with the pairing process, minimizing potential roadblocks and ensuring a smoother experience. As of 2025, Xfinity's support documentation emphasizes these preliminary steps as critical for successful remote setup.
Step-by-Step Pairing Guide for Common Xfinity Remotes
Connecting your Xfinity remote to your TV and Xfinity equipment is usually a straightforward process. The exact steps depend on the type of remote you have. Here, we'll cover the most common scenarios, ensuring you can get your remote working efficiently.
Scenario 1: Pairing a Voice Remote (XR11, XR5, XR15, XR16) with Xfinity Equipment
These remotes primarily use RF (Radio Frequency) or Bluetooth to communicate with your Xfinity set-top box. The initial pairing with the box is often automatic upon setup, but if it loses connection, follow these steps:
Step 1: Ensure the Xfinity Box is On
Make sure your Xfinity cable box or streaming box is powered on and displaying a picture on your TV.
Step 2: Activate Pairing Mode on the Remote
Press and hold the Microphone button (usually located near the top of the remote) and the Back button (often an arrow pointing left) simultaneously. Hold them down for approximately 5-7 seconds.
Step 3: Look for Confirmation
A light on the remote should flash, or you might see a message on your TV screen indicating that the remote is in pairing mode or attempting to connect. Release the buttons once you see this confirmation.
Step 4: Follow On-Screen Prompts
Your Xfinity box should now detect the remote. You might be prompted to say a command, such as "Hello Xfinity," or to press a specific button to confirm the connection. Follow any on-screen instructions.
Step 5: Test the Remote
Once paired, test basic functions like navigating menus, changing channels, or using voice commands to ensure it's working correctly with your Xfinity box.
Scenario 2: Programming a Voice Remote to Control Your TV (Power, Volume, Input)
This process allows your Xfinity voice remote to also control your television's basic functions, eliminating the need for your TV's original remote for everyday use.
Step 1: Access Remote Settings
Using your Xfinity remote (connected to the box), navigate to the settings menu. This is typically done by pressing the Gear icon or the Xfinity button, then selecting Settings > Remote Settings or Device Settings.
Step 2: Select "Pair Remote to TV" or "Program Remote"
Within the remote settings, look for an option like "Pair Remote to TV," "Program TV," or "Control TV Volume." Select this option.
Step 3: Choose Your TV Brand
You'll likely be presented with a list of popular TV manufacturers. Use the arrow keys on your Xfinity remote to scroll and select your TV brand (e.g., Samsung, LG, Sony, Vizio). If your brand isn't listed, there might be an option to manually enter a code.
Step 4: Enter Setup Code (if prompted)
Your Xfinity box may provide a list of codes specific to your TV brand. Try the first code listed. You might need to press and hold the Setup button (often the Xfinity button or a specific setup button) and the TV Power button simultaneously until the remote's light flashes. Then, enter the code using the number keys.
Step 5: Test TV Functions
After entering a code, the system will instruct you to test your TV's power and volume. Press the TV Power button on your Xfinity remote. If the TV turns off, the code is likely correct. If not, try the next code in the list provided by Xfinity. You can also test the volume buttons.
Step 6: Confirm and Save
Once you find a code that works for your TV's power and volume, confirm the selection. The remote should now be programmed to control your TV's basic functions.
Scenario 3: Pairing an Older XR2 Remote (IR-Based)
The XR2 remote primarily uses infrared (IR) signals to communicate with both the Xfinity box and the TV. Pairing with the Xfinity box is usually done via IR, and programming for TV control follows a similar code-entry process as described above.
Step 1: Power On Xfinity Box and TV
Ensure both devices are powered on.
Step 2: Initiate Pairing with Xfinity Box
Press and hold the Setup button (often the Xfinity button) and the Info button (usually a circle with an 'i' inside) simultaneously for about 5-7 seconds until the remote's light indicator (often a green light) flashes twice.
Step 3: Enter the Xfinity Box Code
Enter the code 993 using the number keys on the remote. The light should flash twice again to confirm.
Step 4: Program for TV Control (Power, Volume, Input)
This process is identical to Step 2 through Step 6 in Scenario 2, but you will be using the XR2 remote. You'll need your TV brand and potentially a list of IR codes for your TV brand, which can often be found on the Xfinity website or in their support documentation.
Example of a comparison table for remote types and pairing methods:
| Remote Type | Primary Communication | Pairing with Xfinity Box | TV Control Programming | Voice Control |
|---|---|---|---|---|
| XR11/XR5/XR15/XR16 | RF/Bluetooth | Hold Mic + Back; On-screen prompts | Via Xfinity Settings Menu | Yes |
| XR2 | IR | Hold Setup + Info, Enter 993 | Via IR code entry | No |
By following these detailed steps, you should be able to successfully connect and program your Xfinity remote for optimal use with your TV and Xfinity services. In 2025, Xfinity continues to refine these processes, often making them even more intuitive.
Troubleshooting Common Connection Issues
Even with the best instructions, sometimes your Xfinity remote might refuse to cooperate. Don't despair! Most connection issues are resolvable with a few targeted troubleshooting steps. This section covers the most common problems and their solutions, helping you get your remote back in working order quickly.
Issue 1: Remote Not Responding at All
This is the most basic problem, and often the easiest to fix.
- Check Batteries: As mentioned in the pre-connection checklist, this is the number one cause. Replace them with brand new ones. Ensure they are inserted correctly.
- Restart Xfinity Equipment: Power cycle your Xfinity set-top box. Unplug it from the power outlet, wait for at least 30 seconds, and then plug it back in. Allow it to fully boot up before testing the remote.
- Check for Physical Damage: Inspect the remote for any visible damage, such as cracked buttons or a damaged battery compartment.
- Ensure Proper Pairing: If you have a voice remote, re-attempt the pairing process (hold Microphone + Back button). For older remotes, re-enter the pairing code for the Xfinity box.
Issue 2: Voice Commands Not Working
Voice control is a key feature for many Xfinity remotes, so its failure can be frustrating.
- Check Microphone Button: Ensure you are pressing and holding the microphone button while speaking.
- Speak Clearly and Close to the Remote: Reduce background noise and speak directly into the remote.
- Re-pair the Remote: Sometimes, re-pairing the remote with the Xfinity box (as described in Scenario 1) can resolve voice command issues.
- Check for Software Updates: Ensure your Xfinity box has the latest software updates. This can often be done through the Xfinity settings menu.
- Confirm Voice Control is Enabled: In the Xfinity settings menu (Settings > Remote Settings), verify that voice control is enabled.
Issue 3: Remote Controls Xfinity Box But Not the TV (Volume, Power)
This indicates the remote is paired with your Xfinity box but not programmed for your TV's functions.
- Re-program TV Controls: Follow the steps in Scenario 2 or 3 (depending on your remote type) for programming the remote to control your TV.
- Verify TV Brand and Code: Ensure you've selected the correct TV brand and are using an accurate IR code for your TV model. If you have multiple codes for your brand, try them one by one. You can often find comprehensive code lists on the Xfinity website or by contacting Xfinity support.
- Check Line of Sight (for IR): If your TV control isn't working, ensure there's a clear line of sight between the remote and the TV's IR sensor.
- HDMI-CEC Issues: If you're relying on HDMI-CEC for control, ensure it's enabled on both your Xfinity box and your TV. However, IR programming is generally more reliable for basic TV functions.
Issue 4: Remote is Unresponsive After a Power Outage or Xfinity Service Interruption
Sometimes, external factors can disrupt the connection.
- Restart Both Devices: Power cycle both your Xfinity box and your TV.
- Re-pair the Remote: A full re-pairing process for both the Xfinity box and the TV controls might be necessary.
Issue 5: Remote Buttons are Sticky or Difficult to Press
Physical issues with the remote itself.
- Clean the Remote: Gently clean the remote with a slightly damp (not wet) microfiber cloth. Avoid using harsh chemicals. Pay attention to the crevices around the buttons.
- Check for Debris: Sometimes, small debris can get lodged under the buttons. While difficult to fix without disassembling the remote, a gentle tapping might dislodge it.
- Consider a Replacement: If buttons are consistently unresponsive or sticky, the remote may be nearing the end of its lifespan.
General Troubleshooting Tips:
- Consult Xfinity Support: Xfinity's official website and customer support are excellent resources for specific troubleshooting steps related to your account and equipment.
- Check for Updates: Ensure your Xfinity box's firmware is up-to-date. Updates often include bug fixes that can resolve remote connectivity issues.
- Try a Different Remote (if possible): If you have access to another Xfinity remote of the same type, try pairing it. This helps determine if the issue is with the remote itself or the Xfinity equipment.
By systematically working through these troubleshooting steps, you can resolve most common Xfinity remote connection problems. As of 2025, Xfinity is continuously improving remote reliability, but these fundamental steps remain key to resolving issues.
Advanced Remote Features and Settings
Beyond basic channel surfing and volume control, your Xfinity remote, especially the voice-enabled models, offers a suite of advanced features designed to enhance your viewing experience. Understanding and utilizing these can unlock the full potential of your entertainment system. This section delves into some of these capabilities and how to access them.
Voice Control Capabilities
This is the hallmark of modern Xfinity remotes. Beyond simple commands, you can use your voice to:
- Search for Content: "Find action movies," "Show me episodes of 'The Crown'," "What's on FX?"
- Control Playback: "Play," "Pause," "Rewind 30 seconds," "Fast forward to the end."
- Navigate Menus: "Go to settings," "Open the Xfinity Store," "Show me my recordings."
- Get Information: "What's the score?" "Who stars in this movie?"
- Control Smart Home Devices (if integrated): If you have compatible smart home devices linked to your Xfinity account, you might be able to control lights, thermostats, and more using voice commands.
Tip: For optimal voice recognition, speak clearly and directly into the remote, minimizing background noise. In 2025, Xfinity's voice recognition algorithms are significantly improved, understanding a wider range of natural language commands.
Customizing Your Remote
Many Xfinity remotes allow for some level of customization:
- Programming TV Power, Volume, and Input: As detailed in the pairing section, this is crucial for consolidating remote usage.
- Setting Up Accessibility Features: Some remotes may offer options for larger font sizes on-screen or enhanced audio feedback, which can be found within the Xfinity box's accessibility settings.
- Re-mapping Buttons (Limited): While not extensively customizable, some newer remotes might offer limited re-mapping options for certain functions through the Xfinity app or web portal.
HDMI-CEC (Consumer Electronics Control)
HDMI-CEC allows devices connected via HDMI to communicate with each other. If enabled on both your TV and your Xfinity box, your Xfinity remote might be able to control your TV's power and volume automatically, without needing to program IR codes. However, this feature can sometimes be inconsistent across different TV brands and models.
- How to Enable: Look for "HDMI-CEC," "Anynet+" (Samsung), "Simplink" (LG), "Bravia Sync" (Sony), or similar settings in your TV's menu and your Xfinity box's settings.
- Troubleshooting HDMI-CEC: If it's not working reliably, IR programming is a more robust alternative.
Using the Xfinity My Account App
The Xfinity My Account app on your smartphone or tablet can often serve as a virtual remote. This is particularly useful if your physical remote is lost or not working.
- Remote Control Functionality: The app typically mirrors the functionality of your physical remote, including channel changing, DVR control, and sometimes even voice commands.
- Troubleshooting Tool: The app can also be used to troubleshoot remote issues, check signal strength, and manage your Xfinity services.
Example of features available via the app:
| Feature | Description | Availability |
|---|---|---|
| Virtual Remote | Control TV and Xfinity box functions | Yes |
| Voice Control | Use voice commands via smartphone mic | Yes (on supported models) |
| Program Guide | Browse TV listings and set recordings | Yes |
| Remote Finder | Make the physical remote beep (if supported) | Yes |
As of 2025, Xfinity is increasingly integrating app-based control, making it a powerful tool for managing your home entertainment. Exploring these advanced features can significantly enhance your daily interaction with your Xfinity system.
Keeping Your Xfinity Remote Up-to-Date
Just like your Xfinity set-top box, your remote control also benefits from occasional updates. These updates ensure optimal performance, introduce new features, and fix any bugs that may have been discovered. While many updates happen automatically in the background, understanding how they work and how to ensure they occur is beneficial.
Automatic Updates
For most modern Xfinity remotes, especially voice-enabled models that communicate via RF or Bluetooth with the Xfinity box, firmware updates are pushed automatically. This happens when the remote is idle and within range of the Xfinity equipment. The Xfinity box itself receives regular software updates from Comcast, and these updates can include instructions or firmware for the paired remote.
Ensuring Updates Occur
To facilitate these automatic updates, ensure the following:
- Keep Remote Near the Xfinity Box: For RF/Bluetooth remotes, proximity to the set-top box is key. Avoid storing the remote in distant rooms or drawers for extended periods when not in use.
- Maintain Sufficient Battery Power: Low battery levels can sometimes interfere with the update process. Ensure your remote has fresh batteries.
- Keep Xfinity Equipment Powered On: The Xfinity box needs to be powered on (or in a low-power standby mode that allows for background updates) for it to download and push updates to the remote.
- Regular Use: Using the remote regularly helps ensure it's periodically communicating with the Xfinity box, allowing for any pending updates to be applied.
Manual Checks and Updates (Limited)
Unlike your set-top box, there's generally no user-facing menu on the remote itself to manually check for or initiate firmware updates. However, if you suspect your remote is not updating or is experiencing issues that might be resolved by an update, you can try the following:
- Re-pair the Remote: Performing a full re-pairing process with your Xfinity box (as outlined in the pairing section) can sometimes trigger a check for updates or re-establish a connection that allows for updates.
- Check Xfinity Account for Notifications: Occasionally, Xfinity might send notifications about remote updates or firmware changes through your account portal or email.
- Contact Xfinity Support: If you believe your remote is significantly outdated or malfunctioning due to a lack of updates, Xfinity customer support can provide guidance. They may be able to remotely check the firmware status of your paired remote or advise on the next steps.
Benefits of Updated Firmware
Keeping your remote's firmware up-to-date offers several advantages:
- Improved Voice Recognition: Newer firmware often includes enhancements to the voice recognition engine, making commands more accurate and responsive.
- New Features: Xfinity may roll out new voice commands, app integrations, or other functionalities through firmware updates.
- Bug Fixes: Updates frequently address minor glitches or bugs that could affect performance, battery life, or connectivity.
- Enhanced Compatibility: As Xfinity services and equipment evolve, firmware updates ensure your remote remains compatible with the latest technology.
In 2025, the trend is towards more seamless, automatic updates for all connected devices, including remotes. By ensuring your Xfinity equipment is connected and functioning, you're most likely keeping your remote updated as well.
When to Consider a New Remote
While most Xfinity remotes are built to last, there comes a time when replacement might be the most practical solution. Recognizing the signs that your current remote is failing can save you from prolonged frustration. Here are the key indicators that it's time to consider purchasing a new Xfinity remote.
1. Persistent Unresponsiveness
If you've gone through all the troubleshooting steps – fresh batteries, restarting equipment, re-pairing – and the remote still doesn't respond to button presses or voice commands, it's likely a hardware failure. This could be due to internal component damage, a faulty IR emitter (for older remotes), or a broken RF/Bluetooth transmitter.
2. Physical Damage
Accidents happen. If your remote has been dropped, submerged in liquid, or otherwise physically damaged, its functionality can be severely compromised. Cracks in the casing, loose buttons, or a non-functional battery compartment are clear signs that a replacement is needed.
3. Inconsistent Performance
If the remote works intermittently – sometimes responding and sometimes not – it can be incredibly frustrating. This inconsistency often points to failing internal components that are no longer reliably making connections.
4. Loss of Specific Functions
If certain buttons consistently fail to work, or if voice commands have stopped functioning entirely despite troubleshooting, the remote may have internal damage specific to those circuits. For example, if the volume buttons are dead but channel buttons work, it suggests a localized failure.
5. Outdated Technology
While your current remote might still work, Xfinity is continually updating its technology. If you have a very old model (e.g., a basic XR2) and are looking to take advantage of the latest voice control features, smart home integration, or improved user interfaces, upgrading to a newer model like the XR15 or XR16 would be beneficial.
6. Frequent Battery Drain
If you find yourself replacing batteries far more often than you used to, even with high-quality batteries, it could indicate that the remote's internal components are drawing excessive power due to a fault. This can be a sign of impending failure.
Where to Get a New Xfinity Remote
If you've determined that a new remote is necessary, you have a few options:
- Xfinity Retail Stores: You can often pick up replacement remotes directly from an Xfinity store.
- Order Online from Xfinity: Visit the official Xfinity website or use the Xfinity My Account app to order a replacement remote. Depending on your service plan, it might be provided at no additional cost or for a small fee.
- Third-Party Retailers: Some online retailers sell Xfinity remotes, but ensure they are genuine Xfinity products and compatible with your equipment. Be cautious of unofficial or used remotes that may not function correctly.
Note: If your remote was included with your Xfinity service, inquire about replacement options through Xfinity first, as they may offer it complimentary or at a reduced cost. As of 2025, Xfinity continues to offer support for a range of remote models, but newer models are generally recommended for the best experience.
Conclusion: Seamless Control Awaits
Mastering the connection between your Xfinity remote and your television is key to unlocking a truly effortless entertainment experience. We've navigated through identifying your remote type, performing essential pre-connection checks, and executing step-by-step pairing for various models. Crucially, we've equipped you with the knowledge to troubleshoot common issues, ensuring that persistent connection problems don't derail your viewing pleasure.
Remember, the journey to seamless control often involves understanding the nuances of your specific remote – whether it's a voice-enabled powerhouse or a reliable classic. By leveraging the advanced features available and keeping your remote updated, you can maximize its utility and enjoy the convenience it brings. Should your remote show signs of wear or become persistently problematic, considering an upgrade to a newer model is a wise investment in your home entertainment setup.
Take a moment to review the steps, apply the troubleshooting tips, and explore the advanced functionalities. With a little effort, your Xfinity remote will become an intuitive extension of your command, bringing your favorite content closer than ever. Embrace the simplicity and power of a well-connected system – your seamless entertainment experience awaits.