How long does it take for ATT to install fiber optic?
Discover the definitive timeline for AT&T fiber optic installation. This comprehensive guide, updated for 2025-26, answers your burning questions about how long it truly takes, what factors influence the process, and how to prepare for a swift and seamless setup. Get ready for lightning-fast internet.
Understanding the AT&T Fiber Installation Process
Embarking on the journey to upgrade your home internet to AT&T's fiber optic service is an exciting prospect, promising unparalleled speeds and reliability. However, a common question that arises is: "How long does AT&T fiber installation actually take?" The answer isn't a single, fixed duration, as it's influenced by a multitude of variables. This section will demystify the typical process, from initial assessment to the moment your new high-speed connection is live.
AT&T's fiber optic network, often branded as AT&T Fiber, represents a significant leap in internet technology. Unlike traditional copper-based DSL or cable internet, fiber optic cables transmit data using light signals, allowing for vastly superior bandwidth, lower latency, and greater immunity to interference. This technological advantage is why many consumers are eager to make the switch.
The installation process itself is designed to be as efficient as possible, but it requires careful planning and execution by AT&T technicians. It involves bringing fiber optic cable from the nearest network point (often a distribution box or node) directly to your home. This can involve work both inside and outside your property, depending on your specific location and existing infrastructure.
Understanding the stages involved is crucial for setting realistic expectations. Generally, the process can be broken down into several key phases:
- Site Survey/Assessment: In some cases, especially for new fiber builds or complex installations, an initial assessment might be necessary to determine the best route for the fiber cable and identify any potential obstacles.
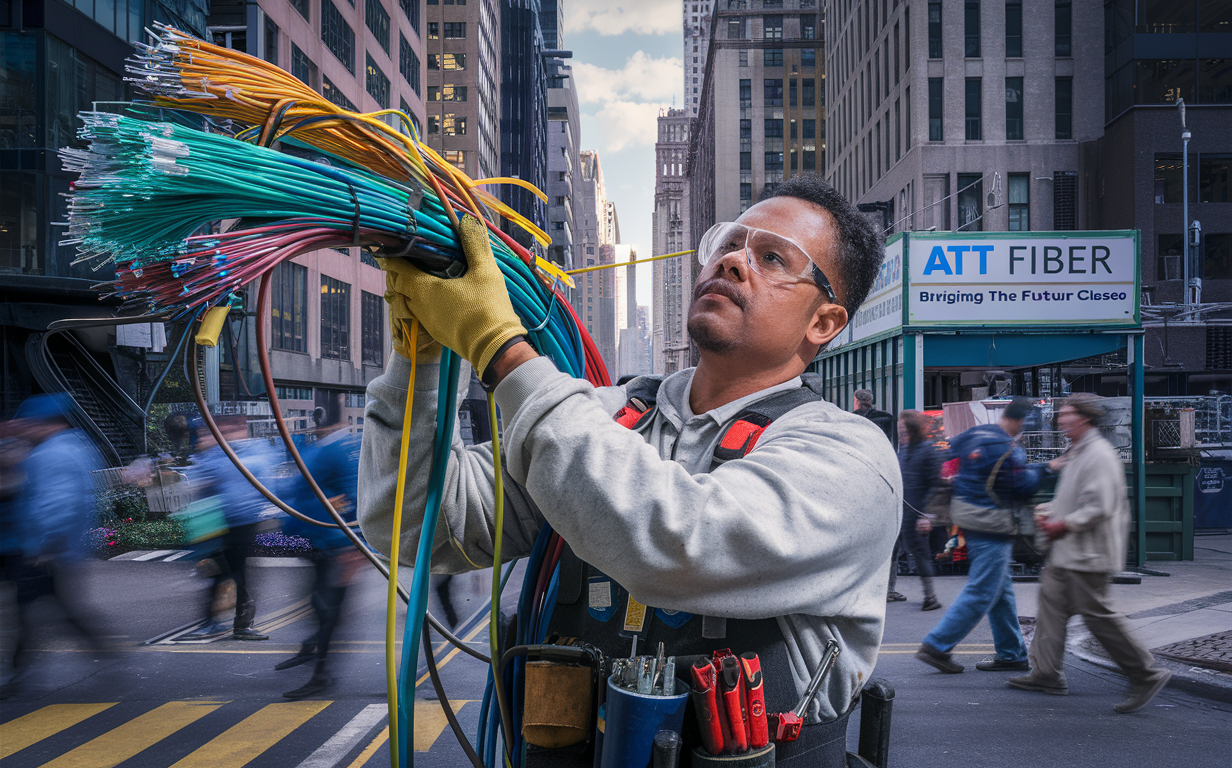
- External Cabling: This involves running the fiber optic cable from the street or a nearby utility pole to your home. This might be done via underground trenching, aerial installation, or utilizing existing conduit.
- Internal Cabling: Once the external cable reaches your home, it needs to be brought inside to a suitable location for the Optical Network Terminal (ONT) – the device that converts the light signal to an electrical signal your router can use.
- ONT and Router Installation: The ONT is mounted, and then your AT&T provided router (or your own compatible router) is connected to it.
- Testing and Activation: Technicians will test the connection to ensure it's performing optimally before handing over the service to you.
Each of these steps contributes to the overall time it takes. While AT&T strives for a quick turnaround, factors like technician availability, the complexity of your property's layout, and the existing infrastructure in your neighborhood play significant roles. We'll delve deeper into these influencing factors in subsequent sections.
The Typical AT&T Fiber Installation Timeline
When you're eager to experience the blazing-fast speeds of AT&T Fiber, the question of "how long will it take?" is paramount. While no two installations are precisely identical, we can establish a general timeline based on common scenarios and industry averages for 2025-26. Understanding these typical durations can help you plan effectively and manage your expectations.
For most residential installations where fiber optic cable is already readily available at the property line or within the neighborhood, the actual in-home installation appointment is often the most predictable part of the process. This appointment typically lasts between 2 to 4 hours. During this time, a certified AT&T technician will:
- Assess the best location for the Optical Network Terminal (ONT).
- Run a fiber cable from the external demarcation point (where AT&T's network meets your property) to the ONT location.
- Mount the ONT.
- Connect your AT&T gateway (router) to the ONT.
- Test the connection and ensure service is active.
- Provide a brief overview of your new service.
However, this 2-4 hour window is just the installation appointment itself. The entire process, from ordering service to having a fully functional AT&T Fiber connection, can span a broader timeframe. Here's a more detailed breakdown:
- Ordering and Scheduling: After you've confirmed service availability and placed your order online or by phone, you'll be presented with available installation appointment dates. This initial scheduling can range from a few days to 2-3 weeks, depending on your location's demand and technician availability. High-demand areas or times of the year might see longer waits.
- Pre-Installation Checks (if applicable): For some addresses, particularly in areas where fiber is being newly deployed or where significant infrastructure work is required, AT&T might conduct a pre-installation site survey. This is usually done a week or two before the actual installation appointment. This step is crucial for planning the external cable route and identifying any potential challenges.
- External Cable Laying (if required): If your home doesn't yet have a fiber drop from the street or pole, this external work needs to be completed. This can add significantly to the timeline. If it involves trenching, it might take a few days to a week or more, depending on local regulations, property size, and the complexity of the terrain. Aerial drops are typically faster, often completed within a day or two. This phase can sometimes be scheduled separately from the in-home installation.
- The Installation Appointment: As mentioned, this is typically 2 to 4 hours.
Therefore, a realistic total timeline for AT&T Fiber installation can range from 1 week (in ideal, pre-existing infrastructure scenarios) to 4-6 weeks or even longer if significant external work or construction is required.
Example Scenario 1 (Ideal):
- You order service on Monday.
- You schedule an installation for the following Thursday (5 days).
- The installation appointment takes 3 hours.
- Total Time: 5 days
Example Scenario 2 (Moderate):
- You order service on a Friday.
- Fiber drop needs to be installed first, scheduled for the following week (7 days).
- In-home installation scheduled for the week after that (14 days).
- The installation appointment takes 4 hours.
- Total Time: 21 days
Example Scenario 3 (Complex/New Build):
- You order service on a Saturday.
- Site survey required (10 days).
- Trenching for new fiber line (14 days).
- In-home installation scheduled after trenching is complete (7 days).
- The installation appointment takes 3.5 hours.
- Total Time: 31 days
It's important to note that these are estimates for 2025-26. Market conditions, weather, and unforeseen circumstances can always cause variations. Always confirm the estimated installation window provided by AT&T during the ordering process.
Key Factors Influencing Installation Duration
The timeline for AT&T Fiber installation is not a one-size-fits-all scenario. Several critical factors can significantly expedite or prolong the process. Understanding these variables is key to managing your expectations and potentially even influencing the speed of your installation. For 2025-26, these factors remain consistent in their impact.
1. Availability of Existing Fiber Infrastructure
This is arguably the most significant determinant of installation speed. If fiber optic cable is already present at your property line (a "fiber drop" is already installed), the installation will be considerably faster. This often occurs in newer developments or areas where AT&T has recently upgraded its network. If fiber needs to be brought to your home for the first time, the process involves more extensive work.
- Pre-existing Fiber Drop: Installation can often be completed within a single appointment, typically taking 2-4 hours. The total time from order to activation might be as short as a week.
- No Existing Fiber Drop: This requires AT&T to run a new cable from the nearest network point (pole or underground box) to your house. This external work can add days or even weeks to the timeline, depending on the method used.
2. Property Type and Location
The physical characteristics of your property and its location play a crucial role.
- Single-Family Homes: Generally the most straightforward, especially if there's easy access from the street or pole.
- Apartments and Condominiums: These can be more complex. Installation often requires coordination with building management, adherence to building codes, and potentially running cable through shared conduits or common areas. This can add time due to approvals and scheduling coordination.
- Rural vs. Urban/Suburban: In rural areas, the distance from the nearest network node to your home can be greater, potentially increasing installation time and complexity. Urban and suburban areas often have more established infrastructure, but also potentially higher demand and more complex permitting for any ground disturbance.
- Terrain and Obstacles: Rocky soil, dense landscaping, driveways, or existing underground utilities can make trenching more difficult and time-consuming. Steep inclines or difficult access points can also add to the labor involved.
3. Type of Installation Method
How the fiber optic cable is brought to your home dictates a significant portion of the external work.
- Aerial Installation: The cable is strung from utility poles. This is typically faster and less disruptive than underground installation, often taking 1-2 days for the external drop.
- Underground Installation (Trenching): A trench is dug from the street or pole to your house. This is more disruptive and time-consuming, potentially taking several days to a week or more, especially if permits are required or the ground is difficult to work with. It also requires restoration of the landscape afterward.
- Existing Conduit: If your home or neighborhood already has underground conduits, AT&T may be able to pull the fiber through them, which is faster than trenching.
4. Technician Availability and Scheduling
Like any service, the demand for AT&T Fiber installations can fluctuate. During peak demand periods (e.g., after a major product launch, during back-to-school season, or in newly serviceable areas), technician availability might be limited, leading to longer wait times for an appointment.
- Geographic Demand: Areas with high interest in fiber service will naturally have more demand for technicians.
- Time of Year: Weather can also play a role. Extreme cold, heavy snow, or prolonged rain can delay outdoor installation work.
- AT&T's Internal Resources: The company's staffing levels and technician scheduling efficiency directly impact how quickly appointments can be offered.
5. Permitting and Local Regulations
For any work that involves digging or altering public rights-of-way, permits are often required. This is particularly true for underground installations. The time it takes for these permits to be approved can add a substantial delay to the overall timeline.
- Local Government Processes: The efficiency of municipal permitting departments varies widely.
- HOA Approval: In some communities, Homeowners Associations may also have their own approval processes for external modifications, adding another layer of potential delay.
6. Complexity of the Installation
Even within a single-family home, the internal layout can influence the installation time. Running cable through finished walls, across attics, or under floors requires more time and skill than a simple surface run.
- Number of Entry Points: If the fiber needs to enter the house at a specific, less accessible point.
- Interior Routing: The distance and complexity of routing the cable from the entry point to the desired ONT location.
By considering these factors, you can better understand the potential timeline for your AT&T Fiber installation. For instance, if you know your area requires trenching and permits, you can anticipate a longer wait than if fiber is already at your curb.
Factors Influencing AT&T Fiber Installation Time (2025-26)
| Factor | Impact on Timeline | Notes |
|---|---|---|
| Existing Fiber Infrastructure | Low Impact (Faster) if present; High Impact (Slower) if not. | Pre-existing fiber drop vs. new cable run required. |
| Property Type | Moderate Impact. Apartments/Condos can be slower due to coordination. | Requires building management approval and access. |
| Location (Urban/Rural) | Variable Impact. Rural may have longer distances; urban may have higher demand. | Distance to network node and local infrastructure density. |
| Installation Method | High Impact. Aerial is faster than trenching. | Trenching requires more time, permits, and restoration. |
| Technician Availability | High Impact. High demand leads to longer waits. | Dependent on local demand and AT&T's staffing. |
| Permitting/Regulations | High Impact, especially for underground work. | Delays depend on municipal and HOA approval processes. |
| Internal Routing Complexity | Moderate Impact. Difficult interior runs take longer. | Requires more time for careful cable management. |
Pre-Installation: What You Need to Do
While AT&T technicians handle the technical aspects of bringing fiber optic internet to your home, your preparation is crucial for a smooth and efficient installation process. By taking a few proactive steps before your scheduled appointment, you can help ensure the technician has clear access, knows your preferences, and that the installation proceeds without unnecessary delays. These steps are relevant for 2025-26 and beyond.
1. Confirm Serviceability and Order
Before anything else, ensure AT&T Fiber is actually available at your address. You can typically do this on the AT&T website by entering your address. Once confirmed, place your order. During this process, you'll select your desired internet plan and schedule your installation appointment. Pay close attention to the estimated installation window provided.
2. Choose the Ideal Location for Your ONT
The Optical Network Terminal (ONT) is a small box that converts the light signal from the fiber optic cable into an electrical signal that your router can use. The technician will need to install this device inside your home. Think about where you want your internet equipment to be located. Consider the following:
- Central Location: Placing the ONT and router in a central location in your home can help optimize Wi-Fi signal distribution.
- Proximity to Power: The ONT and your router will need access to a power outlet.
- Accessibility: Choose a location that is easily accessible for the technician to work and for you to manage cables later. Avoid cramped closets or behind heavy furniture if possible.
- Aesthetics: Some homeowners prefer the ONT to be discreetly placed.
It's a good idea to have a preferred location in mind, but also a backup option. The technician will assess the feasibility of your chosen spot based on where the external fiber entry point is and the best routing path.
3. Clear Access to the Installation Area
This is a critical step for both external and internal work. The technician needs unobstructed access to the areas where they will be working.
- Exterior Access: If the fiber needs to be run from a pole or underground box, ensure the path from the street to your house is clear. This means moving any vehicles, garden furniture, planters, or other obstructions away from the potential cable route. If you have pets, ensure they are secured safely indoors or in a separate, enclosed area during the appointment.
- Interior Access: Clear the area around where you want the ONT installed. Remove any clutter from floors, walls, or nearby furniture that might impede the technician's work. If the technician needs to run cable through a crawl space or attic, ensure these areas are accessible and safe to enter.
4. Prepare for Potential Interior Cable Routing
Depending on your home's layout, the technician may need to drill small holes through walls or floors to run the fiber cable from the exterior entry point to the ONT location. While technicians are skilled at minimizing disruption and patching small holes, it's good to be aware of this possibility.
- Discuss Options: Talk to the technician about the proposed cable routing. They can often offer different options based on your home's construction.
- Consider Aesthetics: If you have specific concerns about cable routing for aesthetic reasons, discuss them with the technician. They may be able to use cable raceways or suggest alternative paths.
5. Have Necessary Information Ready
While the order should have this, it's always good to have:
- Your Account Information: Order number or account details.
- Contact Information: Ensure your contact number is up-to-date for the technician.
- Building Management Contact (if applicable): If you live in an apartment or condo, have the contact details for your building manager readily available.
6. Understand the Equipment
AT&T typically provides a gateway (modem/router) for their fiber service. Familiarize yourself with the type of equipment you'll be receiving. You may have the option to use your own compatible router, but the ONT is always provided by AT&T.
7. Be Present During the Appointment
It is highly recommended that you or an authorized adult (18+) be present for the entire duration of the installation appointment. This allows you to:
- Grant access to your property.
- Discuss placement options for the ONT and cable routing.
- Ask any questions you may have.
- Approve the work being done.
- Ensure the service is activated and working correctly before the technician leaves.
By taking these preparatory steps, you contribute significantly to a faster, more efficient, and less stressful AT&T Fiber installation experience. It ensures the technician can focus on the technical aspects of the job, leading to quicker activation of your new high-speed internet.
What to Expect on Installation Day
The day of your AT&T Fiber installation is the culmination of your ordering process, and knowing what to expect can help alleviate any anxiety and ensure everything runs smoothly. For 2025-26, the core process remains consistent, focusing on safety, efficiency, and proper setup. Here’s a breakdown of what typically happens during your scheduled appointment.
1. Technician Arrival and Verification
The AT&T technician will arrive within the scheduled appointment window. They will typically be driving a clearly marked AT&T vehicle and will have identification. Upon arrival, they will introduce themselves and confirm your identity and the service address. They may also verify your account details or order number.
2. Initial Assessment and Discussion
Before any work begins, the technician will conduct a brief assessment of your property. They will determine the most feasible path for the fiber optic cable from the nearest network point (e.g., a utility pole or underground box) to your home. They will then discuss with you:
- Exterior Entry Point: Where the fiber cable will enter your home.
- ONT Location: Your preferred location for the Optical Network Terminal (ONT) and the technician's recommendation based on feasibility and best practices.
- Interior Cable Routing: How the cable will be run from the entry point to the ONT.
This is your opportunity to voice any preferences or concerns regarding cable placement, especially if you have specific aesthetic considerations or are concerned about drilling through certain walls.
3. External Cable Installation (if necessary)
If your home does not already have a fiber drop, this is the first major step. The technician will run the fiber optic cable from the street to your house. This can be done via:
- Aerial Installation: The cable is attached to existing utility poles and secured to your home. This is generally quicker.
- Underground Installation: A trench is dug from the street or a nearby underground terminal to your home. This is more labor-intensive and may involve temporary disruption to your yard. The technician will aim to minimize damage and will usually discuss the trenching path with you.
The technician will adhere to safety protocols and local regulations during this phase.
4. Internal Cable Routing and ONT Installation
Once the external fiber cable reaches your home, the technician will route it inside to the chosen location for the ONT. This might involve drilling a small hole through an exterior wall. They will then mount the ONT securely to the wall. The ONT is a critical piece of equipment that converts the light signals from the fiber into electrical signals.
5. Gateway (Router) Connection and Setup
The AT&T provided gateway (which acts as both a modem and a Wi-Fi router) will be connected to the ONT via an Ethernet cable. The technician will power up the gateway and ensure it establishes a connection with the AT&T network. They will configure the Wi-Fi network name (SSID) and password, which will be provided to you.
6. Service Testing and Activation
This is a crucial step to ensure everything is working correctly. The technician will perform several tests:
- Speed Test: They will likely run a speed test using a connected device to confirm you are receiving the speeds associated with your subscribed plan.
- Connectivity Check: They will ensure devices can connect to the Wi-Fi network and access the internet.
- Signal Strength: They will verify the signal quality to the ONT.
If any issues arise, the technician will troubleshoot them on the spot. This might involve checking connections, re-configuring equipment, or, in rare cases, scheduling a follow-up if a more complex issue is identified.
7. Demonstration and Information
Once the service is confirmed to be working, the technician will:
- Explain the Equipment: Briefly explain the function of the ONT and the gateway.
- Provide Wi-Fi Credentials: Give you the Wi-Fi network name (SSID) and password.
- Answer Questions: Allow you to ask any questions you have about your new service, equipment, or billing.
- Discuss Next Steps: Inform you about how to manage your account online and any introductory offers.
8. Cleanup and Completion
The technician will clean up the work area, removing any debris or packaging materials from the installation. They will ensure the work site is left tidy. Once you are satisfied that the service is active and working, you will sign off on the completion of the installation.
The entire process, from the technician's arrival to their departure, typically takes between 2 to 4 hours. This duration can vary based on the complexity of the installation, the need for external work, and any unforeseen issues that may arise. Being prepared, having clear access, and communicating effectively with the technician will contribute to a faster and more efficient installation day.
After the Installation: Getting Online
Congratulations! Your AT&T Fiber installation is complete, and you're on the cusp of experiencing high-speed internet. However, the journey isn't entirely over. This section will guide you through the crucial steps to get fully connected and optimize your new fiber optic service for the best performance in 2025-26.
1. Connect Your Devices
The technician has set up the AT&T gateway and provided you with the Wi-Fi network name (SSID) and password. Now it's time to connect your devices:
- Locate Wi-Fi Credentials: These are usually found on a sticker on the AT&T gateway itself or were provided to you by the technician.
- Select Your Network: On your smartphone, tablet, laptop, smart TV, or any other Wi-Fi-enabled device, search for available Wi-Fi networks.
- Enter Password: Select your AT&T network name and enter the provided password.
- Test Connectivity: Once connected, open a web browser and try visiting a few websites to confirm you have internet access.
2. Verify Your Internet Speed
While the technician likely performed a speed test, it's a good idea to run your own tests to confirm you're getting the speeds you expect from your AT&T Fiber plan. Use a reliable speed testing website or app (e.g., Speedtest.net, Fast.com).
- Use a Wired Connection: For the most accurate results, connect a computer directly to the AT&T gateway using an Ethernet cable. Wi-Fi speeds can be affected by distance, interference, and device capabilities.
- Test at Different Times: Run tests at various times of the day to see if speeds fluctuate.
- Compare to Your Plan: Ensure the download and upload speeds are close to what you are paying for. Slight variations are normal, but significant discrepancies warrant further investigation.
3. Optimize Your Wi-Fi Network
Even with fiber's speed, Wi-Fi performance is key to enjoying that speed throughout your home. Consider these optimization tips:
- Router Placement: Ensure your AT&T gateway is placed in a central, open location, away from obstructions like thick walls, metal objects, or other electronics that can cause interference (e.g., microwaves, cordless phones).
- Update Gateway Firmware: AT&T typically manages firmware updates automatically, but it's worth checking your gateway's settings or the AT&T app to ensure it's up-to-date.
- Consider Wi-Fi Extenders or Mesh Systems: If you have a large home or areas with weak Wi-Fi signals, you might need additional equipment. AT&T offers solutions like their AT&T Wi-Fi Extender or you can invest in a third-party mesh Wi-Fi system for more robust coverage.
- Change Wi-Fi Channel: If you experience interference, you can sometimes manually change the Wi-Fi channel on your gateway's settings to a less congested one. Consult your gateway's manual or AT&T support for instructions.
4. Set Up Your AT&T Account and Billing
Ensure you have registered for online access to your AT&T account. This will allow you to:
- View Bills: Access your monthly statements and payment history.
- Manage Services: Make changes to your plan or add services.
- Troubleshoot: Access support resources and manage your account settings.
- Set Up AutoPay: To avoid late fees and ensure timely payments.
Familiarize yourself with your billing cycle and payment due dates.
5. Explore AT&T Services and Features
Your AT&T Fiber connection opens up possibilities for other AT&T services:
- AT&T TV / DIRECTV STREAM: Experience high-quality streaming television.
- Smart Home Devices: Leverage the stable connection for smart home automation.
- Online Gaming: Enjoy lower latency and faster download/upload speeds for a superior gaming experience.
- Home Security Systems: Ensure reliable connectivity for your security monitoring.
Check the AT&T website or your account portal for any bundled offers or complementary services that might interest you.
6. Keep Technician Contact Information
While not always provided, if you received a business card or contact information from the technician, keep it handy in case of immediate post-installation issues. However, for most ongoing support, you'll want to contact AT&T customer service.
7. Troubleshooting Common Post-Installation Issues
If you encounter problems after the technician leaves:
- Restart Your Gateway: Often, simply unplugging the AT&T gateway for 30 seconds and plugging it back in can resolve minor connectivity glitches.
- Check Connections: Ensure all cables (power, Ethernet) are securely plugged into the ONT and gateway.
- Contact AT&T Support: If problems persist, reach out to AT&T customer support. They can remotely diagnose issues with your connection and equipment and schedule a technician visit if necessary. You can usually find support contact information on your bill or the AT&T website.
By following these steps, you'll ensure a seamless transition to AT&T Fiber and maximize the benefits of your new high-speed internet connection. Enjoy the speed and reliability!
Troubleshooting and Minimizing Installation Delays
While AT&T aims for efficient fiber optic installations, delays can sometimes occur. Whether it's a longer-than-expected wait for an appointment, issues during the installation day, or problems arising from external factors, understanding how to troubleshoot and minimize these delays is invaluable. This section provides strategies for navigating potential hiccups in 2025-26.
1. Proactive Communication is Key
The best way to avoid delays is through clear and consistent communication:
- During Ordering: Ask specific questions about the estimated timeline, especially if you know your property might have unique requirements (e.g., long driveway, shared access).
- Before the Appointment: If your circumstances change or if you notice something that might impact the installation (e.g., construction on your street), contact AT&T to inform them.
- On Installation Day: Maintain open communication with the technician. If you have concerns about the proposed work, voice them early.
2. Addressing Appointment Scheduling Delays
If you're facing a longer wait for an installation appointment than anticipated:
- Be Flexible with Dates/Times: If possible, consider off-peak days or times. Mid-week appointments might be more readily available than weekends.
- Check for Cancellations: Periodically check the AT&T scheduling portal or call customer service to see if any earlier slots have opened up due to cancellations.
- Inquire About Technician Availability: Ask customer service if there are specific areas with higher technician availability that might offer a quicker appointment.
- Understand the Reason: Politely ask why there's a delay. Is it high demand, technician shortage, or infrastructure work? This knowledge can help you gauge the expected wait.
3. Mitigating Delays on Installation Day
Once the technician is on-site, the most common delays stem from:
- Access Issues:
- External Obstructions: Ensure your yard, driveway, or any pathway to the house is clear. If the technician can't easily access the area where the fiber needs to be brought in, it will cause a delay.
- Internal Obstructions: Make sure the area for the ONT and the path to it are clear.
- Pet Safety: Secure pets to prevent them from interfering with the technician's work.
- Unforeseen Infrastructure Problems:
- Existing Underground Utilities: The technician might encounter unexpected buried lines (water, gas, electric, other communication lines) that require careful navigation or rerouting, potentially adding significant time or requiring a different approach.
- Difficult Terrain: Rocky soil, dense roots, or steep inclines can slow down trenching significantly.
- Permitting Issues: If the installation requires permits (especially for trenching across public property) and they haven't been fully secured or approved, the technician may not be able to complete the work.
- Equipment Malfunctions: Though rare, the technician might encounter faulty equipment that needs to be replaced, causing a delay.
- Complex Home Layouts: Homes with difficult-to-access attics, basements, or numerous walls can increase the time needed for internal cable routing.
What to do if a delay occurs on installation day:
- Discuss with the Technician: The technician is your primary point of contact. Ask them for an updated estimated time for completion and understand the specific reason for the delay.
- Be Patient but Proactive: While patience is needed, ensure the technician has everything they need from you.
- If Work Cannot Be Completed: In cases of significant unforeseen issues (like hitting an unmarked utility line or major permitting problems), the technician may need to reschedule. Ensure you get a clear understanding of when the work can be completed and what steps will be taken.
4. Addressing Post-Installation Issues Promptly
If you experience connectivity problems after the technician leaves:
- Restart Equipment: Always try rebooting your AT&T gateway and ONT first.
- Check Physical Connections: Ensure all cables are securely plugged in.
- Contact AT&T Support Immediately: Report any issues as soon as possible. The sooner you report it, the sooner AT&T can begin troubleshooting. They may be able to resolve the issue remotely or schedule a follow-up technician visit.
- Document Everything: Keep records of when you contacted support, who you spoke with, and any ticket numbers provided.
5. Factors Outside Your Control (and How to Cope)
Some delays are simply unavoidable:
- Severe Weather: Heavy rain, snow, ice, or high winds can halt outdoor installation work.
- Supply Chain Issues: Although less common for installation appointments themselves, major equipment shortages could theoretically impact technician availability or repair capabilities.
- Unforeseen Network Issues: Problems with the broader AT&T network infrastructure in your area might require attention before new installations can proceed.
In these cases, the best approach is to stay informed by checking AT&T's service status pages (if available) and maintaining communication with their support team for updates.
By being prepared, communicative, and understanding of the potential challenges, you can significantly increase the likelihood of a smooth AT&T Fiber installation process and minimize any frustrating delays.
Fiber Optic vs. Other Internet Technologies: A Speed and Installation Comparison
Understanding how AT&T Fiber stacks up against other common internet technologies is crucial when making an informed decision about your home connectivity. This comparison, relevant for 2025-26, will focus on both the speed capabilities and the typical installation processes involved.
1. Fiber Optic Internet (AT&T Fiber)
Technology: Transmits data as pulses of light through thin strands of glass or plastic. This allows for extremely high bandwidth and minimal signal degradation over distance.
Speed:
- Download Speeds: Typically range from 300 Mbps to 5 Gbps (Gigabits per second), with symmetrical upload speeds often matching download speeds. Some plans offer even higher speeds.
- Upload Speeds: Crucial for video conferencing, uploading large files, and cloud backups. Fiber's symmetrical speeds are a major advantage here.
- Latency: Extremely low, measured in single-digit milliseconds. Ideal for online gaming, real-time applications, and smooth video streaming.
Installation:
- Process: Requires running a new fiber optic cable from the nearest network point to your home. This can involve aerial or underground installation. An Optical Network Terminal (ONT) is installed inside.
- Typical Timeframe: Can range from 1 week to 4-6 weeks or more, heavily dependent on whether a fiber drop already exists and the complexity of external work (trenching, permits). The in-home appointment itself is usually 2-4 hours.
- Complexity: Can be more complex if new external cabling is required.
2. Cable Internet
Technology: Uses coaxial cables, the same type used for cable television, to transmit data. Data is sent over electrical signals. It's a shared bandwidth technology, meaning speeds can fluctuate based on neighborhood usage.
Speed:
- Download Speeds: Commonly range from 100 Mbps to over 1 Gbps. However, advertised speeds are often "up to," and actual speeds can be lower during peak hours.
- Upload Speeds: Significantly slower than download speeds, often a fraction of the download capacity (e.g., 10-50 Mbps).
- Latency: Higher than fiber, typically ranging from 15-50 milliseconds. Acceptable for most users but can be noticeable in competitive online gaming.
Installation:
- Process: If cable TV service is already present, installation is usually straightforward. A technician connects the modem to an existing coaxial outlet. If no cable outlet exists, one may need to be installed.
- Typical Timeframe: Often quicker than fiber if cable is already active. Appointments can be scheduled within a few days to a week, and the in-home setup usually takes 1-2 hours.
- Complexity: Generally less complex than fiber if existing infrastructure is in place.
3. DSL (Digital Subscriber Line)
Technology: Transmits data over existing copper telephone lines. Speed is highly dependent on the distance from the provider's central office or local exchange.
Speed:
- Download Speeds: Varies greatly, from as low as 1 Mbps to around 100 Mbps for newer VDSL technologies. Speeds degrade significantly with distance.
- Upload Speeds: Also much slower than download speeds, often in the 1-10 Mbps range.
- Latency: Generally higher than cable and significantly higher than fiber, making it less suitable for real-time applications.
Installation:
- Process: Often the simplest. If a phone line is already active, installation might involve simply plugging in a DSL modem. A technician may need to activate the line or install a new jack.
- Typical Timeframe: Can be very fast, sometimes even self-installed if a phone jack is present. Appointments, if needed, can often be scheduled within a few days, and the setup is usually under an hour.
- Complexity: Typically the least complex, especially if phone service is already active.
4. 5G Home Internet / Fixed Wireless
Technology: Utilizes cellular networks (like 4G LTE or 5G) to provide internet access to a fixed location via a receiver or gateway. Performance can be affected by signal strength, network congestion, and distance to the cell tower.
Speed:
- Download Speeds: Highly variable. 5G can offer speeds comparable to cable or even lower-end fiber (100 Mbps to 1 Gbps+), but performance is inconsistent. 4G LTE is generally slower.
- Upload Speeds: Similar to cable, typically slower than download speeds.
- Latency: Can vary significantly. 5G has the potential for low latency, but real-world performance can be higher than fiber.
Installation:
- Process: Often designed for self-installation. The user places a gateway device in a window or location with good signal reception. Some providers may offer professional installation.
- Typical Timeframe: Can be very quick, often delivered by mail and self-installed within hours. Professional installation, if offered, might take 1-2 hours.
- Complexity: Generally low for self-installation, focused on finding the optimal signal location.
Comparison Table: Speed and Installation
| Feature | AT&T Fiber (Fiber Optic) | Cable Internet | DSL | 5G Home Internet |
|---|---|---|---|---|
| Max Download Speed (Typical 2025-26) | 300 Mbps - 5 Gbps+ | 100 Mbps - 1 Gbps+ | 1 Mbps - 100 Mbps | 100 Mbps - 1 Gbps+ (Variable) |
| Upload Speed Symmetry | Excellent (Symmetrical) | Poor (Asymmetrical) | Very Poor (Asymmetrical) | Poor to Moderate |
| Latency | Very Low (1-10 ms) | Low to Moderate (15-50 ms) | Moderate to High (20-100+ ms) | Variable (Potentially Low, but often higher than Fiber) |
| Installation Complexity | Moderate to High (if new fiber drop needed) | Low to Moderate | Very Low | Very Low (often self-install) |
| Typical Installation Time (Order to Activation) | 1 week - 6+ weeks | Few days - 1 week | Few days (often self-install) | Few days (often self-install) |
| Reliability/Consistency | Very High | Moderate (shared bandwidth) | Moderate (distance dependent) | Variable (signal dependent) |
In summary, AT&T Fiber offers the most robust performance in terms of speed, latency, and reliability. While its installation can sometimes take longer due to the need for new infrastructure, the long-term benefits in terms of internet experience are substantial. Cable internet provides a good balance of speed and accessibility, while DSL is a legacy technology suitable for basic needs. 5G Home Internet offers a flexible alternative, particularly in areas with limited wired options, but its performance can be less consistent.
Preparing Your Home for the Future of Connectivity
The installation of AT&T Fiber is not just about getting faster internet today; it's an investment in future-proofing your home's connectivity. As the digital landscape evolves rapidly, having a robust fiber optic connection is becoming increasingly essential for everything from remote work and online education to immersive entertainment and smart home integration. This section explores how to best prepare your home for the era of hyper-connectivity that fiber enables, focusing on 2025-26 trends.
1. Upgrade Your Home Network Hardware
While AT&T provides a capable gateway, your internal network hardware plays a vital role in distributing that fiber speed throughout your home. For optimal performance:
- Wi-Fi 6/6E Routers: Ensure your router supports the latest Wi-Fi standards (Wi-Fi 6 or Wi-Fi 6E). These standards offer higher speeds, better efficiency, and improved performance in congested environments compared to older Wi-Fi 5 (802.11ac) devices.
- Mesh Wi-Fi Systems: For larger homes or those with dead zones, a mesh Wi-Fi system is highly recommended. These systems use multiple nodes to create a seamless, whole-home Wi-Fi network, ensuring consistent high speeds in every room.
- Ethernet Ports: Ensure your router has Gigabit Ethernet ports. If you have devices that require the absolute fastest and most stable connection (e.g., gaming consoles, high-end PCs, streaming boxes), connect them directly via Ethernet cable rather than relying solely on Wi-Fi.
2. Enhance Your Smart Home Ecosystem
The reliability and low latency of fiber optic internet are perfect for the growing demands of smart home devices:
- More Devices, Less Lag: As you add more smart devices – thermostats, lighting, security cameras, voice assistants, smart appliances – a fiber connection ensures they all operate smoothly without bogging down your network.
- High-Definition Security Cameras: Stream crystal-clear, real-time video from your security cameras without buffering or delay, enhancing your home's security.
- Seamless Automation: Trigger complex smart home routines instantly, whether it's adjusting lighting, temperature, or security settings.
- Future-Proofing: As smart home technology advances towards higher resolutions and more data-intensive applications (like AI-powered home management), fiber will be the backbone that supports it.
3. Support Remote Work and Online Learning
The shift towards remote work and online education has accelerated, and fiber is the ideal solution:
- Reliable Video Conferencing: Enjoy crystal-clear video calls with no dropped frames or audio lag, making remote meetings and online classes far more productive and engaging.
- Large File Transfers: Upload and download large work files, project assets, or educational materials quickly and efficiently, saving valuable time.
- Multiple Users: Fiber can easily support multiple users in a household simultaneously working or studying online without performance degradation.
4. Elevate Your Entertainment Experience
Fiber optic internet transforms home entertainment:
- 4K/8K Streaming: Stream ultra-high-definition content from services like Netflix, Disney+, or YouTube without buffering, even on multiple devices simultaneously.
- Cloud Gaming: Services like Xbox Cloud Gaming, NVIDIA GeForce NOW, and PlayStation Plus Premium rely on low latency and high bandwidth. Fiber provides the optimal experience, making it feel like you're playing on a local console.
- Virtual Reality (VR) and Augmented Reality (AR): As VR and AR become more mainstream for gaming and social experiences, they will demand significant bandwidth and low latency, which fiber is uniquely positioned to provide.
5. Consider Internal Network Wiring